Last updated on April 7th, 2024 at 05:07 pm
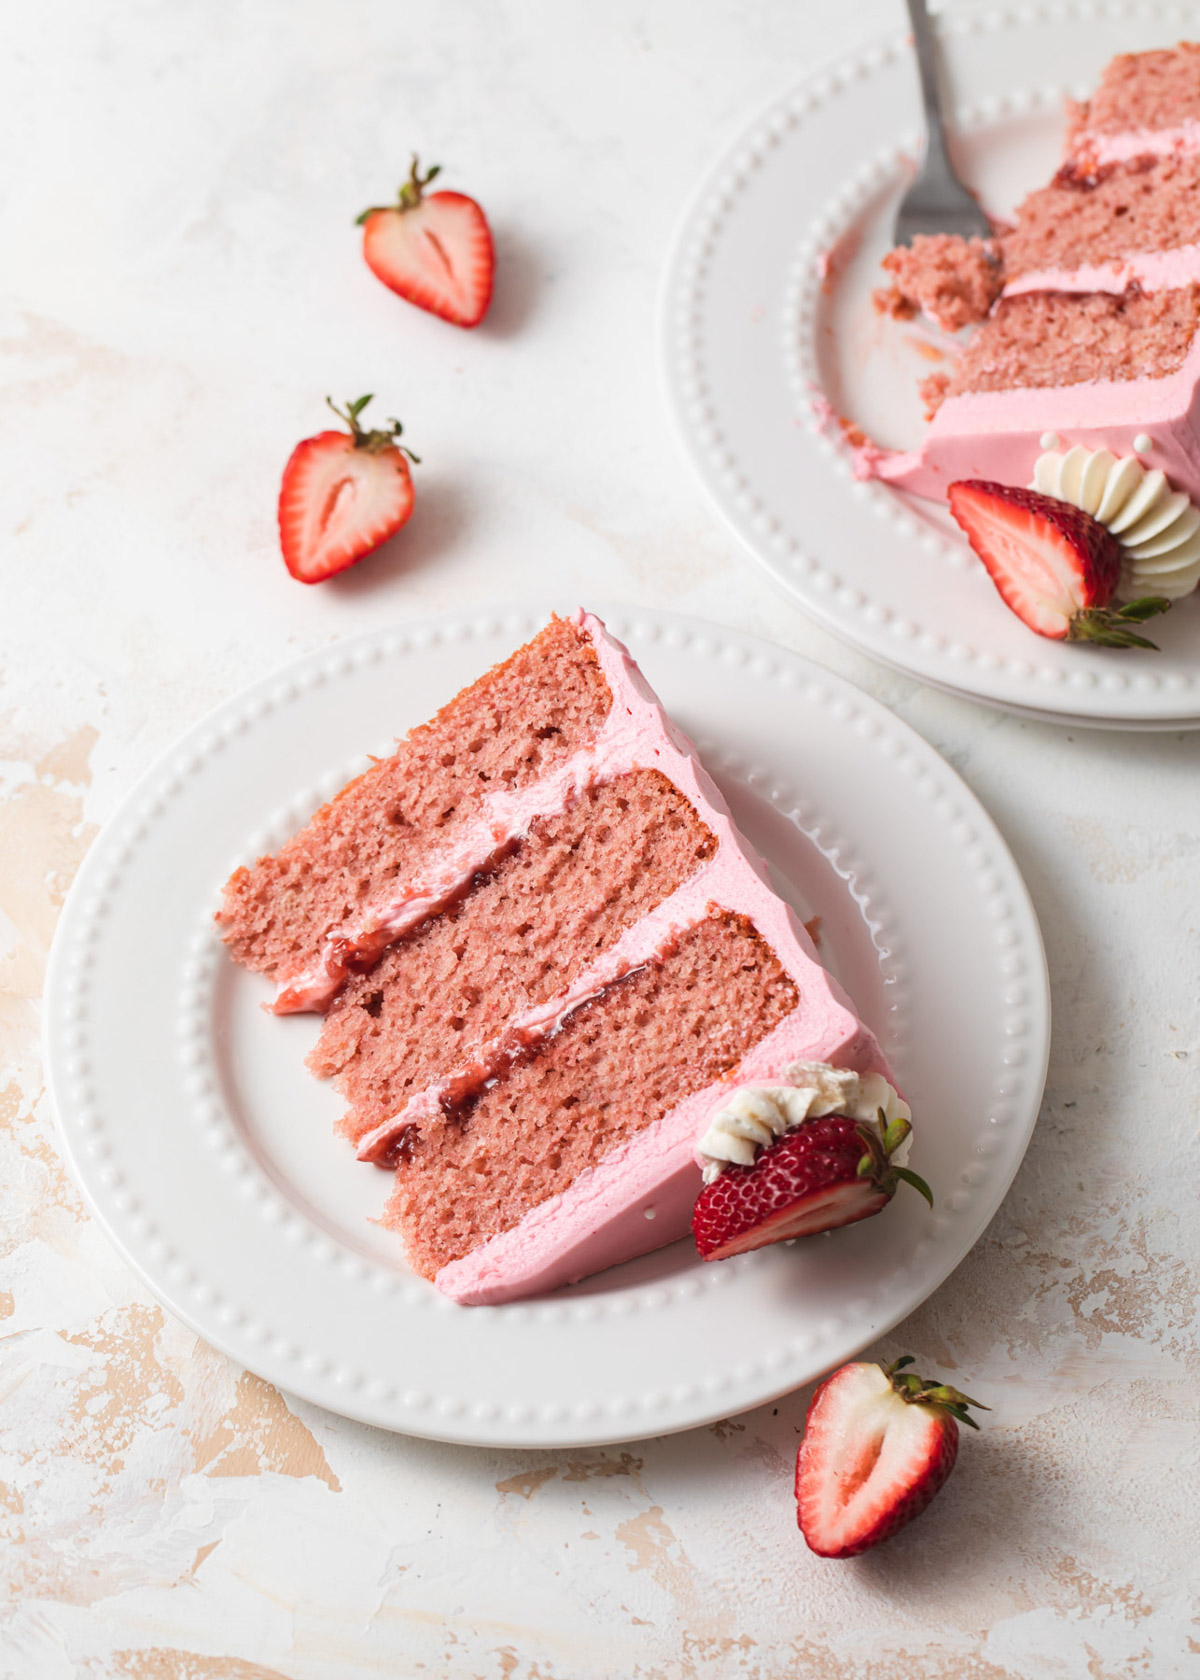
When the Farmer’s Market is overflowing with tiny baskets and large flats of ruby-colored berries, then you know it’s time to make this Strawberry Layer Cake.
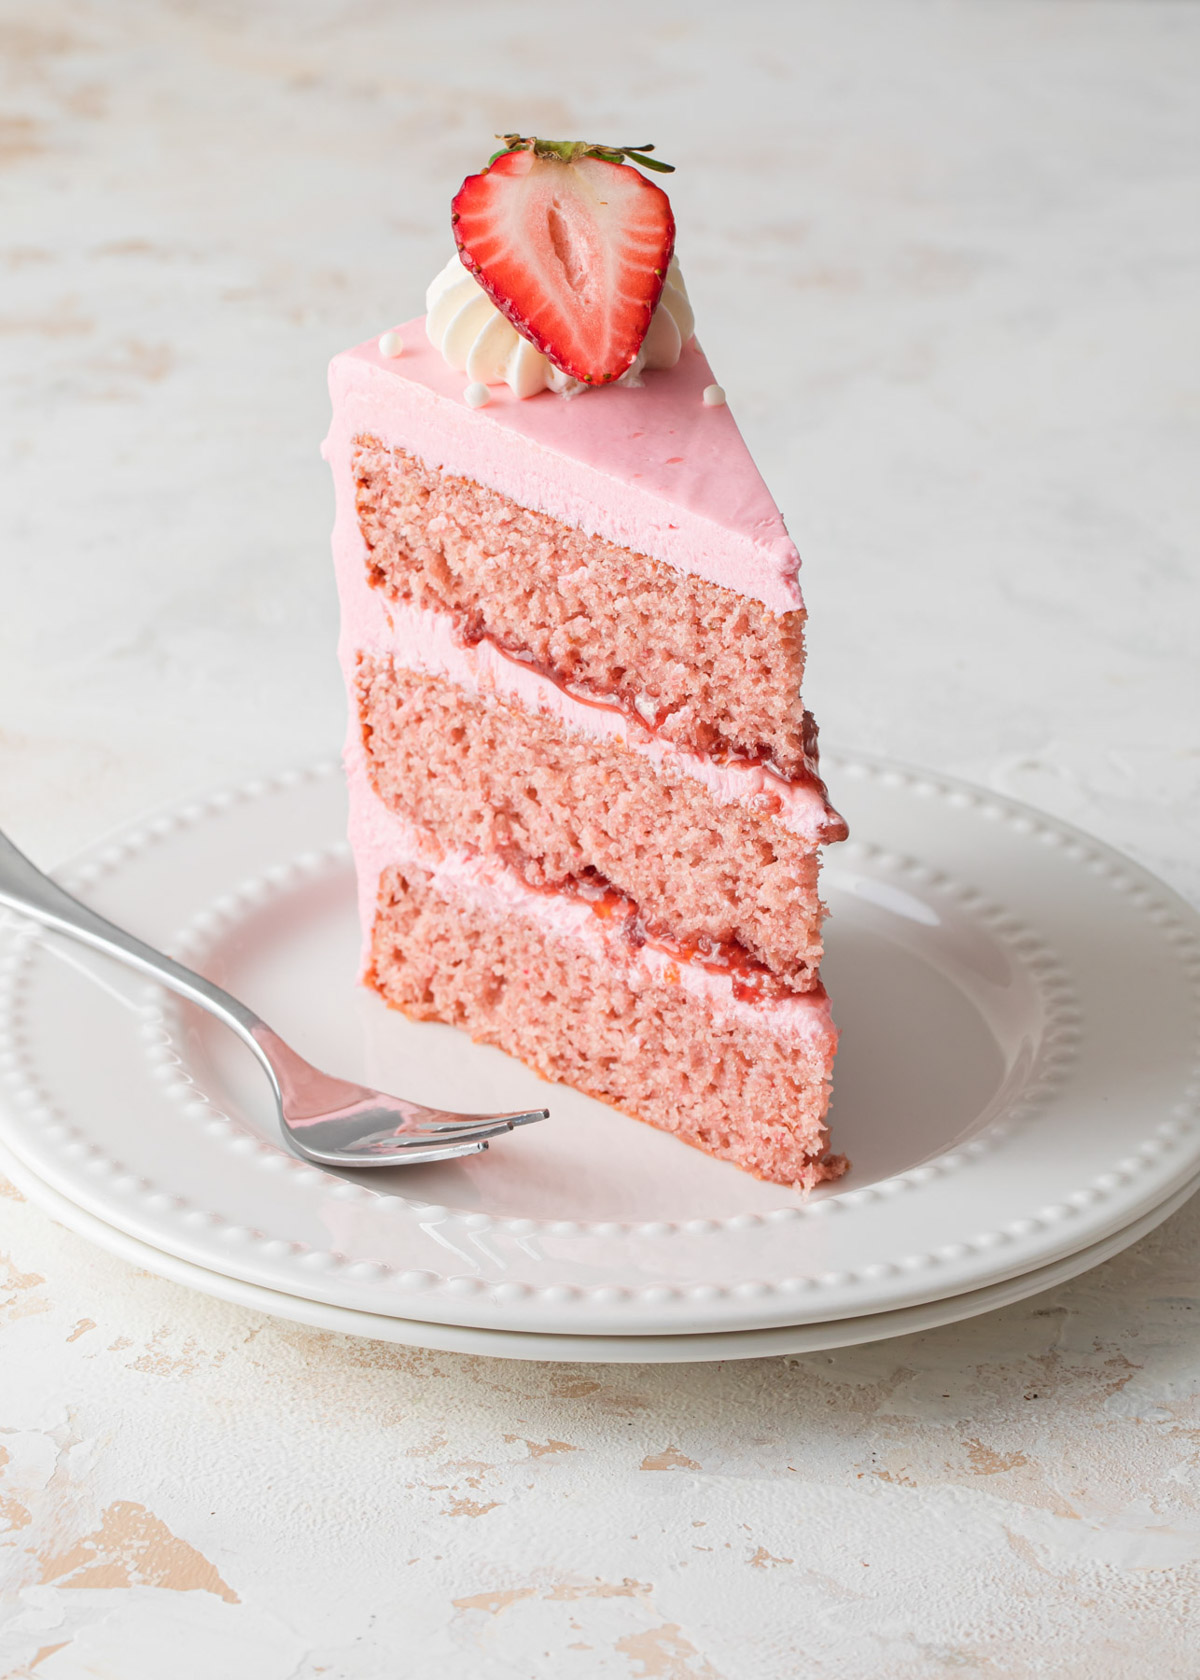
The fluffy pink layers are made with real strawberries and spread with strawberry preserves for an ever more intense, sweet, and slightly tart bite. Creamy, vanilla-spiked Ermine frosting brings it all together in this summer celebration cake.
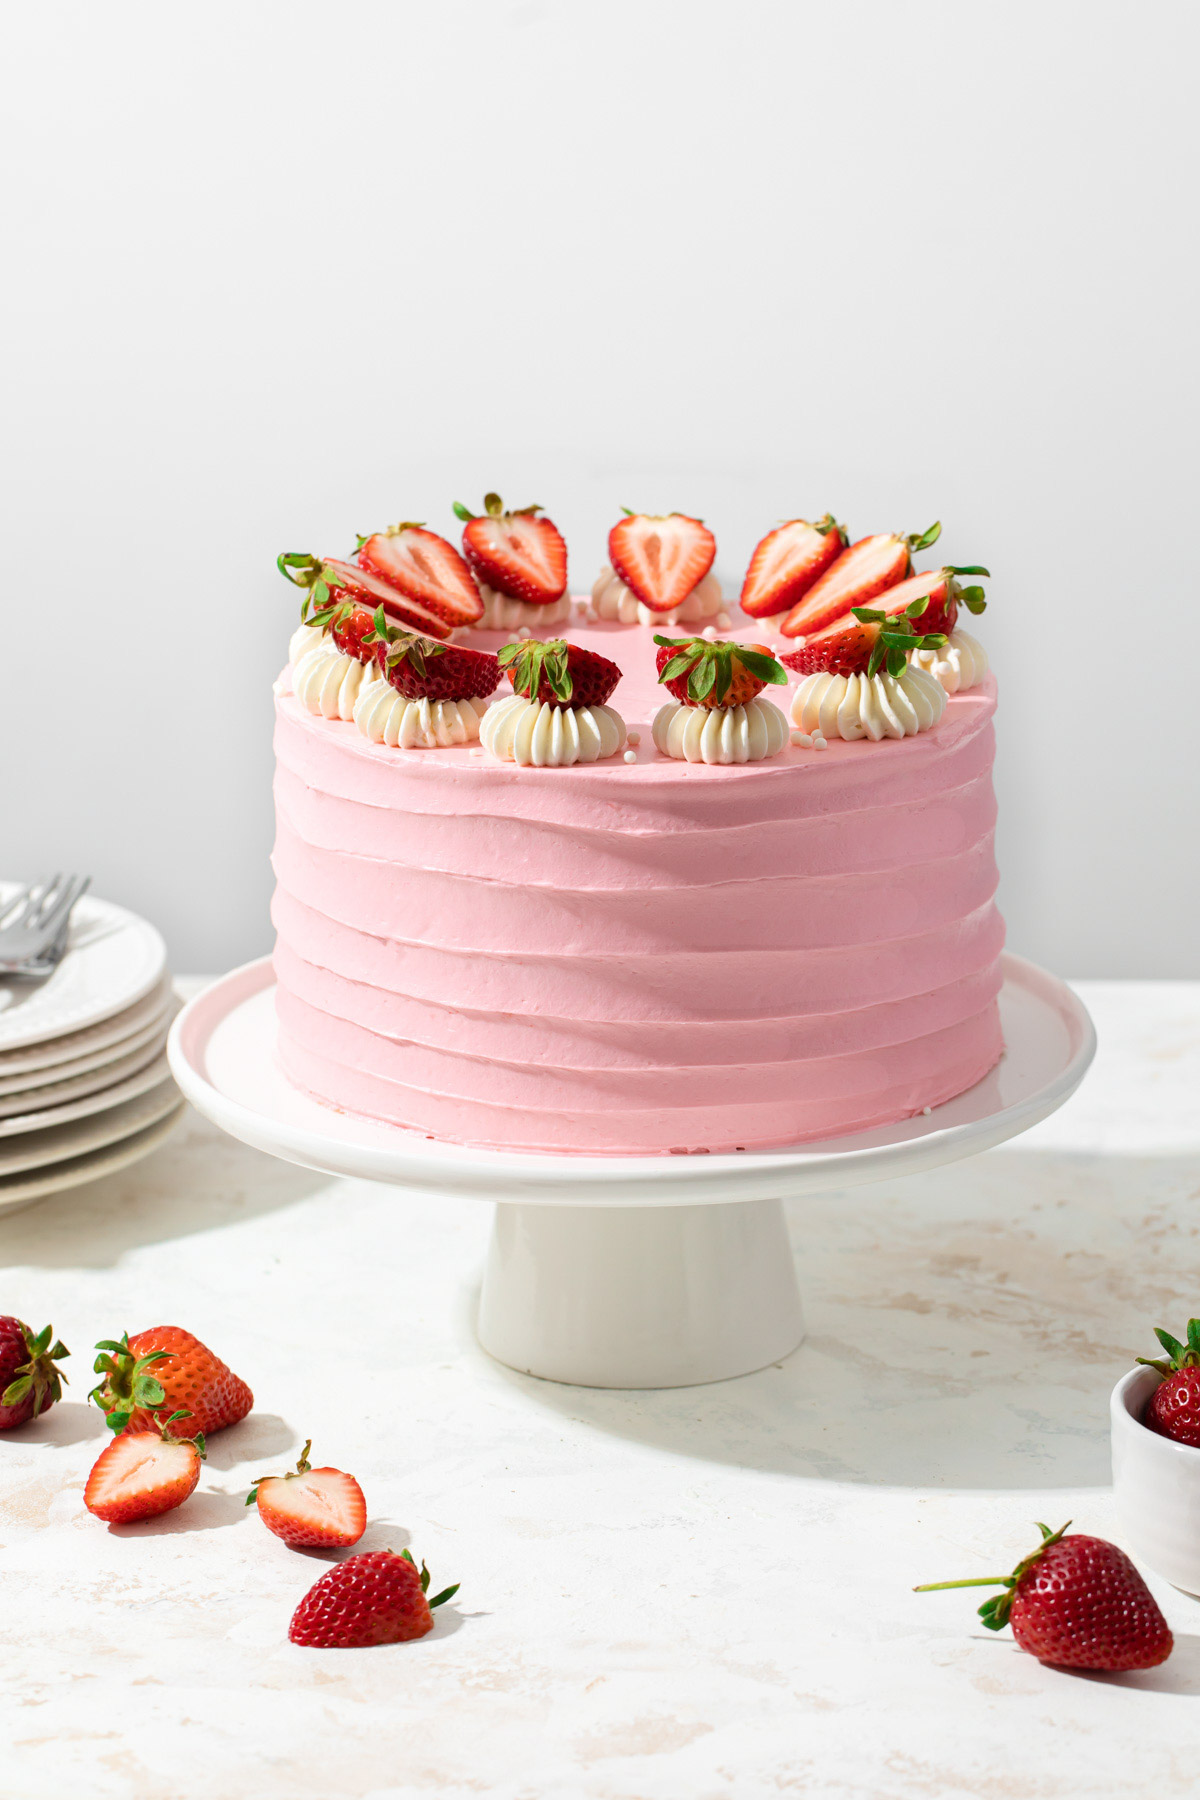
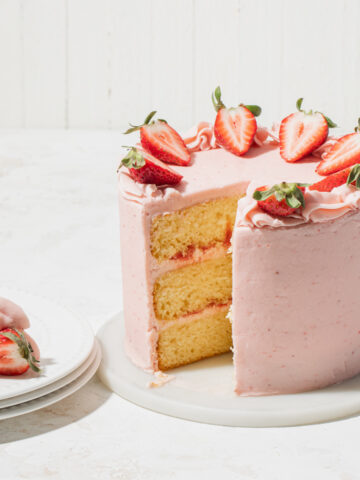
You are going to fall in love with this cake! Three layers of fluffy pink strawberry cake with strawberry jam and creamy Ermine Frosting.
I must emphasize the real strawberries used in this cake. Often strawberry cake recipes call for boxed strawberry jello or instant strawberry pudding, but we will keep those on the store shelves where they belong.
Instead, this is the perfect opportunity to take advantage of an abundance of summer berries.
Jump to:
I was inspired by this Vanilla Cake with Strawberry Buttercream. This is the inverse having strawberry cake layers and creamy vanilla frosting.
UPDATE: I recognize that the pink frosting is a bit deceiving. No, it is not flavored with strawberries but is rather a creamy vanilla buttercream that is tinted pink.
If you'd like to use a frosting that tastes like strawberries, then there are two options:
Strawberry frosting using freeze dried strawberries
Strawberry buttercream using strawberry puree. Multiply the buttercream recipe by 1.5 to frost and fill this three layer, 8-inch cake.
Ingredients
- Fresh strawberries - add tons of real strawberry flavor by blending and cooking down fresh strawberries
- Granulated sugar
- Lemon zest/juice - these are used to enhance the strawberry flavor
- All-purpose flour
- Cornstarch - lighten up the flour by adding a bit of cornstarch like a homemade cake flour
- Baking powder
- Baking soda
- Salt
- Whole Milk - any percentage or non-dairy milk will do too
- Unsalted butter - make sure the butter is softened to use with the creaming method
- Vanilla extract
- Large eggs - allow the eggs to come to room temperature before baking or set them in a bowl of warm water for about 15 minutes.
- Strawberry jam - use sweet strawberry jam for the filling
See recipe card for quantities.
Tools and Equipment
Here are some of the kitchen tools you will need to successfully bake and decorate this strawberry layer cake:
- Food processor
- Saucepan
- Electric mixer
- Rubber spatula
- Three, 8-inch cake pans
- Rotating cake stand
- Piping bag
- Offset spatula
Strawberry Purée
Even when strawberries are at their peak ripeness, reducing the puréed fruit concentrates their flavor.
Cook the puréed strawberries over low heat until they become thick and jammy. Make sure to cool the reduced purée before adding it to your cake batter.
Can I use Frozen Strawberries?
Frozen strawberries may also work, but they have a tendency to hold onto more water. It might take a bit more time to reduce the liquid down until thick. Sweeten to taste.
Instructions for Filling and Stacking
When working with a softer filling, like jam or pastry cream, use a buttercream dam to help hold everything in. It will be near impossible to smoothly ice a cake if the filling starts leaking out.
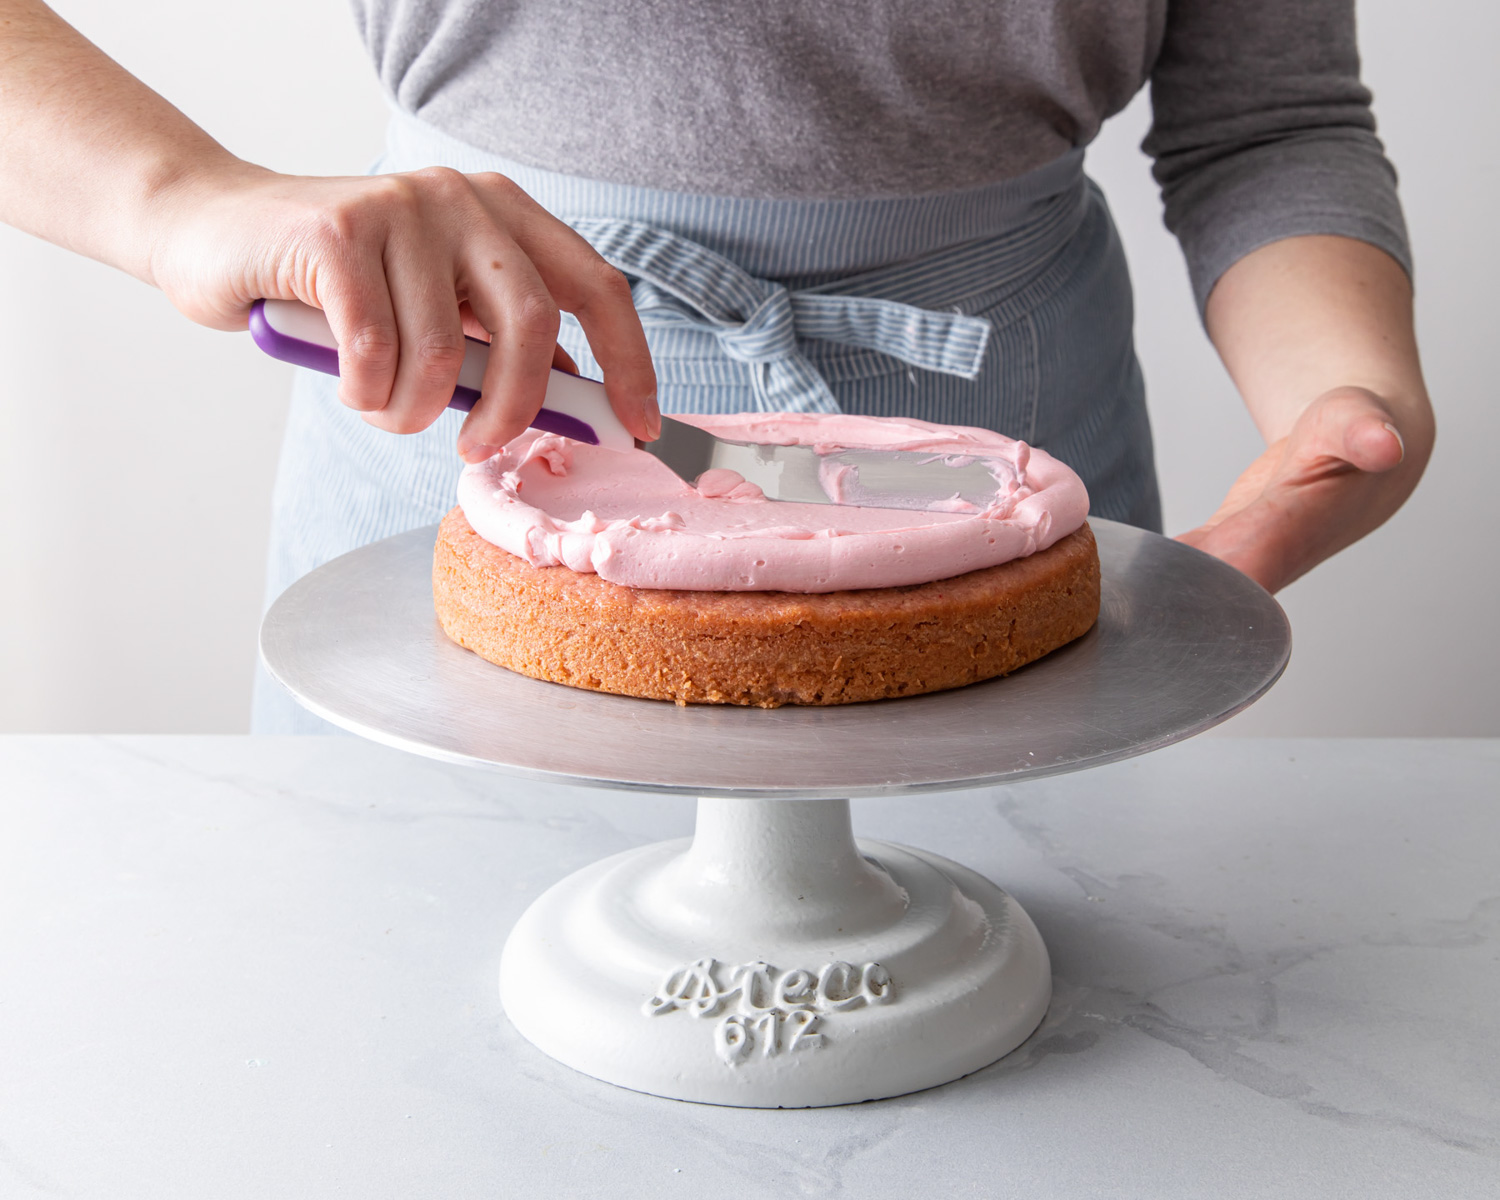
Start by piping a ring of buttercream around the edge to act as a dam for the filling. Add buttercream and smooth.
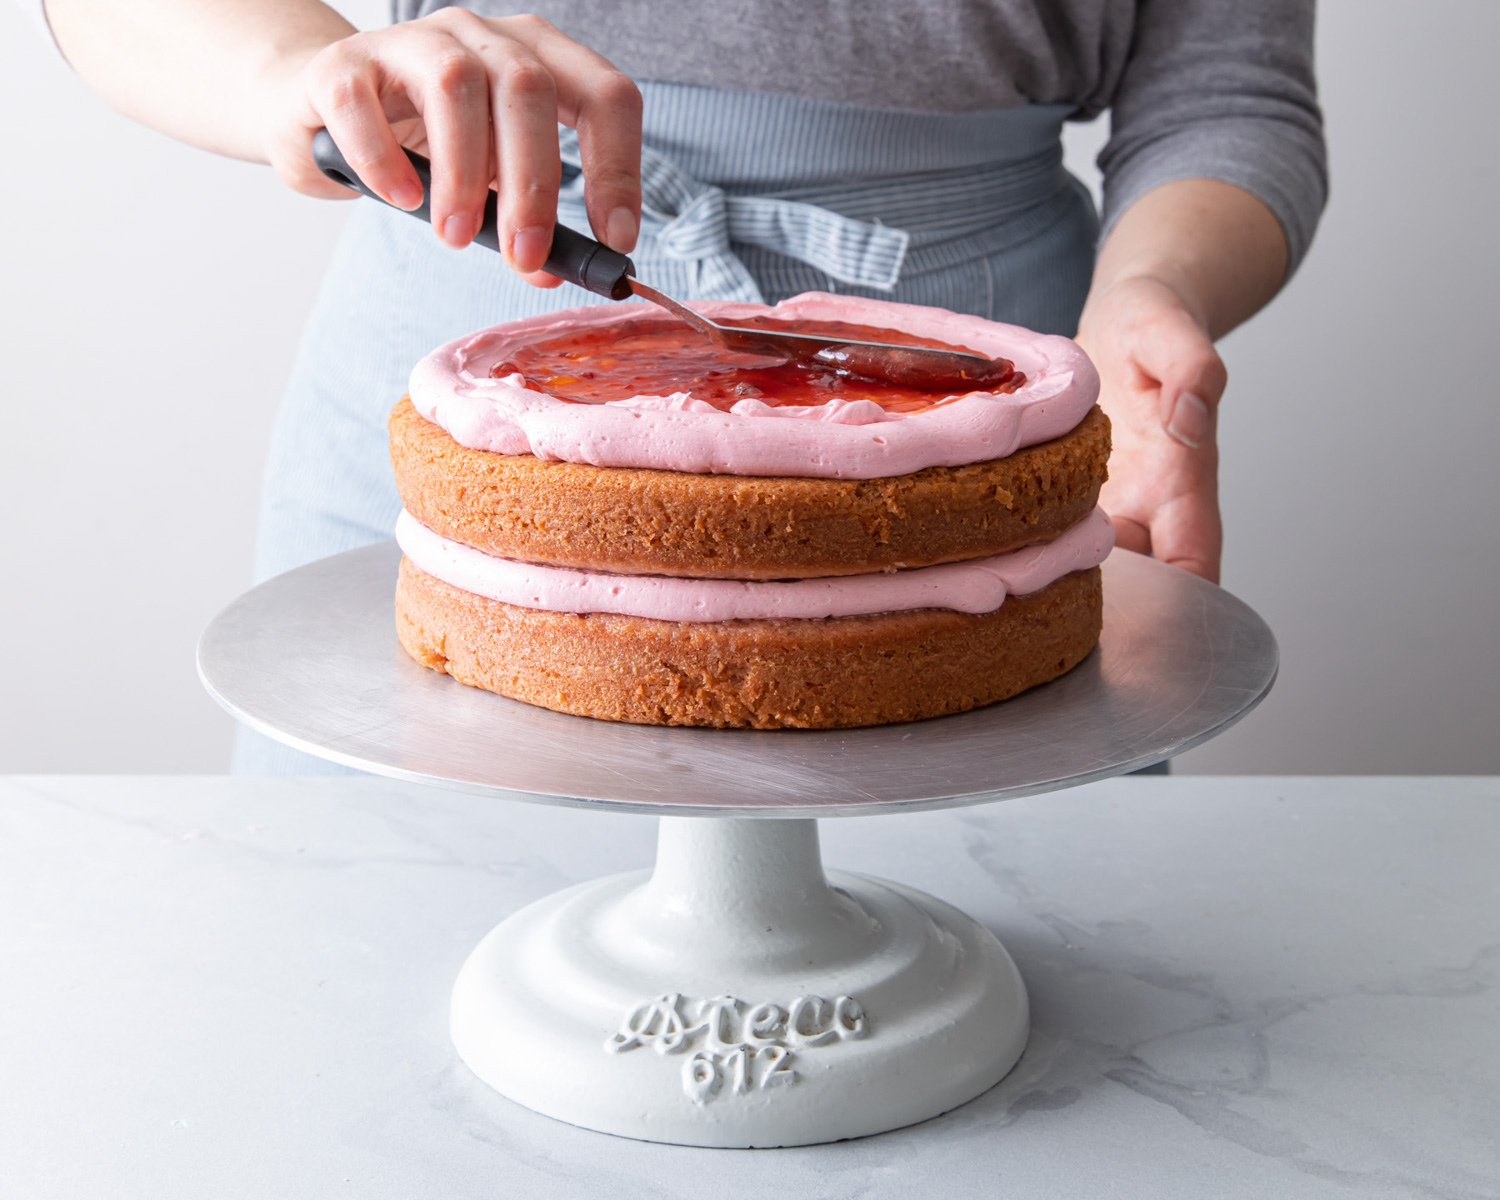
Fill the center with strawberry jam. Make sure that the jam does not leak out of the buttercream dam.
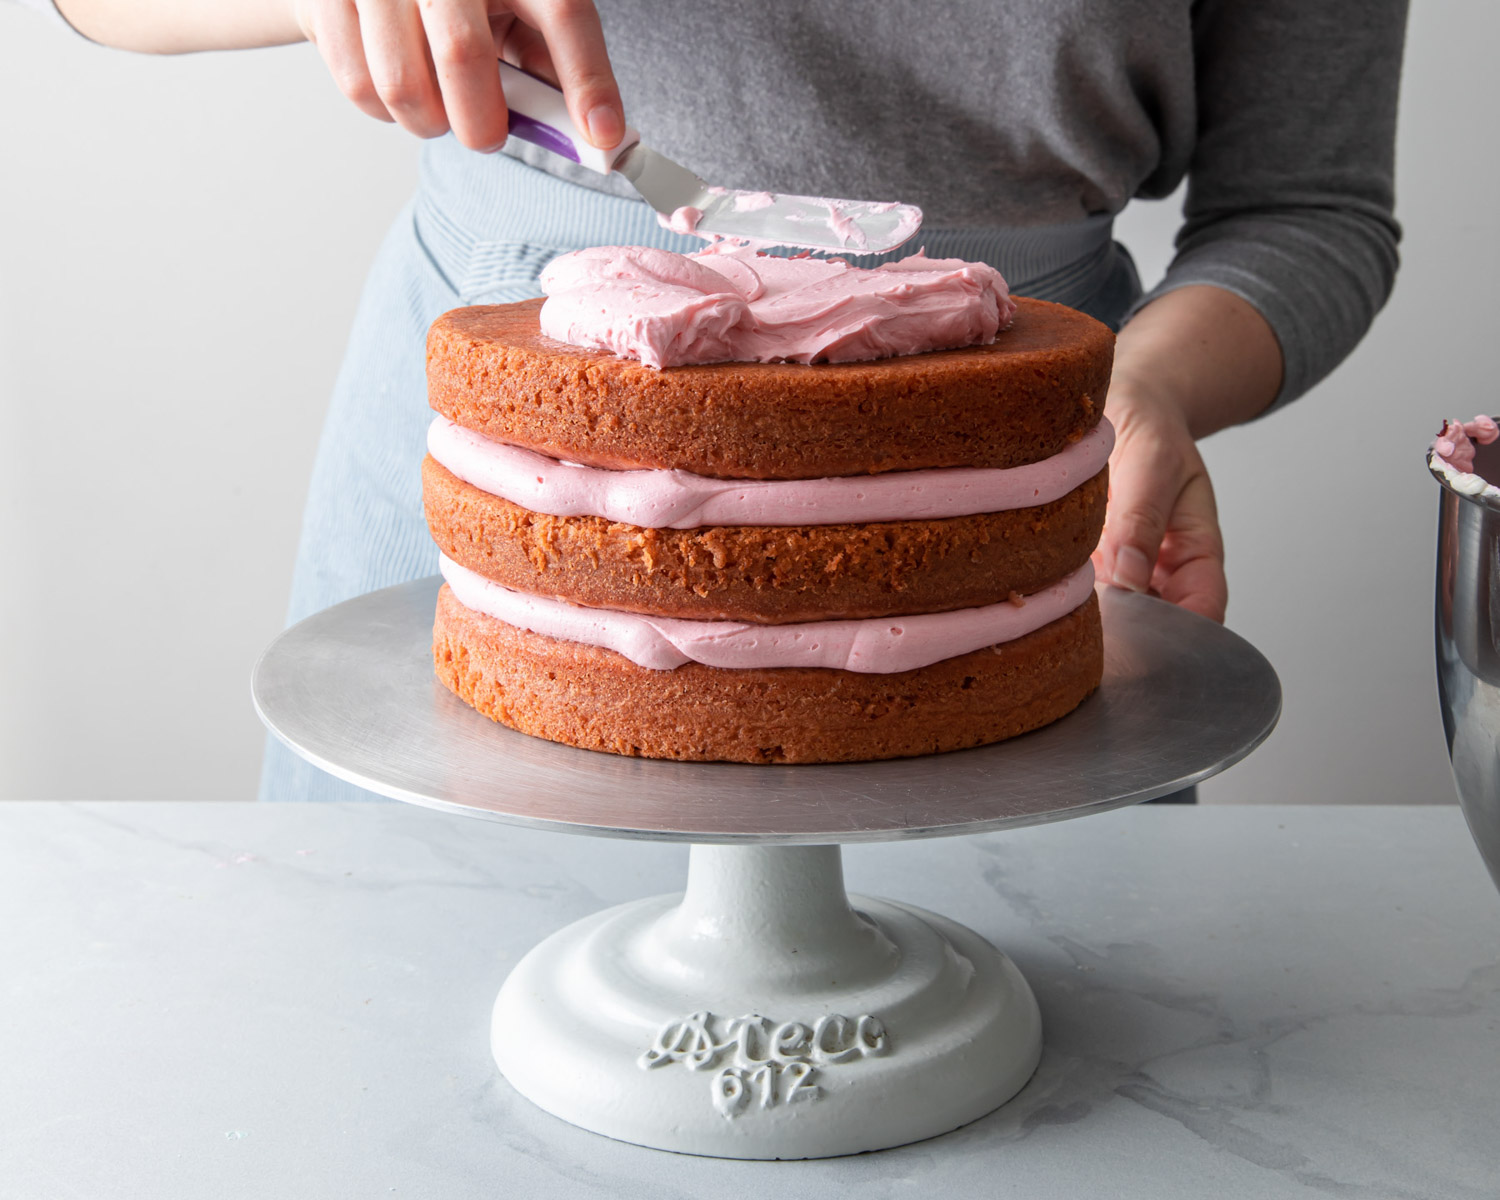
Continue stacking and filling the cake layers. Add more buttercream to fill in the gaps between the layers.
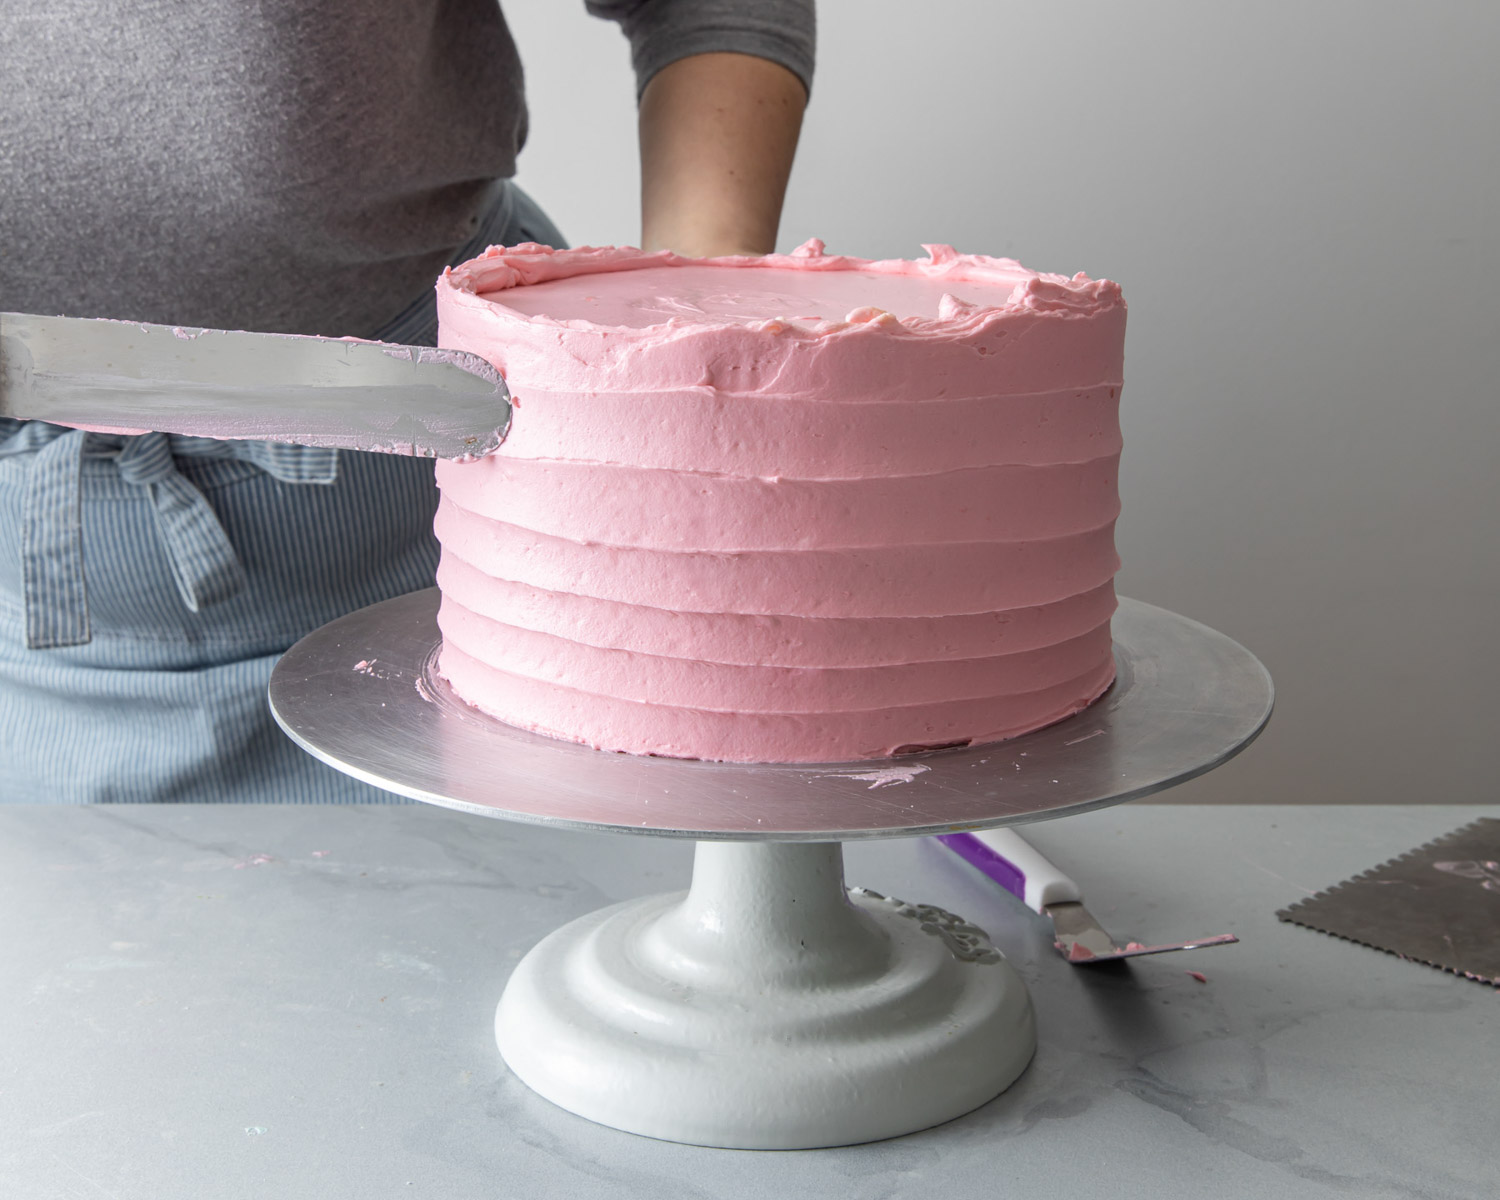
Ice the cake! Use an offset spatula to make wavy stripes on the sides.
Hint: if at any point the cake feels unstable or the filling/frosting starts slipping, pop the whole thing in the refrigerator to help firm up.
Not into stacking? Try this Strawberry Sheet Cake!
Layer Cake 101
New to cake decorating? Start here:
Easy Textured Buttercream Cakes
How to Make Beautiful Layer Cakes
Buy my books! Layered and Icing on the Cake
Steps for Making a Strawberry Layer Cake
- Start the Ermine Frosting - the frosting begins with a cooked flour custard that needs to be chilled
- Make the Strawberry Puree - blend in the food processor then cook to reduce
- Make the Cake Batter - ensure that the strawberry puree is cooled before adding to the cake batter
- Bake!
- Complete the Frosting - allow the cooked flour custard to come back to room temperature before mixing with the butter
- Assemble and Decorate!
Substitutions
Frozen Strawberries - they tend to hold onto more water, but will work. It might take a bit more time to reduce the liquid down until thick. Sweeten to taste.
Non-Dairy Milk - you should be able to make the ermine frosting with any non-dairy milk with similar results.
Strawberry Frosting - Triple up the strawberry by using the strawberry buttercream from this Vanilla Cake with Strawberry Filling recipe.
Serving and Storage
Serve this cake at room temperature. The cake may be kept at a cool room temperature overnight. Beyond that, store the cake in the refrigerator for up to 3 days.
Unfrosted cake layers maybe be wrapped in plastic and placed in the freezer for up to 3 months. Thaw frozen cake layers overnight in the refrigerator.
What is Ermine Frosting?
This vintage frosting is silky and custard-like but made without eggs. It is similar in taste and texture as meringue-based buttercreams and far less sweet than American-style buttercream.
Sometimes known as “heritage,” “cooked-flour,” or “boiled,” frosting, it starts with cooking flour on the stove to eliminate its starchy flavor and activate its thickening properties.
The two-part process combines the cooked and cooled flour/milk/sugar roux with softened butter to create the smooth and dreamy frosting.
Looking for a pink Strawberry Buttercream? Try this one on our Vanilla Strawberry Cake.
Tips and Troubleshooting for Ermine Frosting
The key to smooth Ermine frosting is temperature control. The base and butter should both be room temperature when whipped together. Add vanilla and salt to season the buttercream before slathering it on this Strawberry Layer Cake.
For best results, use right after mixing.
If the frosting feels heavy and thick then it is likely too cold and has not had enough time to mix. It should be weightless and silky, but not greasy.
You may gently warm the frosting using a double-boiler or by microwaving a very small amount and mixing it back in until smooth and spreadable.
If the frosting is too soft to spread and slips off the cake, then it is likely too warm. Try placing the frosting in the refrigerator for 10 to 15 minutes, then re-mixing until smooth and spreadable.
Recipe FAQs
Choose a good quality aluminum cake pan with at least 2-inch tall sides.
You can cut the recipe in half and bake in three 6-inch cake pans. Do not fill more than ¾ of the way full. Bake times will vary.
Using Freeze-dried Fruit for Strawberry Layer Cake
A lot of modern recipes for strawberry layer cake and frosting contain ground freeze-dried strawberries. While using freeze-dried fruit undoubtedly adds intense berry flavor, they can be incredibly hard to source outside of the US.
Even here in Canada, they are difficult to find and come with a hefty price tag. I wanted to make this cake recipe accessible for all, so I opted out of using freeze-dried strawberries.
Beautiful layer cakes are sometimes reserved for special occasions, so I understand if you want to splurge or go all-out with the strawberry flavor. Try adding ground freeze-dried strawberries to the cake batter itself and/or to the buttercream for a fruit-forward frosting.
Bonus? Freeze-dried fruit will eliminate the need for food coloring as it is naturally a very vibrant pink.
Related
Looking for other recipes like this? Try these:
Recipe
Strawberry Layer Cake
Ingredients
- 2 cups (300g) ripe strawberries halved
- 1 tablespoon granulated sugar
- 1 tea fresh lemon zest
- 1 tea fresh lemon juice
- ⅛ tea salt
For the Strawberry Cake
- 3 cups (375g) all-purpose flour
- 3 tablespoon cornstarch
- 1 tablespoon baking powder
- ½ teas baking soda
- 1 teas salt
- 1 cup (240ml) whole milk
- 1 cup (225g) unsalted butter softened
- 2 cups (400g) granulated sugar
- 2 teas pure vanilla extract
- 4 large eggs
- ¾ cup (180ml) reduced strawberry puree
- pink gel food color
For the Ermine Frosting
- ½ cup (63g) all-purpose flour
- 2 cups (480mml) whole milk
- 2 cups (400g) granulated sugar
- ⅛ teas salt
- 2 cups (454g) unsalted butter softened
- 2 teas pure vanilla extract
- ½ cup strawberry jam
Instructions
For the Strawberry Puree
- Place all of the ingredients in a small food processor and process until smooth.
- Pour the purée into a small or medium saucepan and place over medium heat until it begins to simmer. Lower the heat to low and cook, occasionally stirring, until the purée reduces down to about ¾ cup (180 ml). The purée will become thick and jammy. It will take 30 to 60 minutes to reduce over low heat.
- Allow the purée to cool before using in the cake.
For the Strawberry Cake
- Preheat the oven to 350°F. Grease and flour three, 8-inch round cake pans and set aside.
- Whisk together the flour, cornstarch, baking powder, baking soda and salt in a medium bowl and set aside.
- In the bowl of a stand mixer fitted with the paddle attachment (or in a large bowl with a hand mixer), beat the butter and sugar together on medium speed until light and fluffy, 3 to 4 minutes. Stop the mixer and scrape down the sides of the bowl.
- With the mixer on medium-low speed, add in the vanilla and eggs, one at a time allowing each to combine before adding the next. Stop the mixer and scrape down the sides of the bowl.
- Add about half of the dry ingredients and mix on low speed until incorporated. Stream in the milk, followed by the strawberry purée and a few drops of food coloring, and mix until the liquids are absorbed. Add the remaining dry ingredients and mix until combined. Mix on low speed no more than 30 seconds.
- Evenly distribute the batter among the prepared pans. Bake for 24 to 28 minutes, or until a toothpick inserted in the center of the cakes comes out clean. Cool the cakes on a wire rack for 10 minutes before removing them from their pans. Allow the cakes to cool completely before filling and frosting.
For the Ermine Frosting
- In a medium saucepan, whisk the milk into the flour until smooth. Heat the mixture, while whisking slowly but constantly, over medium heat until it reaches a thick, pudding-like consistency, about 5 minutes.
- Remove from the heat and whisk in the sugar and salt until dissolved. Pour the mixture into a heat-safe container or shallow bowl and press a piece of plastic wrap to the surface. Allow the mixture to cool to room temperature (in the refrigerator to speed things up). It should be the same temperature as the softened butter before moving on to the next step.
- In the bowl of a stand mixer fitted with the paddle attachment, beat the butter on medium-low speed until smooth and creamy, about 3 minutes. Begin adding in the cooled flour mixture, a couple tablespoons at a time, until fully incorporated. Stop the mixer and scrape down the sides of the bowl.
- Switch to the whisk attachment and gradually increase the speed to medium-high. Whip the frosting together until light and fluffy, 2 to 5 minutes. Reduce the speed to low and add the vanilla extract. Continue to mix on low speed for a few additional minutes to smooth it out. When done, the frosting should feel light on the tongue but smooth and silky when spread over the top of a cake.
To Assemble
- Reserve about ¾ cup of the frosting and set aside. Tint the remaining frosting pink, or the color of your choice. Fill a piping bag fitted with a large round tip with some of the pink frosting and set aside.
- Once the cakes have completely cooled, trim the tops with a serrated knife until flat, if necessary. Place the bottom layer of cake on a cake board, serving dish, or rotating cake stand. Pipe a ring of frosting around the top edge of the cake. Fill the ring with about ½ cup of frosting and spread it out with an offset spatula. While spreading the frosting, gently press down with the spatula (or the back of a spoon) in the center to create a shallow “bowl” of frosting, the edges matching up with the piped frosting “dam” around the edges.
- Fill the middle of the frosting with ¼ cup strawberry jam and spread until smooth. Top the filling with a second layer of cake and repeat. Flip the final layer of cake upside down and place on top of the cake. Gently press down to secure and make sure the sides of the cake are straight.
- Fill in any gaps between the layers with frosting. It is very important that none of the strawberry jam squeezes out between the layers of cake.
- Crumb coat the cake by spreading a thin layer of frosting over the top and sides of the cake. Chill in the refrigerator for 15 minutes.
- Smoothly frost the cake with the remaining frosting. To finish, gently touch the tip of the offset spatula to the side of the cake (near the bottom). As you spin the cake stand, gradually move the spatula up the side of the cake to create the wavey texture. Clean off the top of the cake by gently pulling the excess frosting around the edges towards the center of the cake with a small offset spatula.
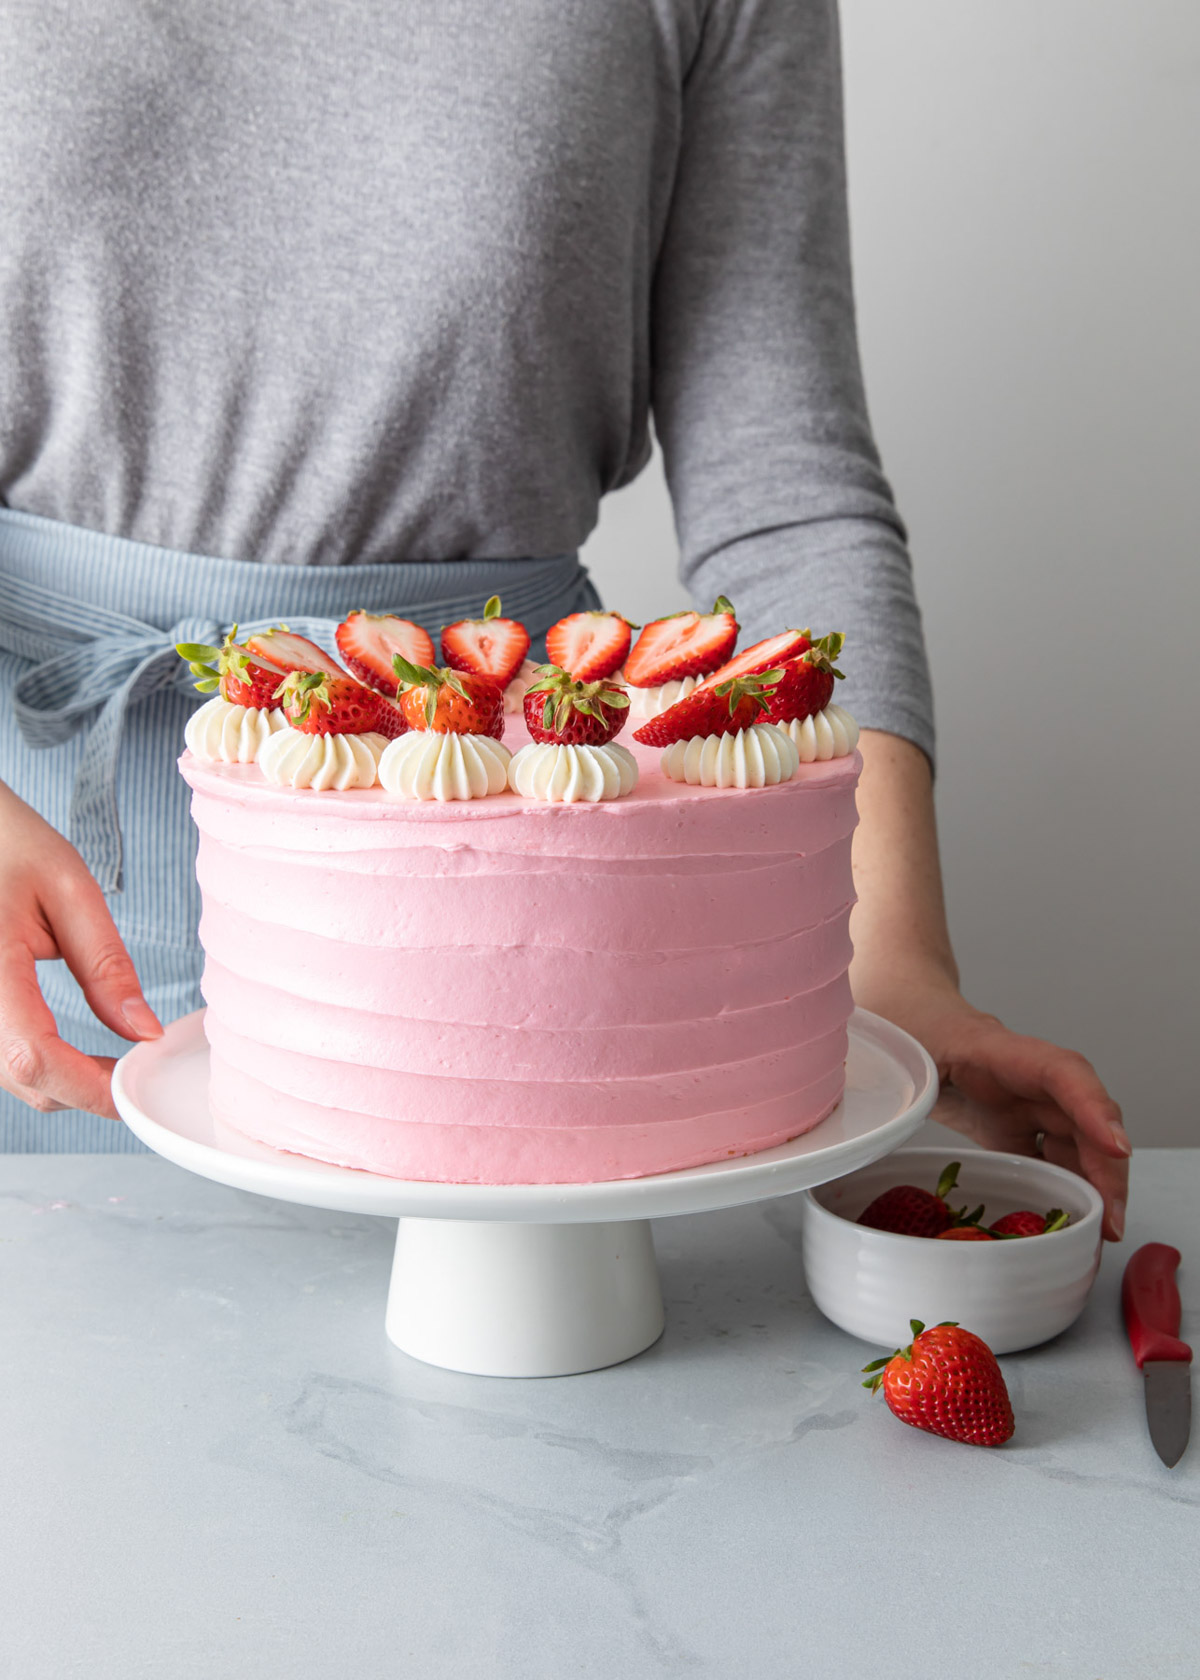
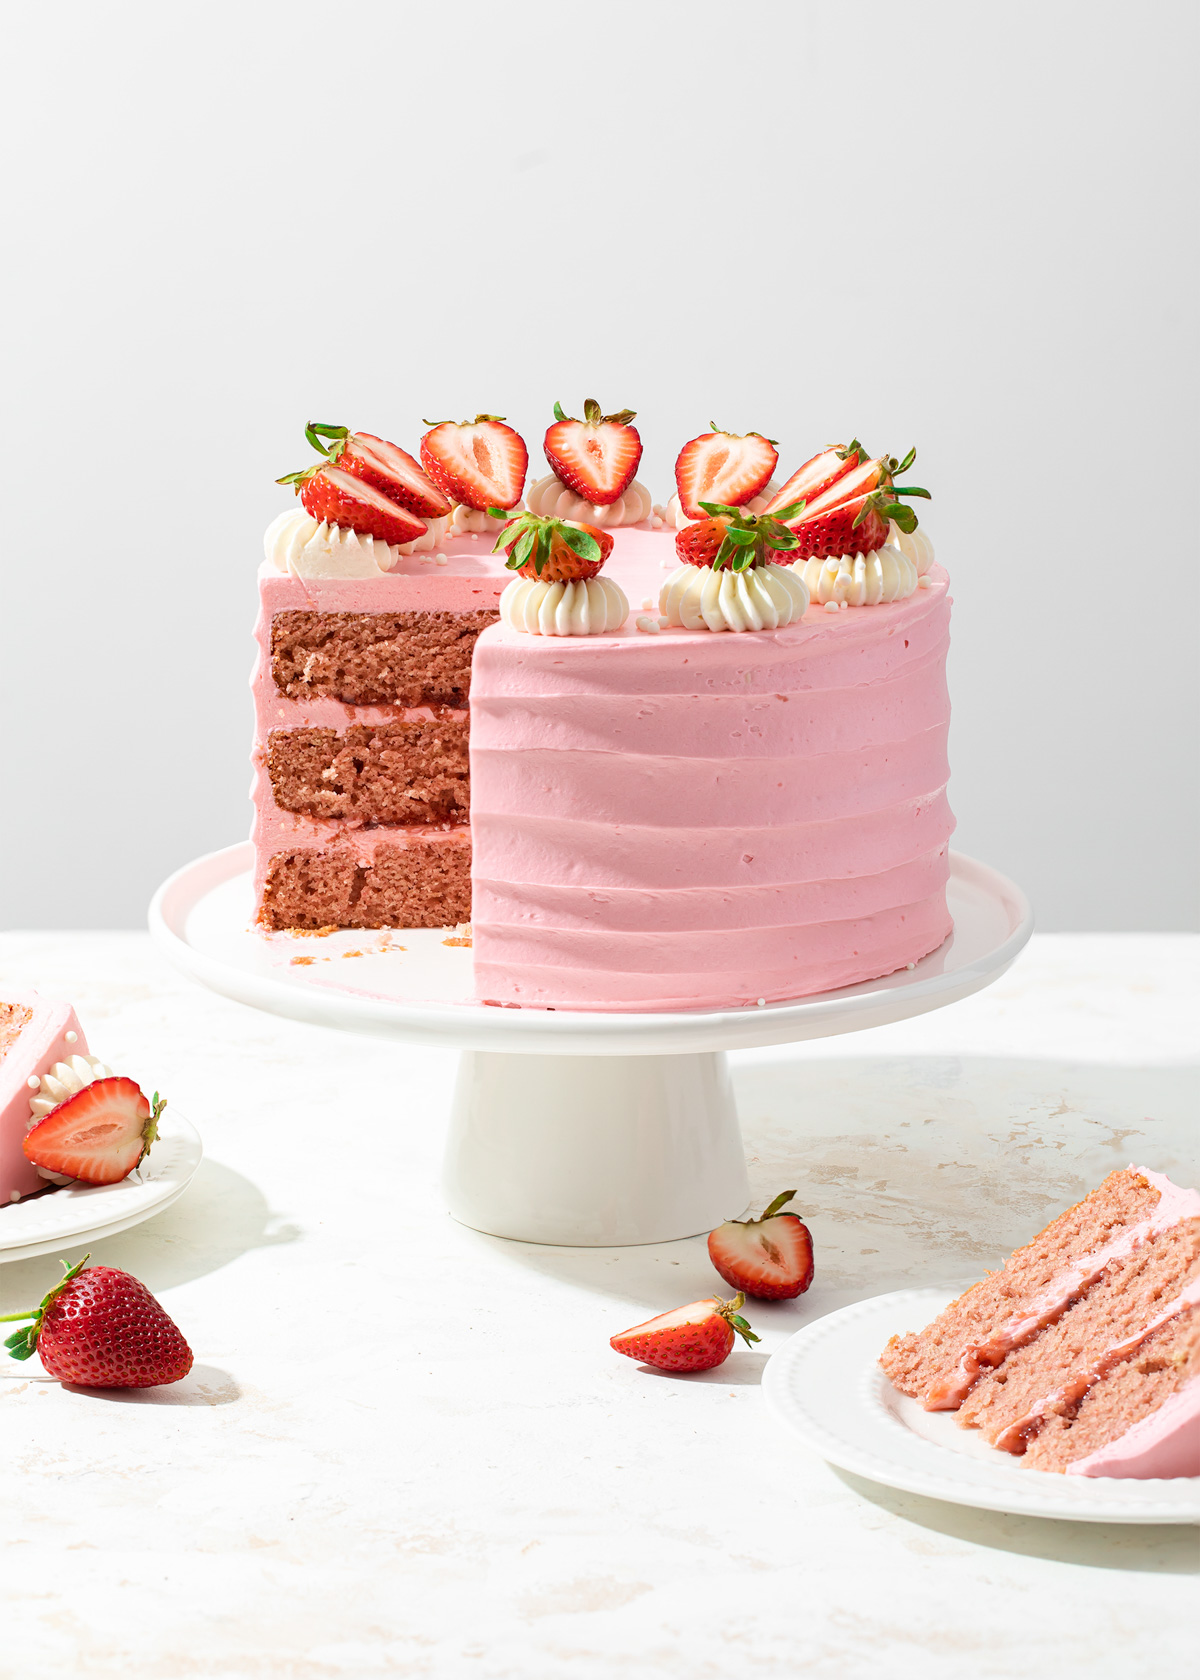
- Fill a piping bag fitted with a French Star Tip with the reserved plain buttercream. Pipe star “kisses” around the top edge of the frosted cake. Place a cut strawberry on each dollop and finish with a sprinkle of sugar pearls.
Notes
- Store leftover cake in the refrigerator in a cake box wrapped in plastic wrap. If you do not have a box, press a piece of plastic wrap directly to the cut sides of the cake and gently drape it over the frosting.
- Serve the cake at room temperature. Make sure to give it ample time out of the refrigerator to ensure that the frosting is soft and silky when served.
- The cake is best eaten within 3 days.

Jerrie Hutchison
This cake looks spectacular. Could you please advise the flour amount used in grams as online conversion sites vary significantly in how much a cup of flour weighs.
Thanks
Sofia Ann Northrup
I used 360 and it worked well!
Rachel
Such an easy and delicious strawberry cake recipe. I’ll be baking this a BUNCH of times.
Bree
If one were to use freeze-dried strawberries, can you give an estimate/range of how many grams to use? I happen to have two bags in my pantry right now.
Erin
LOVE this recipe. Thank you!
stylesweet
Hi! I am so glad you enjoyed it =)
sadia
hey! I was just wondering is the frosting pink bc you used coloring? its not strawberry flavor correct? just want to make sure ive understood correctly. I want to make a strawberry flavored ermine frosting...is that possible? if so, could you tell me how you would do that? thanks in advance!
stylesweet
Hi! Yes, the frosting is just vanilla ermine tinted pink. The strawberry is in the cake layers themselves and the jam. I haven't made a strawberry ermine but I suppose you could add freeze-dried strawberries to it. Or try replacing some of the milk for strawberry puree, but you'd have to experiment with that one first. Sounds yummy!
sadia
ok sounds good! thank you so much 🙂
bridget
hi!! hoping to make this for my friend's daughter's birthday party. about how many servings would you say are in this cake? thank you so much.
stylesweet
Hi! This is a pretty big cake and can serve about 16, possibly more if you are slicing smaller pieces. Enjoy!
Kristi Martin
I made this for my daughter's birthday over the weekend and it was a total winner. She loves everything pink and we decorated with these puffy rainbow marshmallows. Love the strawberry cake flavor! Will make again next year.
Taylor P.
I make this cake every summer and it still my favorite! Great recipe. thank you!
Sammi
A perfect cake recipe for summer! Classic and easy. Thanks for sharing!
Bree
This cake was great despite several errors on my part. Next time I will use parchment paper rounds in the cake pans because mine stuck terribly, and I had to sort of piece it together before freezing the layers. I also had less than 3/4 cup strawberry purée after it reached “jammy” consistency so I made another batch (next time I might 1.5 the recipe to give myself wiggle room for over-reducing it). I put the ermine frosting mixture through a sieve before letting it come to room temp because I had lots of little lumps. None of the errors were apparent in the final product, though. It looked beautiful and tasted great.
stylesweet
Thank you for a lovely, honest review - even after a few setbacks. I am so glad you enjoyed the cake!