Last updated on September 28th, 2023 at 02:31 pm
Make a drip cake like a pro following this simple tutorial! Learn how to make a chocolate drip cake and add your glaze with confidence.
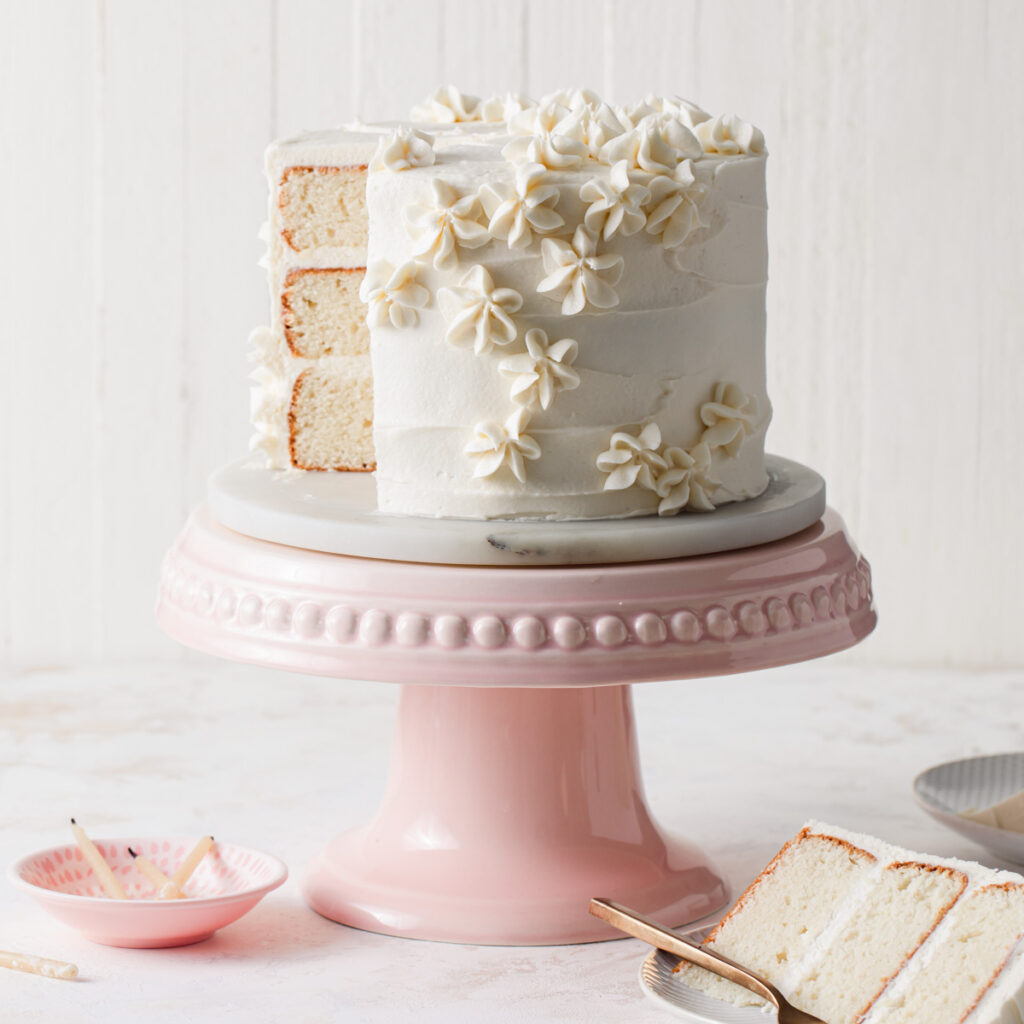
Now try my best White Chocolate Drip!
Jump to:
- Instructions
- Layer Cake 101
- Tips for Making a Chocolate Drip Cake
- Chill Your Cake
- Use a Drip Recipe That Works
- Cool Cooked Glaze
- Chocolate Drip Consistency is Key!
- Make a Test Chocolate Drip
- Drip the Outside of the Cake
- Fill the Center of a Chocolate Drip Cake
- Drip FAQs
- Steps for Making A Drip Cake
- Join the Style Sweet Bake Club!
- Recipe
Quickly elevate your cake by adding a chocolate drip around the edge! There are classic chocolate drips to neon, technicolored Willy Wonka drips – those left rustic, natural, and beautiful to those covered in sprinkles, candy, gold leaf, donuts, etc.
Whichever style you choose, anyone that has ever tried a drip cake probably understands the pain and headache that usually comes along with it.
Use a glaze that is too runny, and it slides right off the sides and pools at the bottom of the cake stand. Too thick, and you are trying to force, nudge, plead, and beg your drips to look natural and not like blobs left on the side of your cake.
Now, as an experienced cake-dripper (I’ve been drizzling cakes since 2007 at my first bakery gig), I thought I would share some key pointers for creating gorgeous chocolate, ganache, caramel, and fruit glaze cake drips
Instructions
Use this section for process shots, alternating between the step and image showing the step. Users don't like seeing process shots cluttering up the recipe card, so include your process shots here.
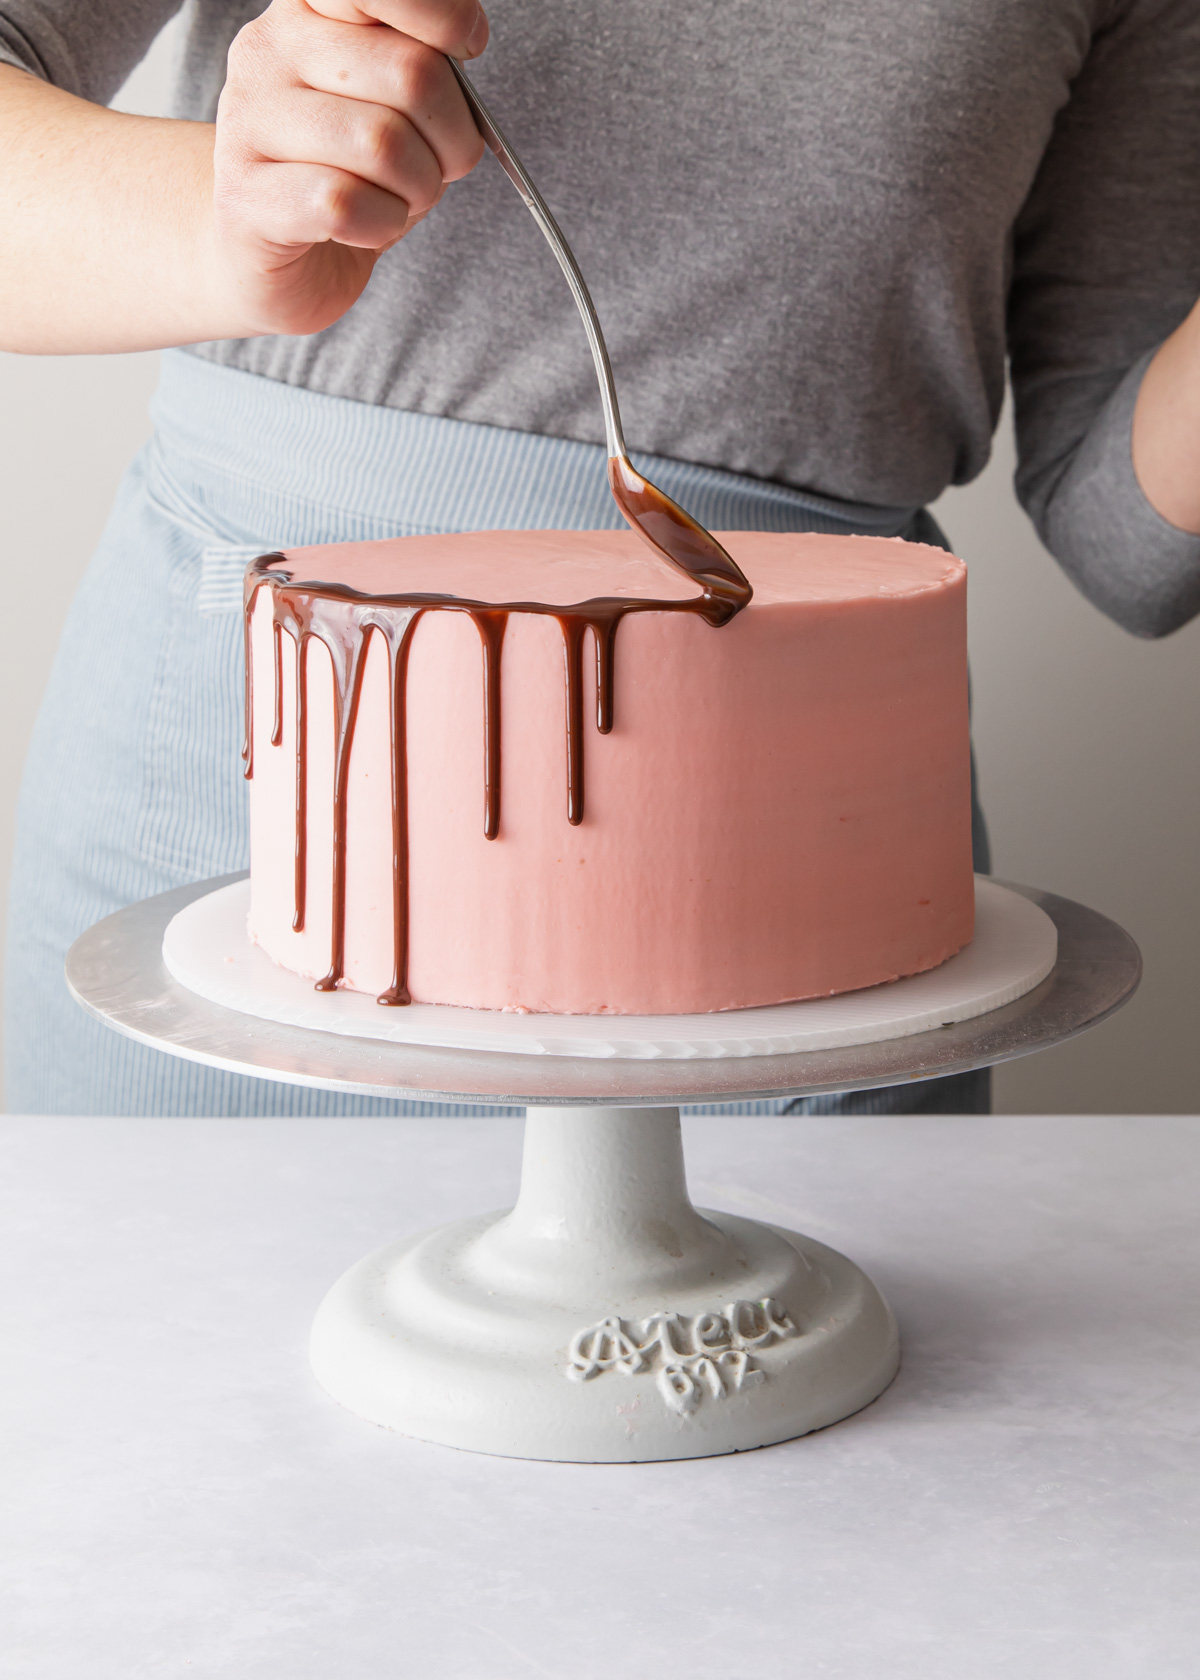
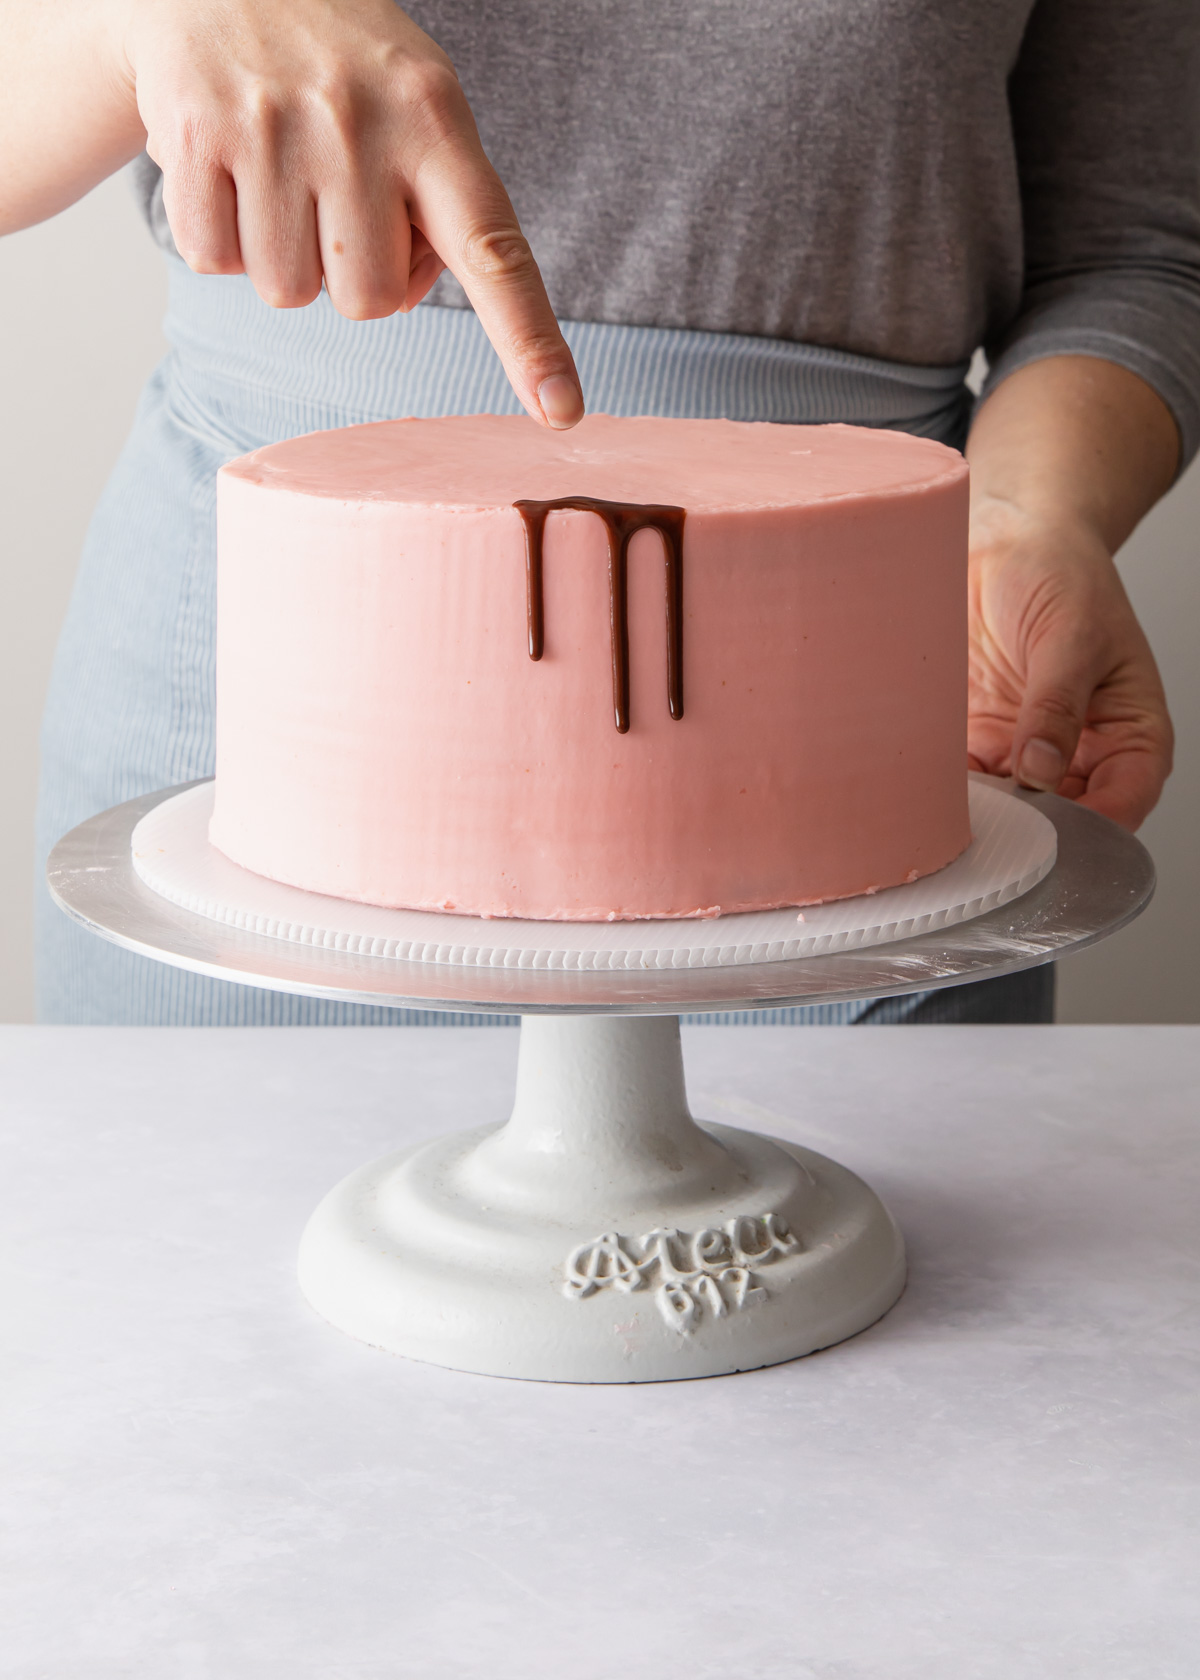
Use a spoon to add chocolate glaze to the edges of a cake. Nudge the drips to flow naturally.
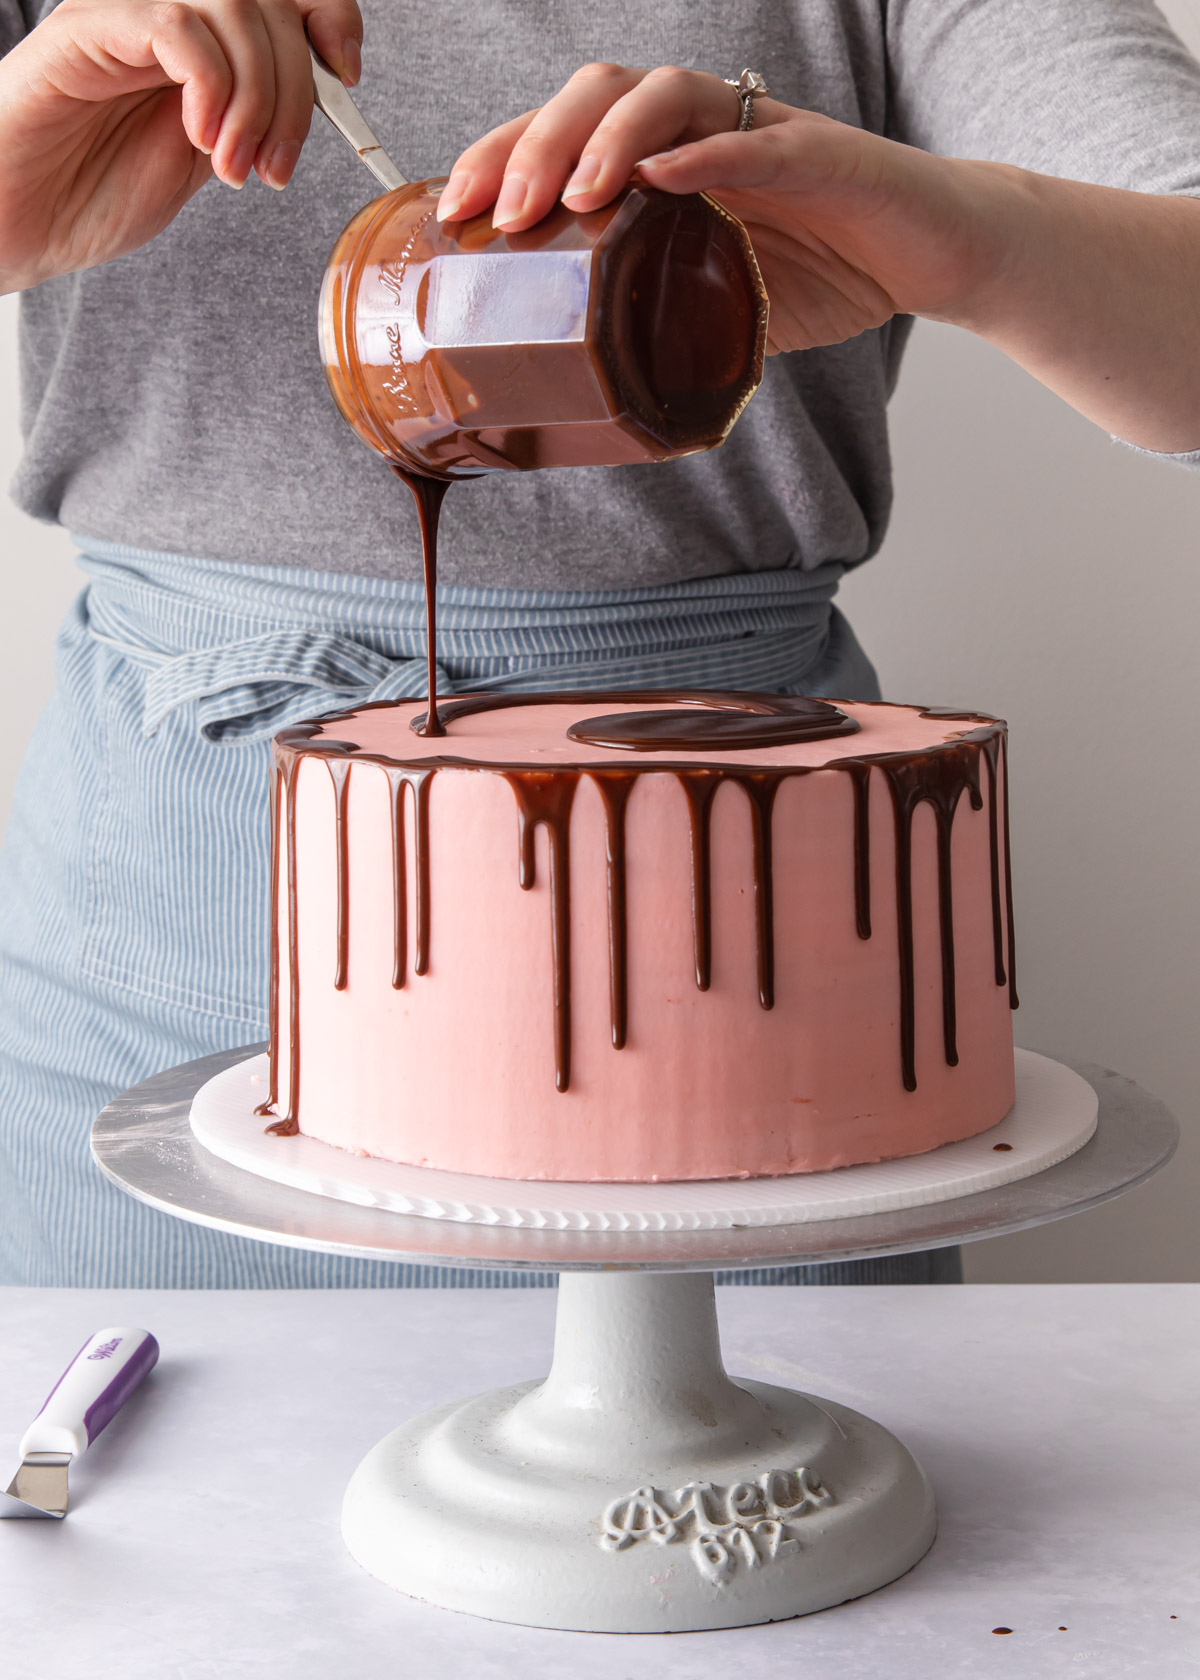
After the edges are done, pour chocolate glaze on top of the cake.
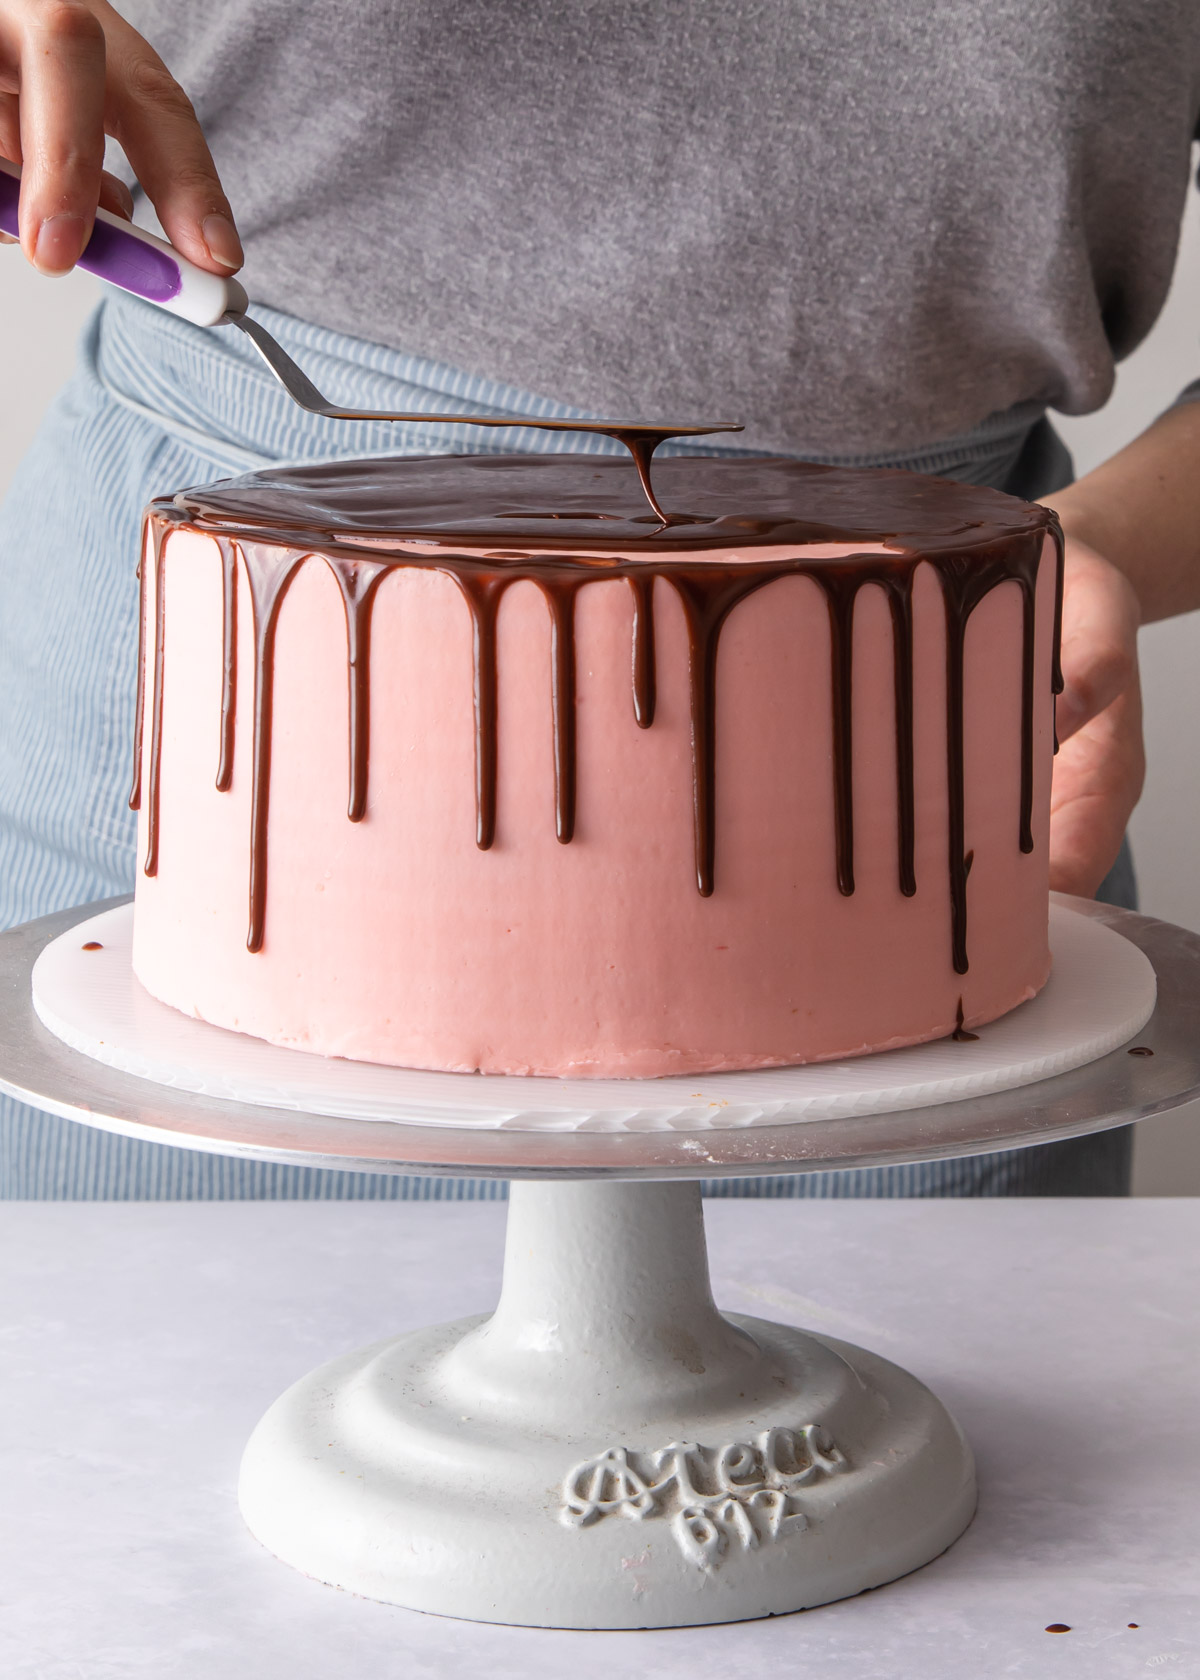
Use an offset spatula to spread the glaze on top and connect it to the outside drips.
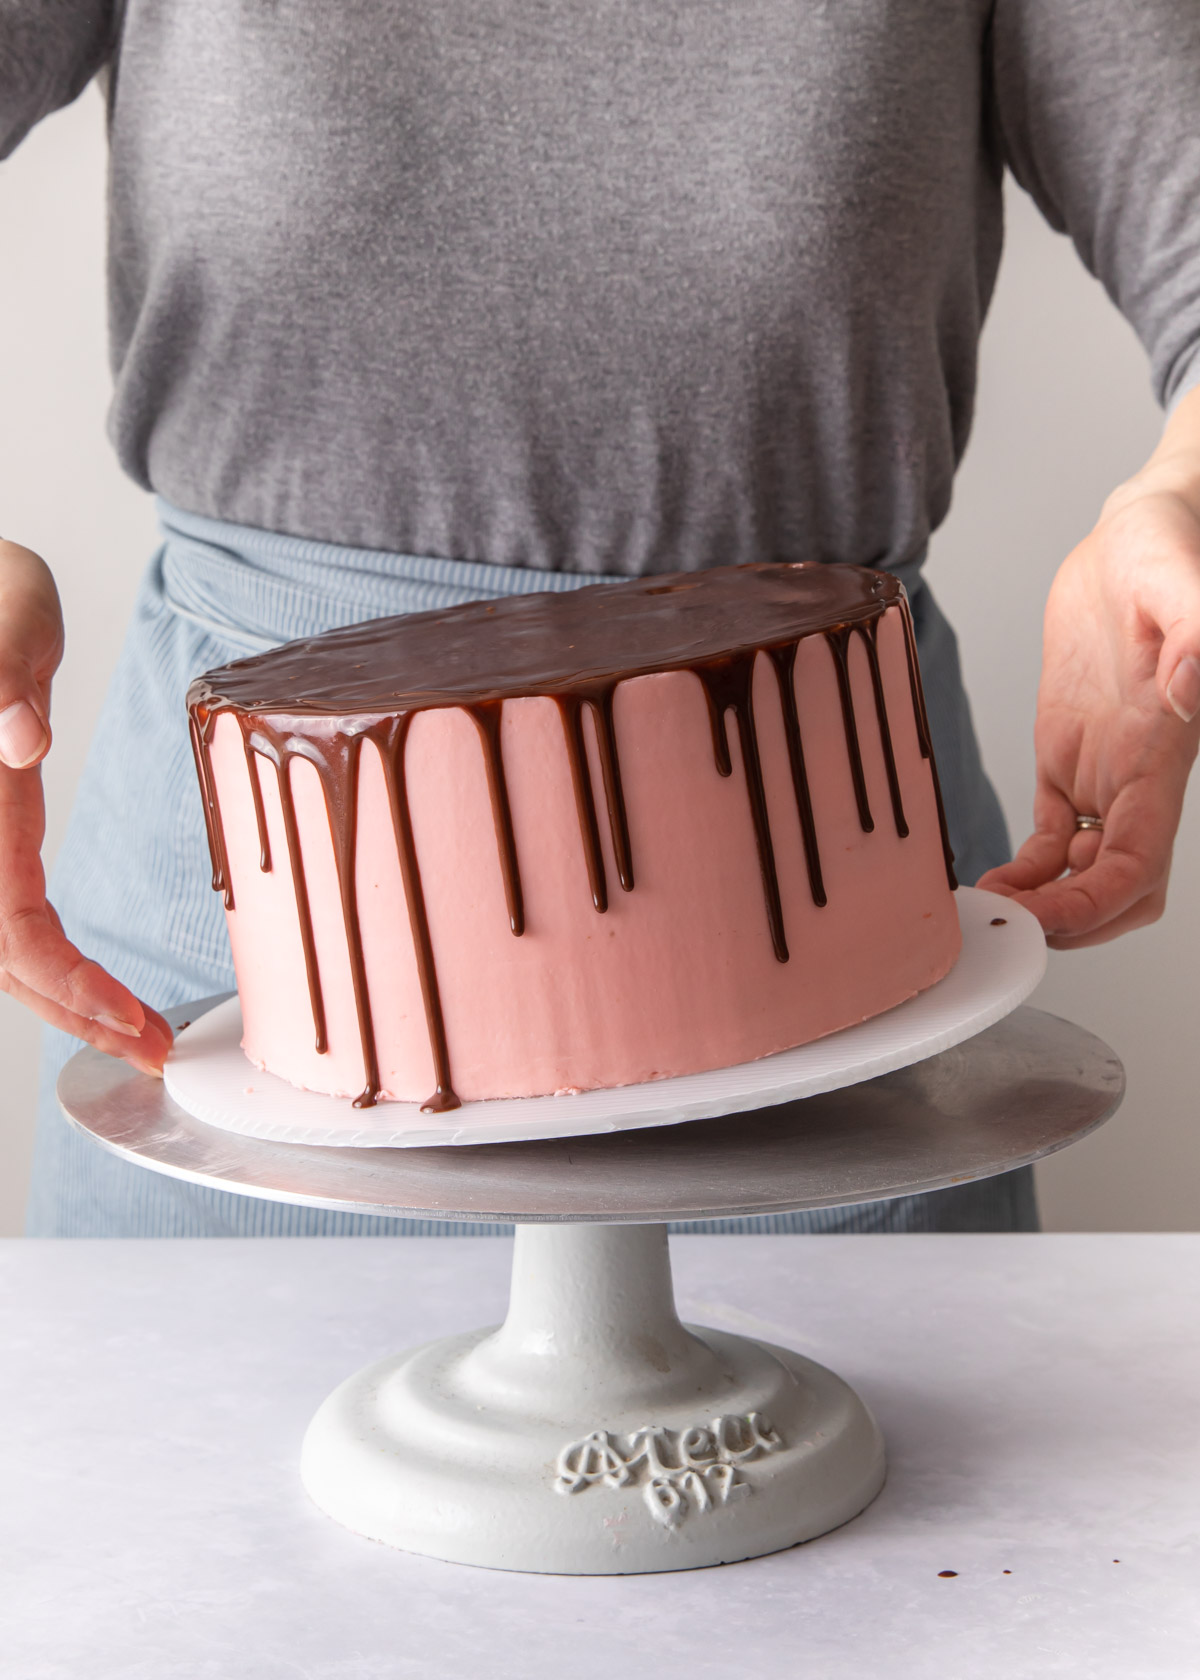
Carefully lift and drop the finished cake to smooth out the glaze and pop any air bubbles.
Hint: start with a chilled buttercream cake - a cold cake with help control the speed of the drip and be easier to scrape if the test drip is unsuccessful.
Layer Cake 101
New to cake decorating? Start here:
How to Make Beautiful Layer Cakes
Buy my books! Layered and Icing on the Cake
Tips for Making a Chocolate Drip Cake
Chill Your Cake
A great start to a perfect drippy cake is a good base, or something for the chocolate or glaze to drip of off. A smooth buttercream finish works the best.
A cold, smooth cake not only creates a seamless, uninterrupted finish for the glaze to drip down, but the chilled cake helps control the drips from sliding all the way down the cake.
Also, if the test drip doesn't turn out (see below), it can easily be scraped off.
Even when I drip a naked cake, I like to give it either a bit of a crumb coat or ice just the top of the cake.
Use a Drip Recipe That Works
This might be a no-brainer, but try to use a recipe that works as a suitable glaze (see below). For example, honey by it self might be too runny while peanut butter is too thick.
Recipes that are suitable for drizzling include: chocolate ganache, white chocolate ganache (plain, flavored, or tinted with gel food coloring), chocolate glaze, caramel sauce (although sometimes a bit tricker and harder to set), and powdered sugar glaze (either mixed with a touch of milk or fruit juice/puree).
Try this White Chocolate Drip!
Cool Cooked Glaze
Many glazes and sauces are made on the stove or require some heat. You must allow the glaze to cool a bit before dripping on your cake.
My basic chocolate glaze (recipe below) takes a good 10 to 15 minutes to cool. Freshly made caramel may take even longer!
Chocolate Drip Consistency is Key!
Other than temperature, the consistency of the glaze is very important. Sometimes this directly relates to the temperature (ganache and caramel will thicken as they cool), but other times it does not.
Regardless, you are looking for a glaze that is thick yet still fluid. It should slowly drip off of spoon, not run or plop.
To adjust, wait until cool, add more powdered sugar/liquid, or reheat as necessary.
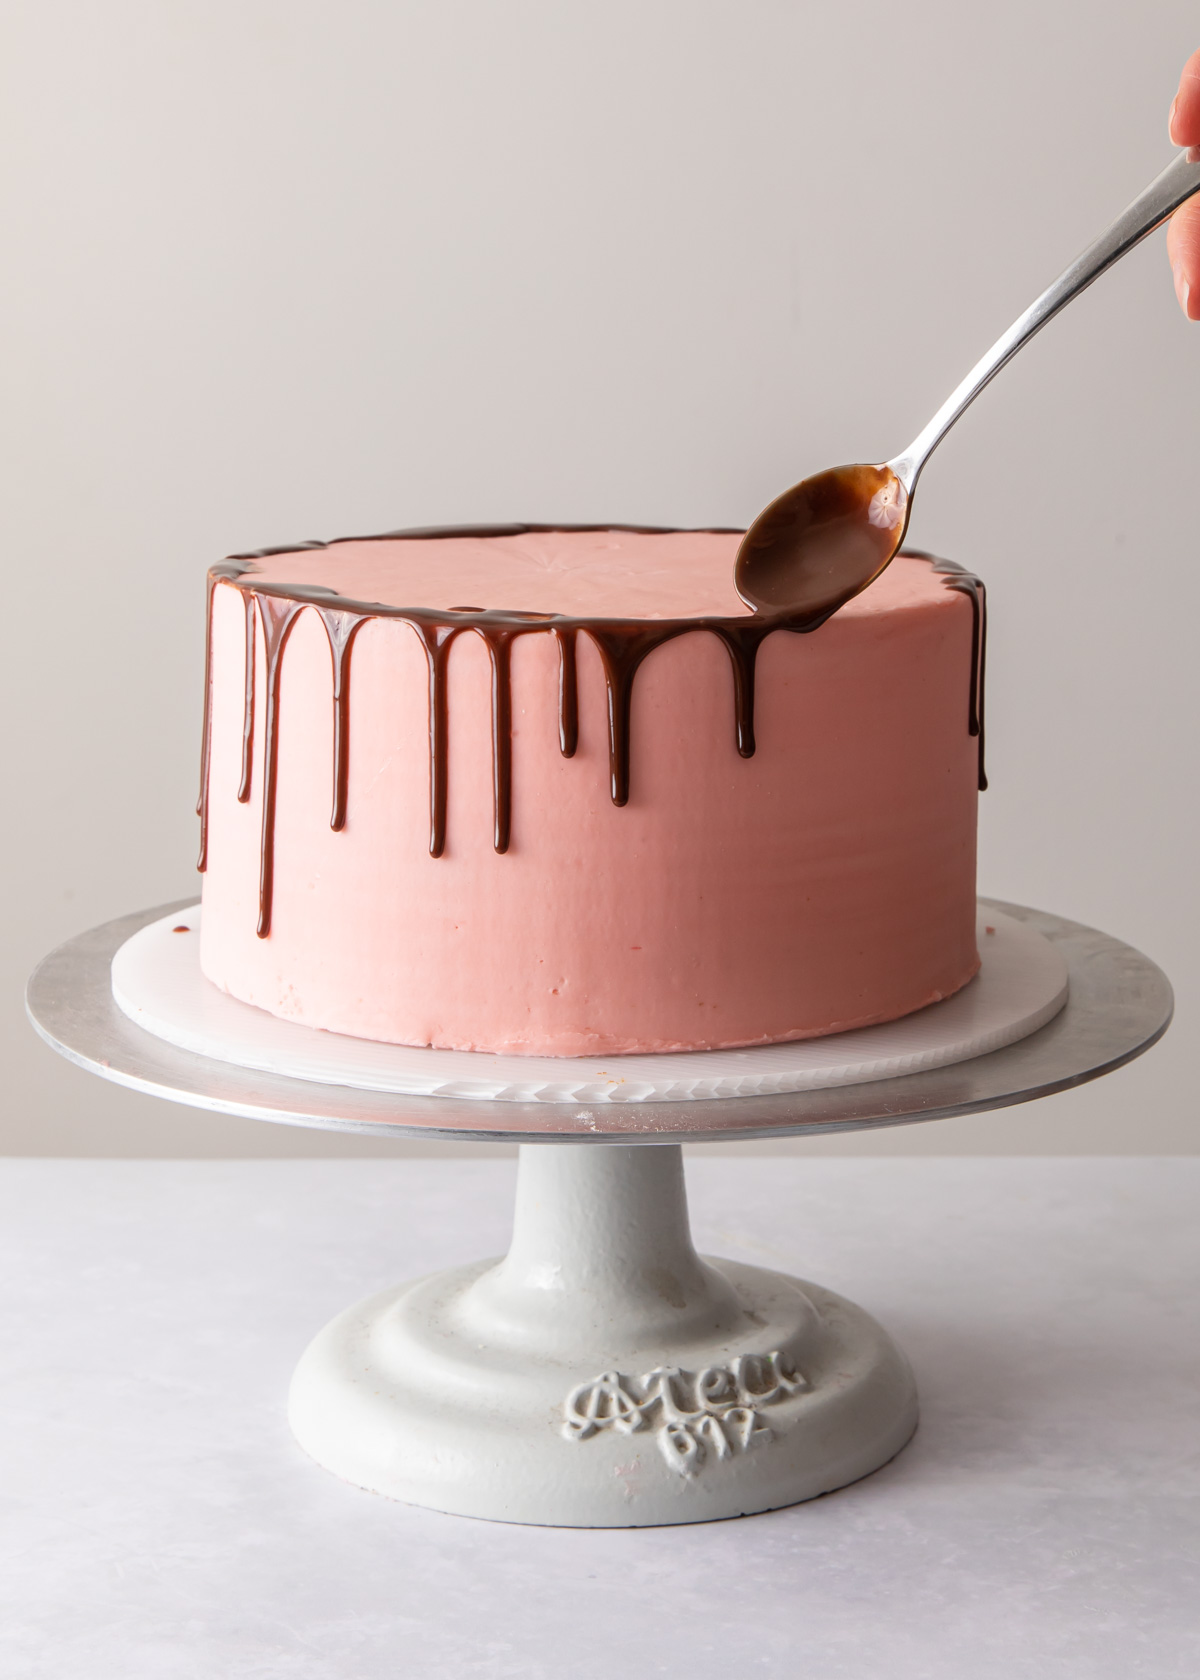
Make a Test Chocolate Drip
The best way to find out if your glaze is the correct temperature and consistency? Try a few practice drips on the actual cake! If the glaze is really off then this might cause some damage to the cake, but chances are it won’t be tragic if it is slightly too warm or thick.
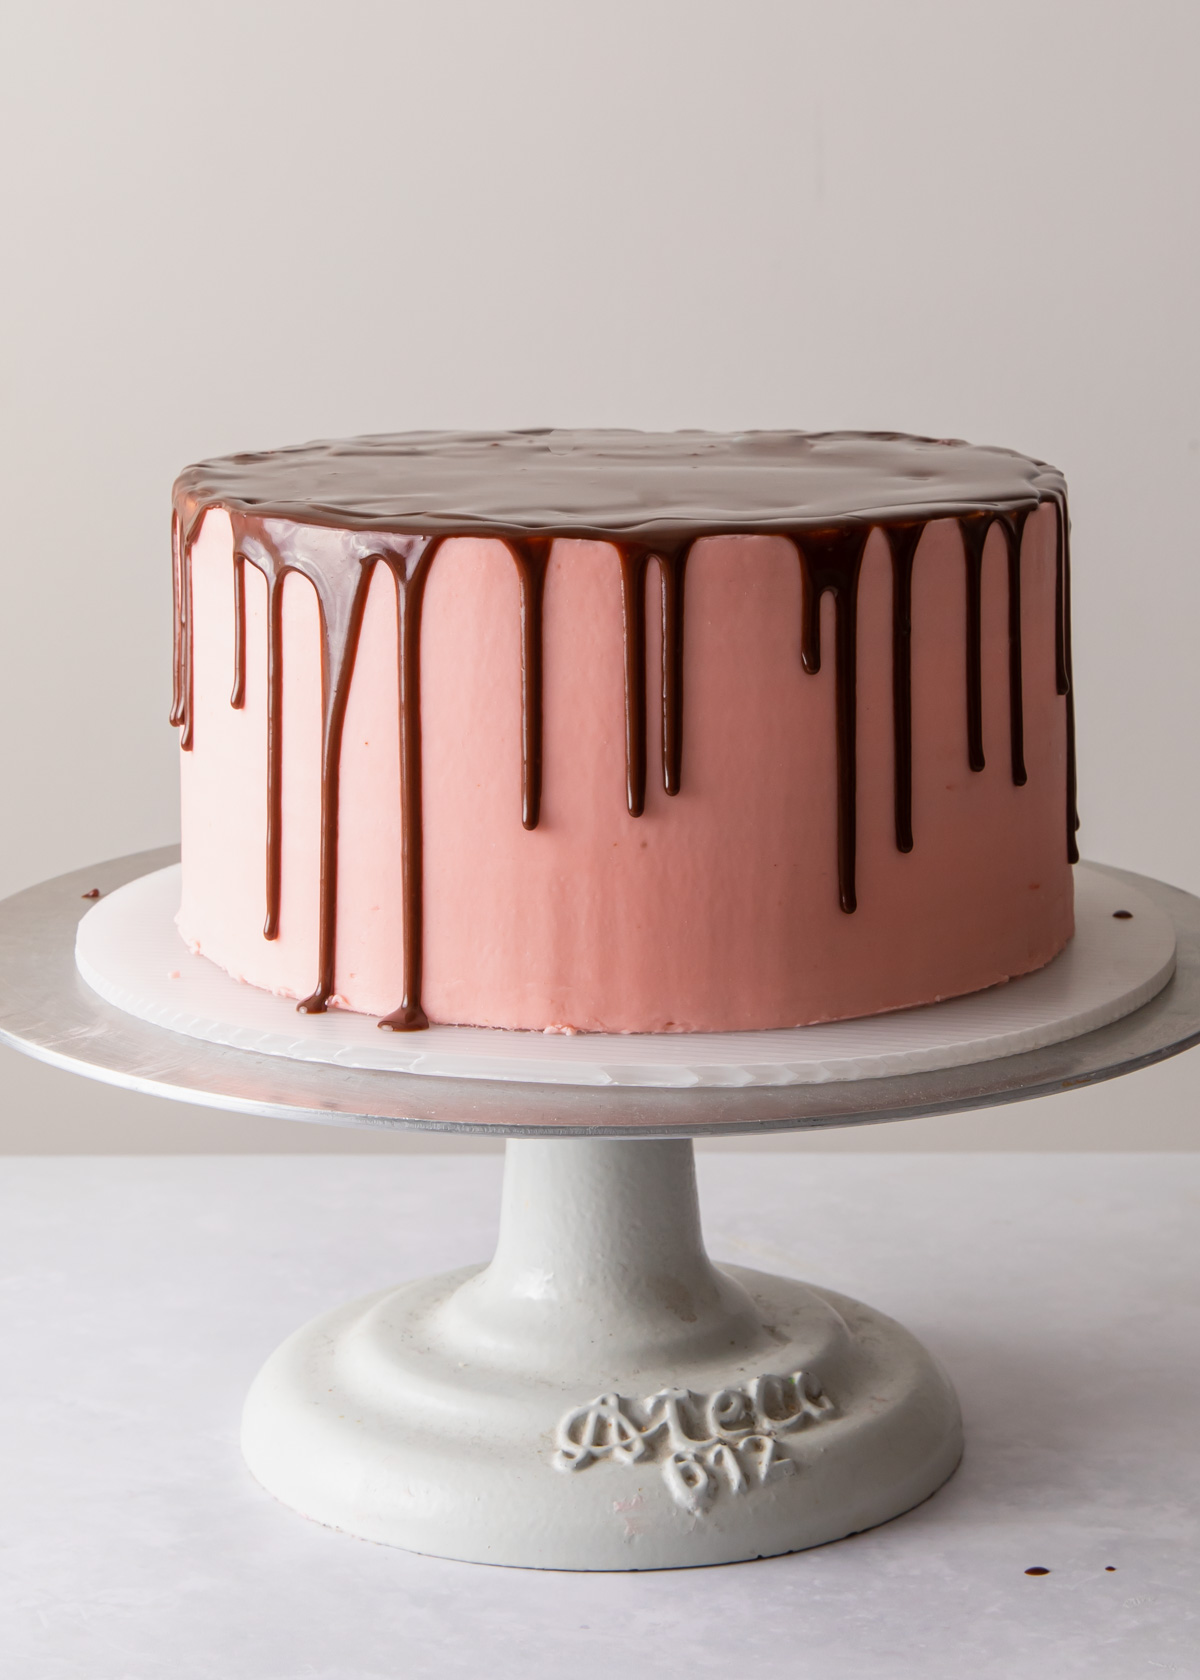
Try these practice drips on the edge and watch to see the rate at which it drips.
Does is slide right off?
Does it stop halfway down?
Adjust accordingly before taking the glaze to the entire cake.
Drip the Outside of the Cake
Until you have the confidence to pour your glaze over the top of your entire cake, start by working with only a few drips at a time around the edge of your cake.
Using a spoon, start making drips around the edges. I find that I am able to control the drips and design of the cake more this way. I love the idea of “perfectly imperfect” so this helps give me back some control while the drips still appear natural.

Fill the Center of a Chocolate Drip Cake
Once you ensure that all of your individual drips are looking their best, it is time to fill in the center. At this point, the glaze or chocolate sometimes cools or thickens up on me, so always re-check the consistency.
If the glaze cools/thickens up too much, it may not spread or blend evenly. Less is more here - you don't want too much spilling over the edges and ruining your gorgeous drips!
To help smooth out the top, use a small off-set spatula to gently even it out. Try tapping the bottom of the cake on the counter to help the top settle, smooth, and pop any air bubbles.
Drip FAQs
You can use a basic ganache. A little corn syrup added to it will make it glossy and easy to pour.
Sure you can! If you have a squeeze bottle and don't mind cleaning it out after, then use it for a chocolate drip. If not, a basic spoon will work.
Chill a warm glaze until it is no longer hot before dripping. If it is still too runny, then adjust the recipe.
The glaze might be too cold. Reheat as necessary.
Steps for Making A Drip Cake
How to Make a Drip Cake
- Frost and chill your cake
The frosting should be firm before dripping.
- Make the Glaze
Meanwhile, make the glaze and refrigerate for about 10 minutes. The glaze should be fluid but no longer warm to the touch.
- Test Drip
Using a spoon, gently drip a small amount the the chocolate glaze over the edge of the chilled cake. If it slowly drips to your liking, then continue. If not, chill or reheat the glaze as necessary.
- Drip the Sides of the Cake
Use the spoon to continue adding a bit of glaze around the top edge of the cake. For the most control, make 2 to 3 drips at a time. Use the tip of the spoon to gently nudge glaze into the perfect drips.
- Add Glaze to the Top
Pour the chocolate glaze onto the center of the top of the cake. After the edges of the cake have been dripped, check the consistency of the glaze before adding it to the top of the cake. Reheat as necessary.
- Smooth it Out
Use an offset spatula to gently spread the glaze smooth. Work quickly for glossy, smooth finish.
- Lift and Drop
When done, gently tap the bottom of the cake on the work surface to pop any bubbles and encourage the glaze to settle.
Join the Style Sweet Bake Club!
Get exclusive recipes and articles sent straight to your inbox. Become a subscriber today! Click to join.
Recipe
Chocolate Drip Cake
Ingredients
- 2 oz dark chocolate, chopped
- ¼ cup heavy cream
- 2 tablespoon white corn syrup
- pinch salt
Instructions
- Place all of the ingredients in a small a saucepan and set on the stove over medium heat.
- Gently heat the ingredients until the cream begins to simmer and the chocolate starts to melt. Stir everything together until smooth.
- Pour the glaze into a heat-safe container and refrigerate for 10 to 20 minutes, or until it is no longer warm to the touch.
Notes
Bailey Joyce
This looks delicious! How would I increase the cake recipe for 2 8-inch pans?
Aisha
I love the new site! It's so airy and clean!
Clara Bjorkman
Thank you SO much for this!! I've tried making a drippy cake before, and kind of ended up with the whole cakes frosting dripping off...not quite the effect I was going for! Super motivated to give it another try now 🙂 P.S your photos are addictively beautiful 🙂
Ashley Walker
Thank you for the incredibly helpful tips!
I'm planning to make a cake for a birthday party, so like Bailey Joyce, I'm wondering how to scale the recipe up. Should I start with the other chocolate cake recipe on your site and then just make more buttercream frosting? Thanks in advance for any advice you might have!
Janet Gary
This cake looks Devine! Slight question - time says 223 to 26 minutes. I know you mean 22?
Also, this cake is very liquid when I make it - is that normal?
Tessa Huff
Hi Janet! Yes, 22 not 223 =)
And yes, this batter is pretty runny - so probably normal. Heheh =)
Amy Timothy
I'm wanting to make this cake this weekend. I've made strawberry frosting before and it split horribly. If this frosting splits, is there a way to save it? Should I just keep whisking?
Tessa Huff
Hi Amy! Yes, sometimes buttercream has a tendency to do that when you are trying to incorporate so much liquid into a fat. Definitely mix, mix, MIX! Try adding a little of the strawberry at a time or even a little less until it all comes back together =)
Melissa Quiroga
Stunning! Looks delicioso!!! 101 Question how tall should I get the 6" tins?!!! Gracias!
Ann Young
Great tip on dripping the edges first! I have a question on the glaze... does it ever set solid like a chocolate shell, like tempered chocolate?
ZIA ASVAT
I TRIED THIS CHOC CAKE RECEIPE AND THE BUTTER CAKE RECEIPE! AMAZING!!!! IT ALL TURNED OUT SO AMAZING! IM SOO GLAS I CAME ACROSS YOUR PAGE/BLOG. THANK YOU!FOR SO LONG I WAS TRYING TO FIND THE RIGHT RECEIPE. THANK YOU
Em Voelker
Hello, thanks for this recipe! I made it as a practice test for a wedding cake I'm doing this week. The practice test looked great, just like it was supposed to. But then the next day, some of those cute drips slipped all the way down the cake, and I'm not sure why. Perhaps some of them were too big and heavy? I had it out on the counter all night, and then asked my sister to put it in the fridge for me while I was at work. So now I can't tell which environment might have contributed to the slipping. Any thoughts? Thanks!
Jennifer Starner
Hello- this looks amazing! I would also like to know how much to increase the recipe for two 8 inch cakes! Thanks!
Alex Hartman
We used this chocolate ganache drip over a cream cheese icing, and it worked beautifully.
We chilled the cake overnight in the freezer to ensure the icing would be firm enough.
The drip icing advice was so hopeful. Never starting from the center again!
Keyra B
Hello, can I bake this chocolate cake in a 9inch springform pan with the whole batter and then just cut it in the middle? And would it be baked at the same temperature for the same period of time or more? Thanks
Trysta
So fun and easy!!! I’ll have to do this again real soon
Erika
My go-to chocolate drip. It's the perfect consistency every time!
Linda Legg
Where is the actual recipe for the cake ?
stylesweet
Hi! The recipe here is just for the chocolate glaze. The cake was an 8-inch vanilla cake, similar here: https://stylesweet.com/2016-1-21-how-to-make-a-butter-cake-my-top-tips-for-baking-the-best-vanilla-bean-cake/ with a Swiss meringue buttercream https://stylesweet.com/2020-3-14-how-to-make-swiss-meringue-buttercream/