Last updated on April 21st, 2023 at 02:22 pm
Whether you are a beginner or veteran cake decorator, I also love this this design because it gets the most bang for its buck, so to speak. For the watercolor effect, you will use the same techniques and tools as you would for frosting a smooth cake.
By simply changing the colors and intensity, the effect can be easily customized and is effortlessly versatile to create celebration cakes for all occasions.
Jump to:
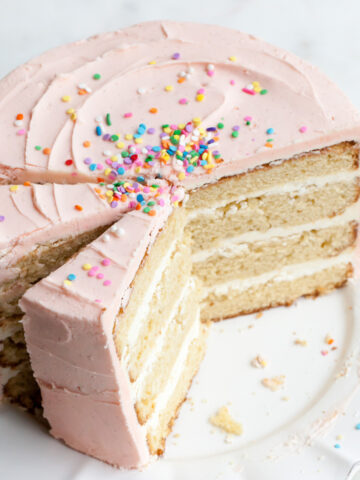
This watercolor buttercream cake design is one of my favorite techniques. It appears in my cookbooks, all over social media, and is one of my most attended in-person classes. With some helpful step-by-step photos, you can see how easy it is to make a watercolor cake at home!
I love this design for so many reasons. One of the biggest reasons is how unique and different each cake turns out. It’s nearly impossible to “mess up!” The colors swirl together organically - each cake beautiful in its own way.
This is an updated version of my original watercolor cake tutorial. The first version is still a hit, but this new way if even easier.
Tools
- Rotating cake stand
- Offset spatula
- Gel food coloring
- Icing smoother
- Paring knife
- Piping tips and bag
How to Make a Watercolor Cake
Frost the Cake
Using your favorite buttercream of choice (I used Swiss meringue buttercream, but American buttercream is fine, as well), smoothly frost the cake about 90% of the way. It does not need to be absolutely perfect yet since we will be adding more buttercream later on.
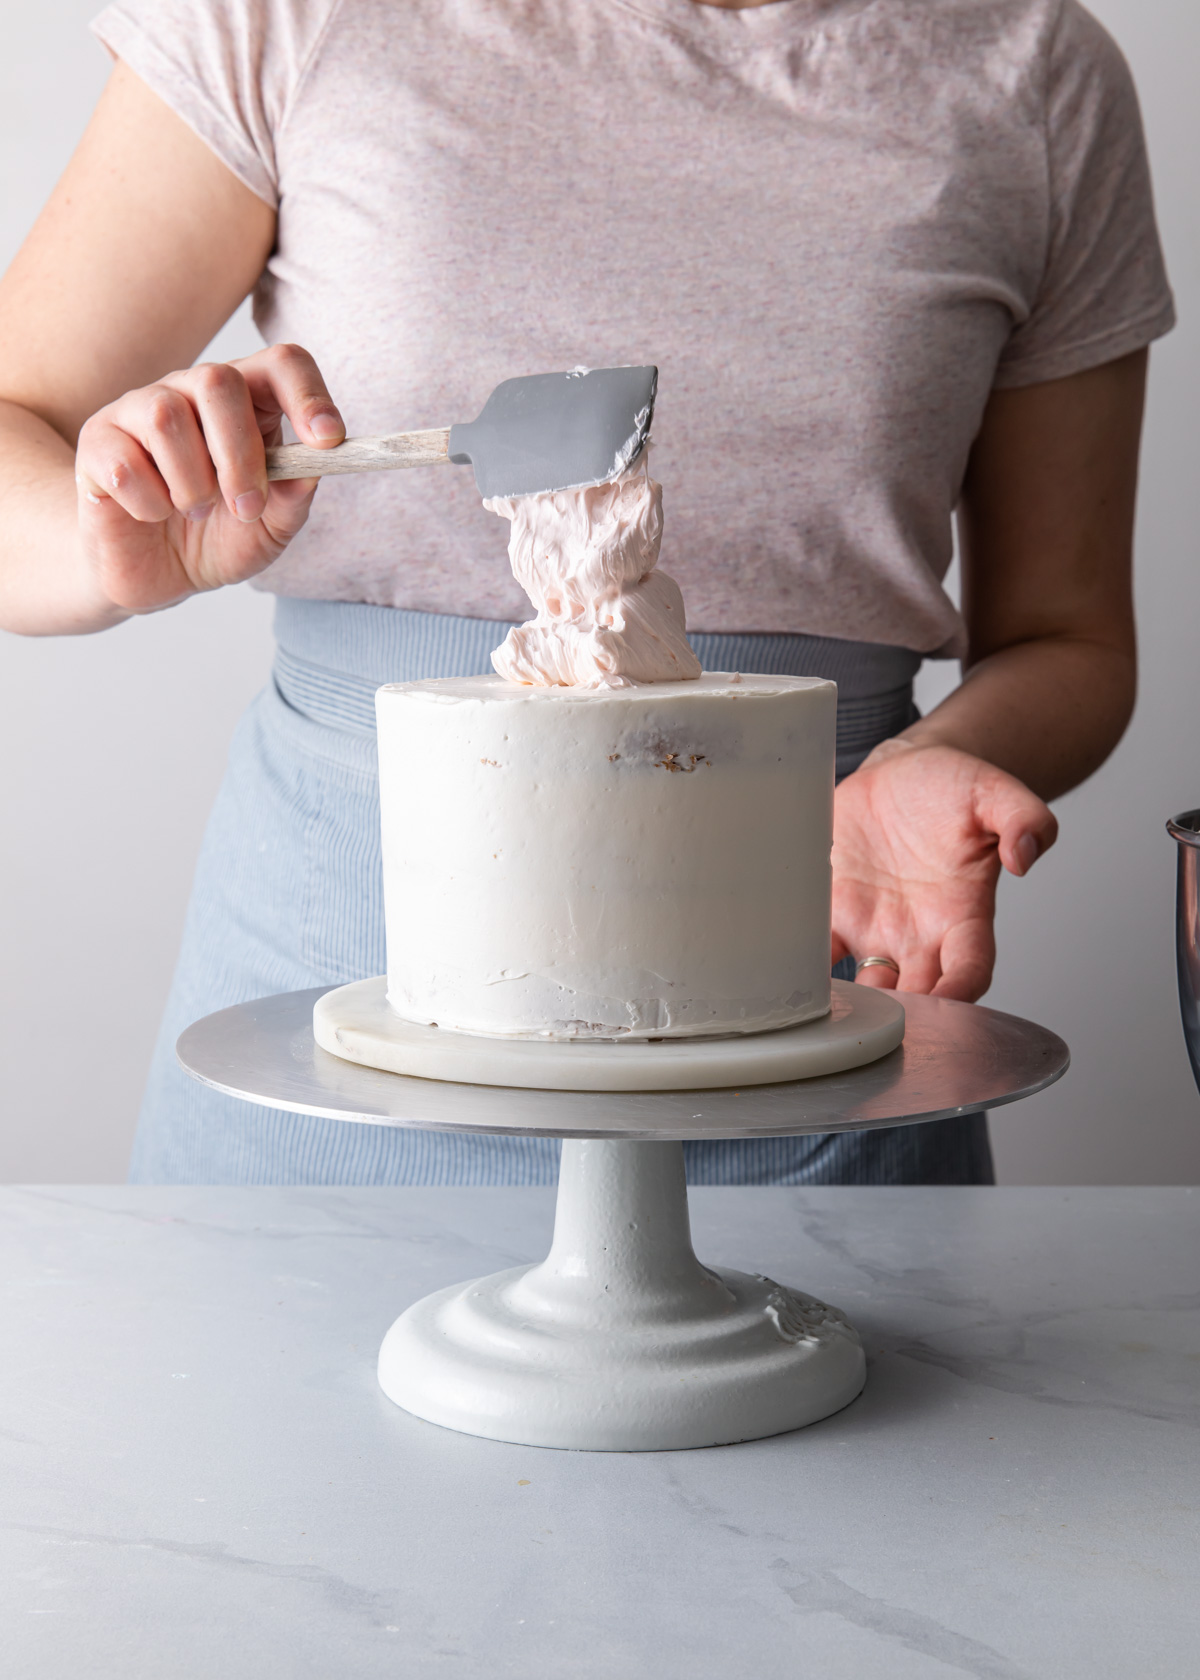
Color the Buttercream – Divide any remaining buttercream into two or three bowls. Using gel food coloring, tint the buttercream the color of your choice. I used pink, peach, and yellow – all colors that when mixed together are still pretty ( see NOTES).
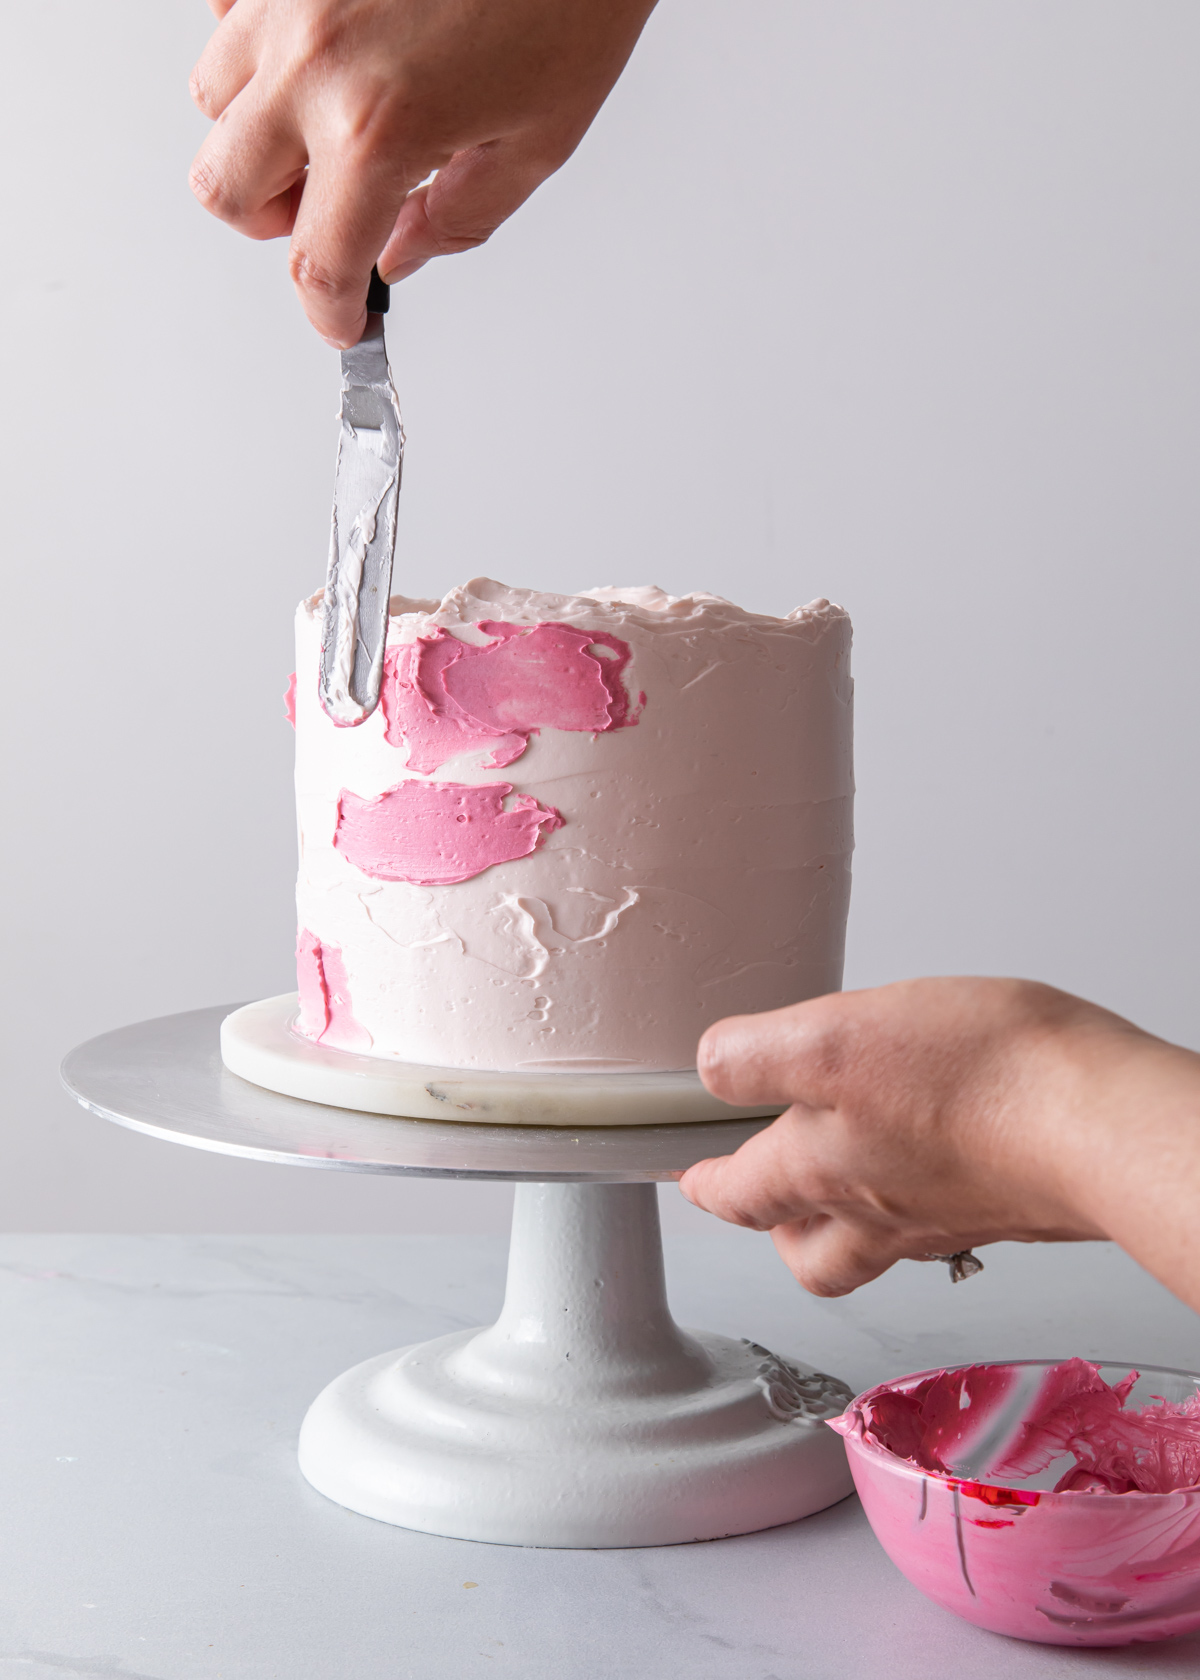
“Paint” the Cake
Next, using an offset spatula, smudge the frosted cake with swipes of the colored buttercream.
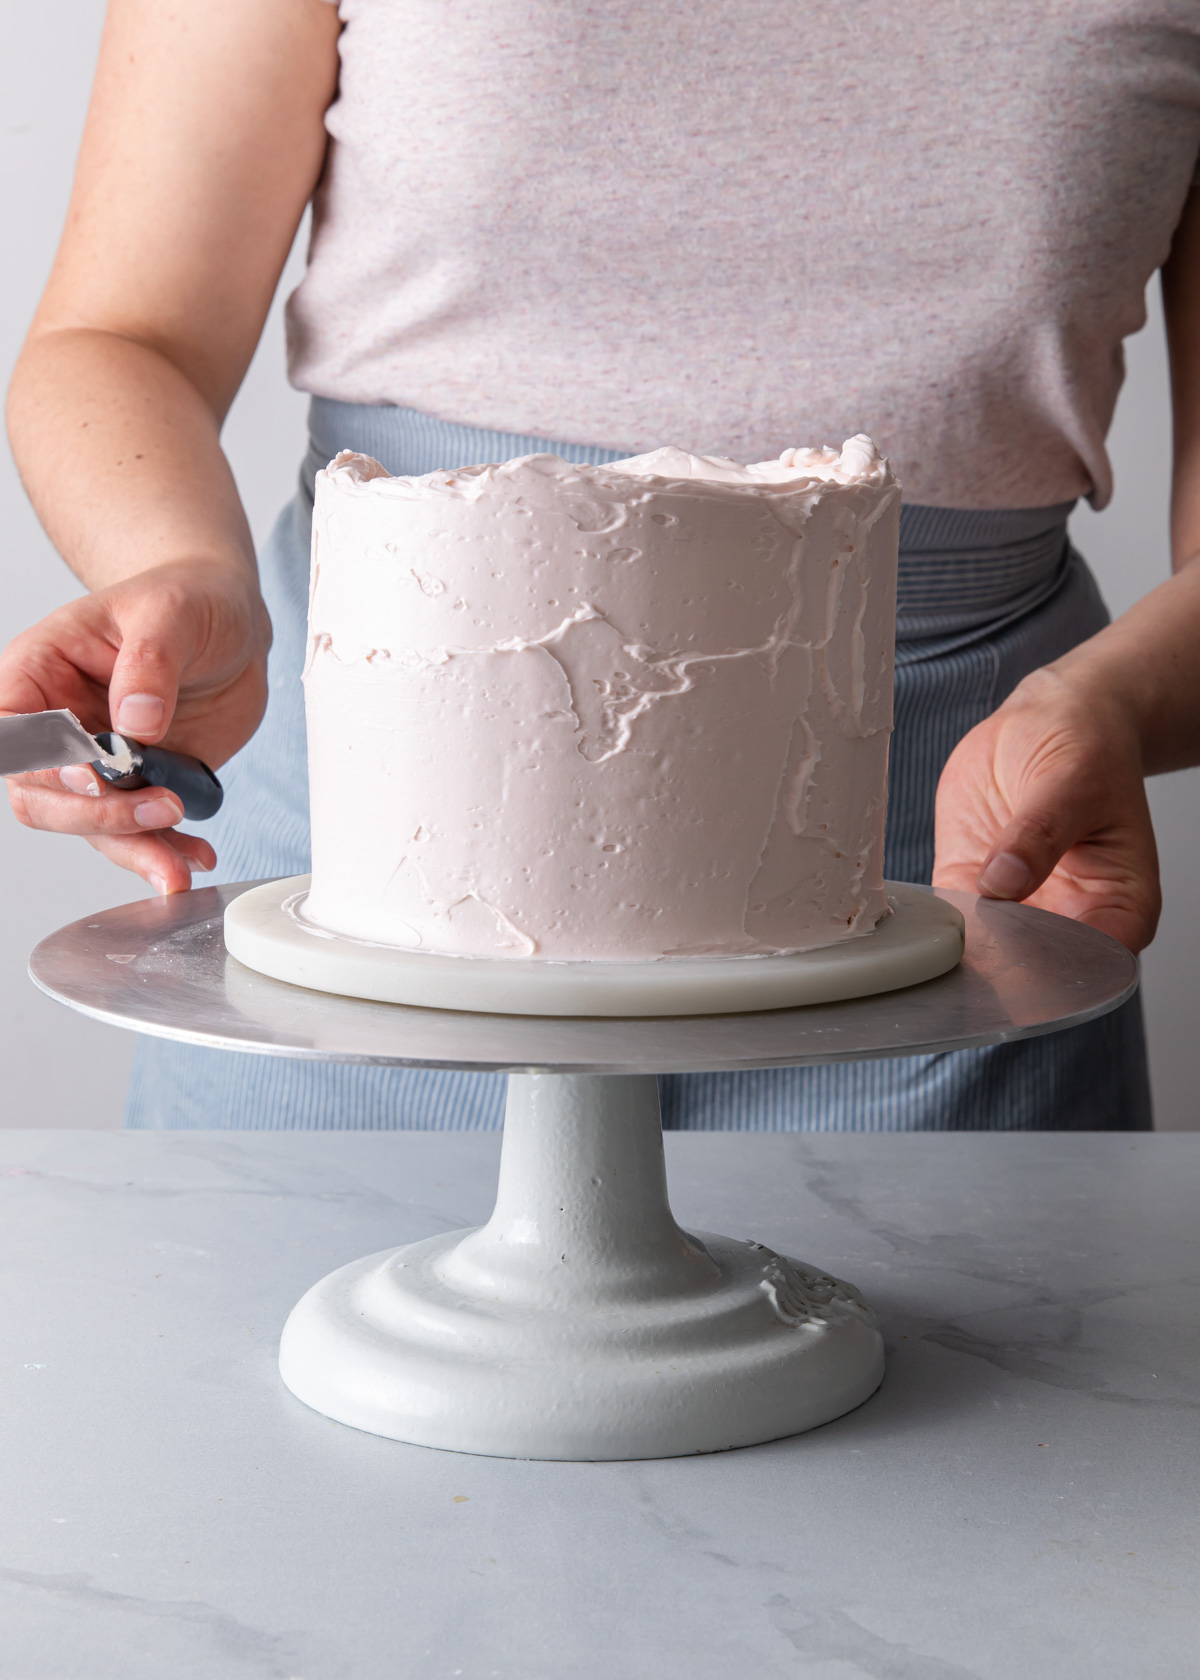
This step can be as random or as calculated as you’d like. There really is no right or wrong way. However, I recommend stacking the colors more vertically instead of right next to each other horizontally – since we will be smoothing the frosting around the sides of the cake horizontally and you’ll want to leave a bit of room to allow the colors the “blend.”
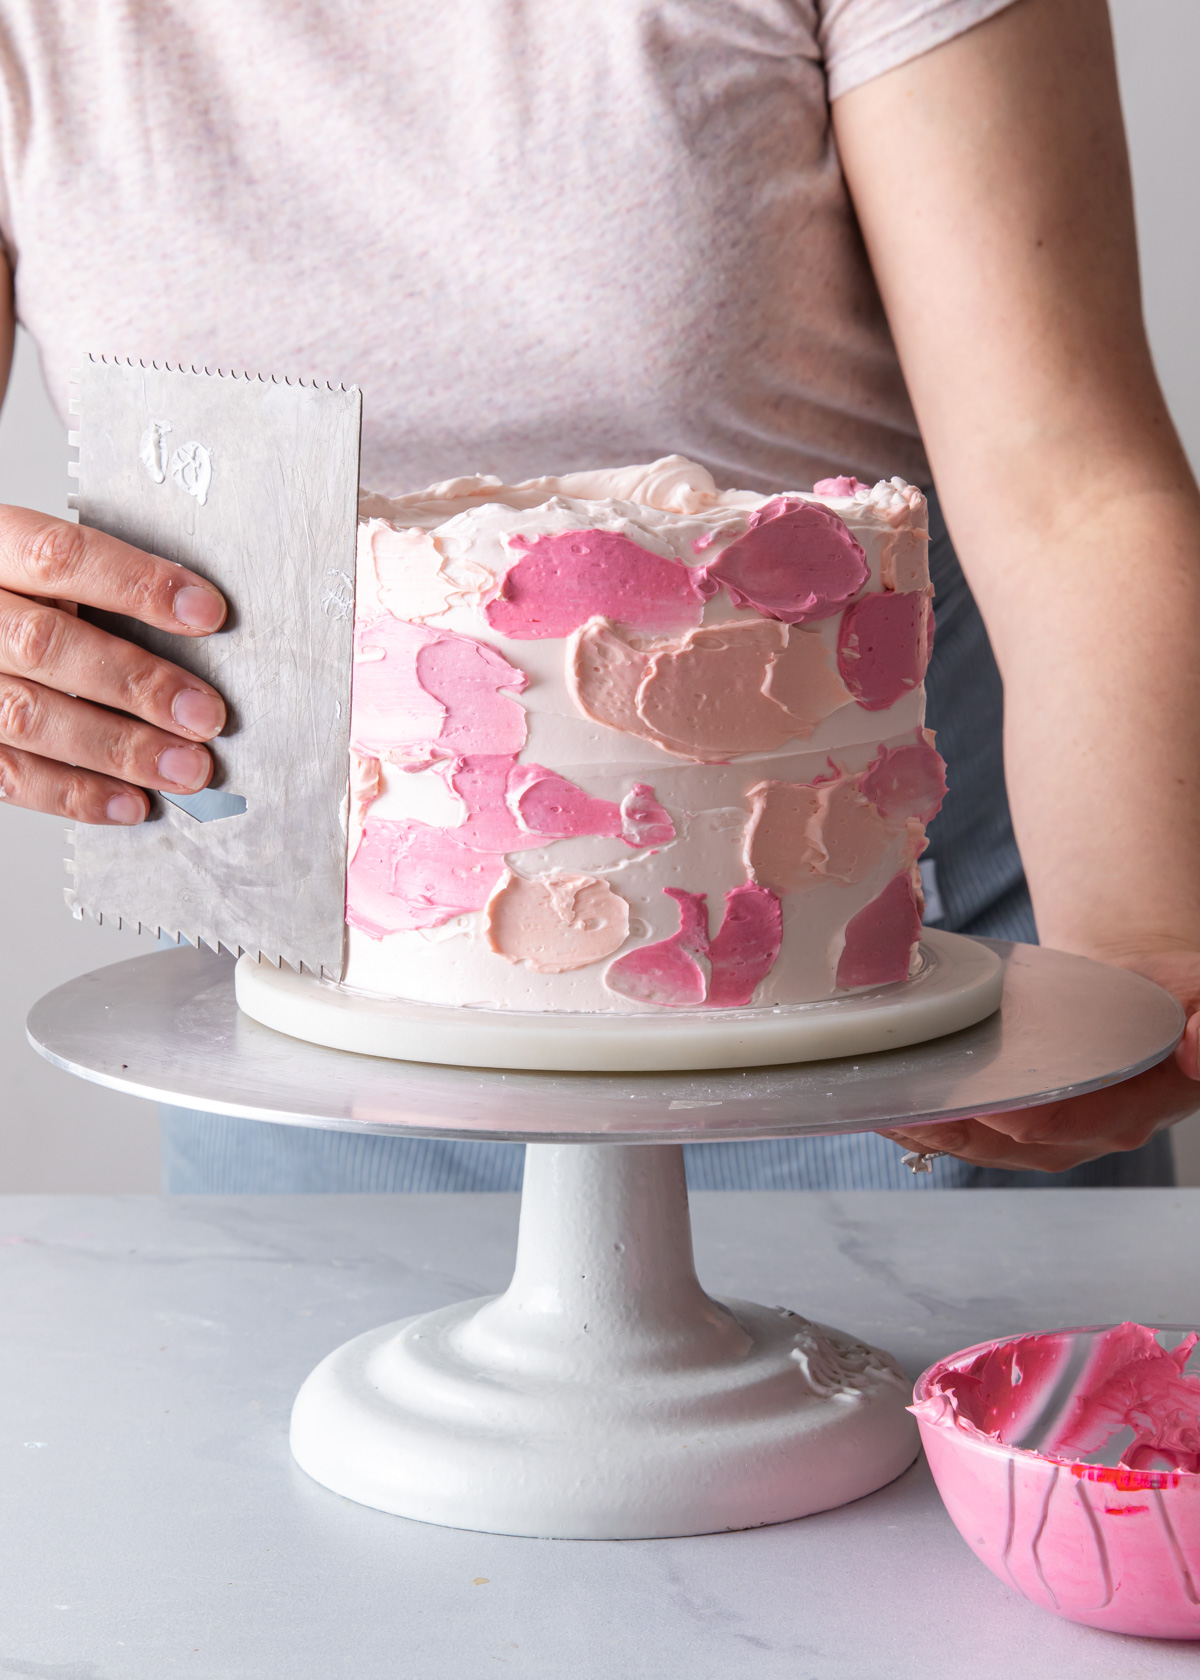
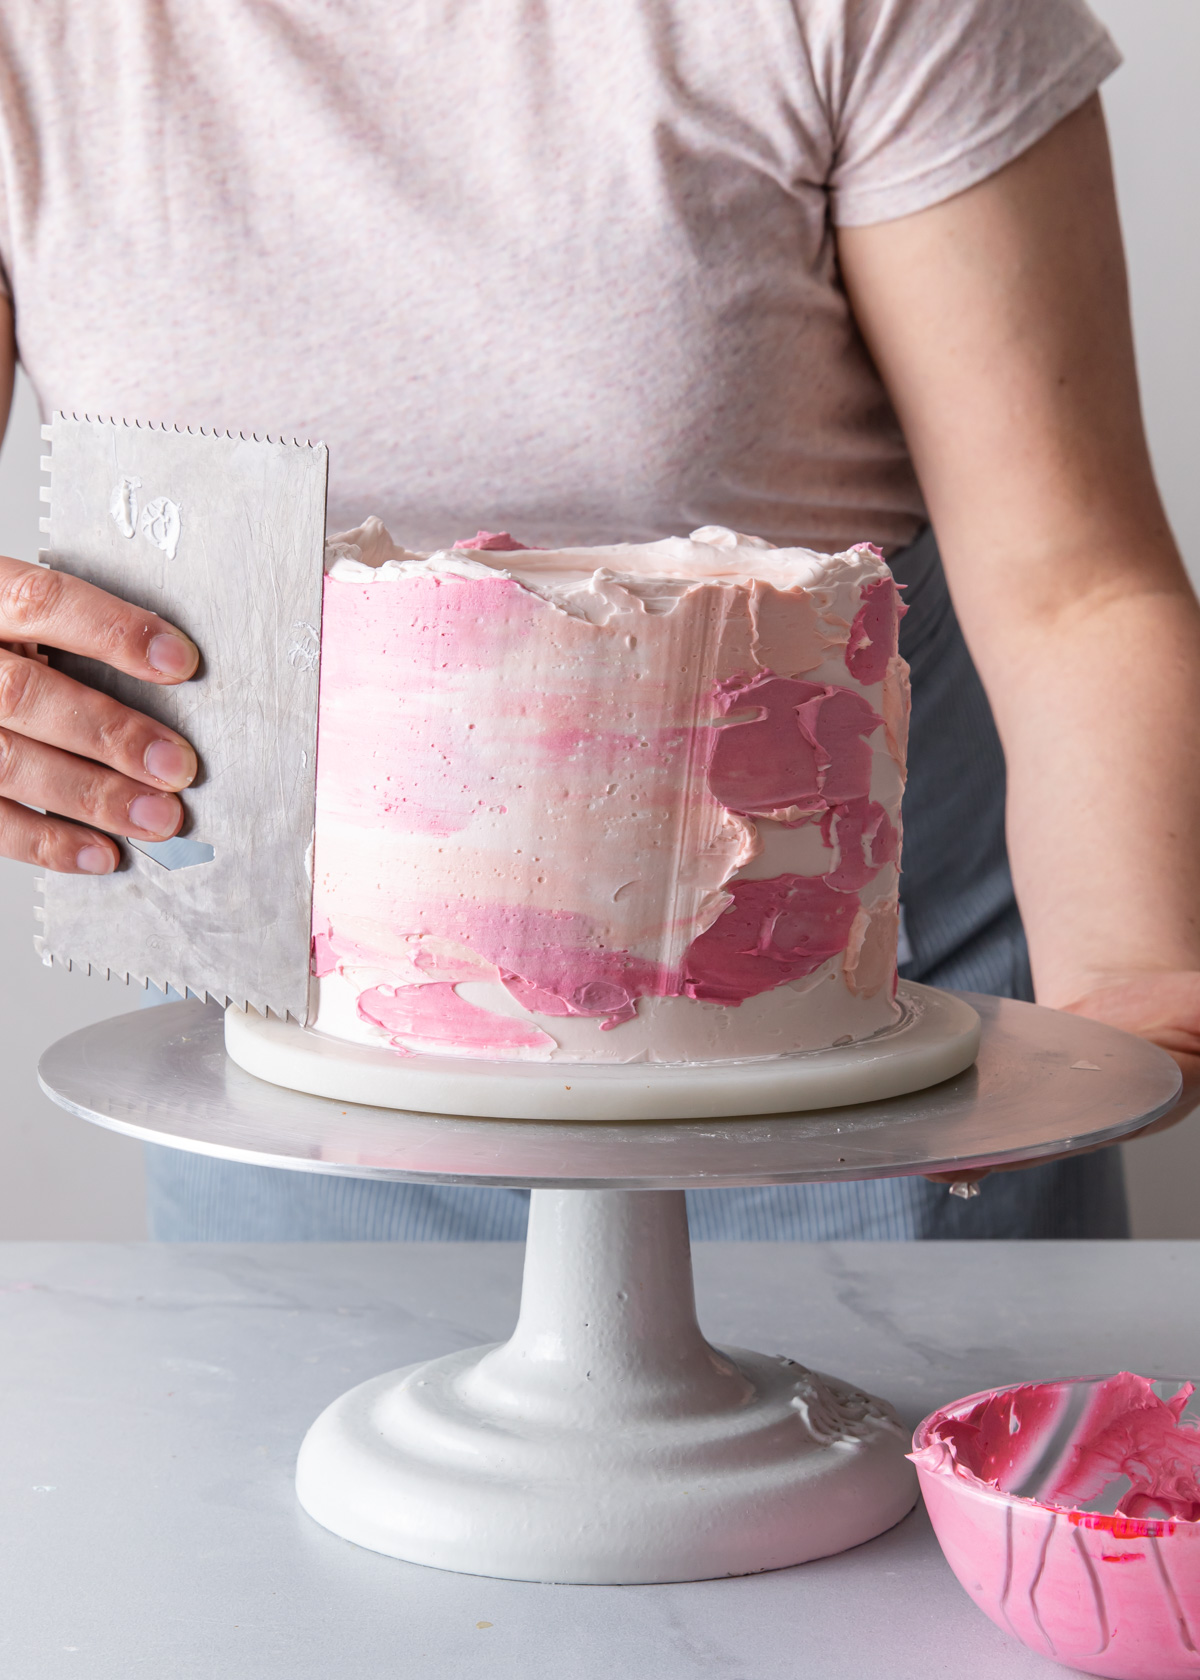
Smooth and Smear – As you would when smoothly frosting any cake, take an icing smoother and begin smoothing out the bits of colored frosting. Stop after each time around the cake to add more frosting when needed.
Please note that this process should be quick yet deliberate. You will only be able to smooth over the frosting a few times around before the colors begin to blend together too much.
Finish the Cake
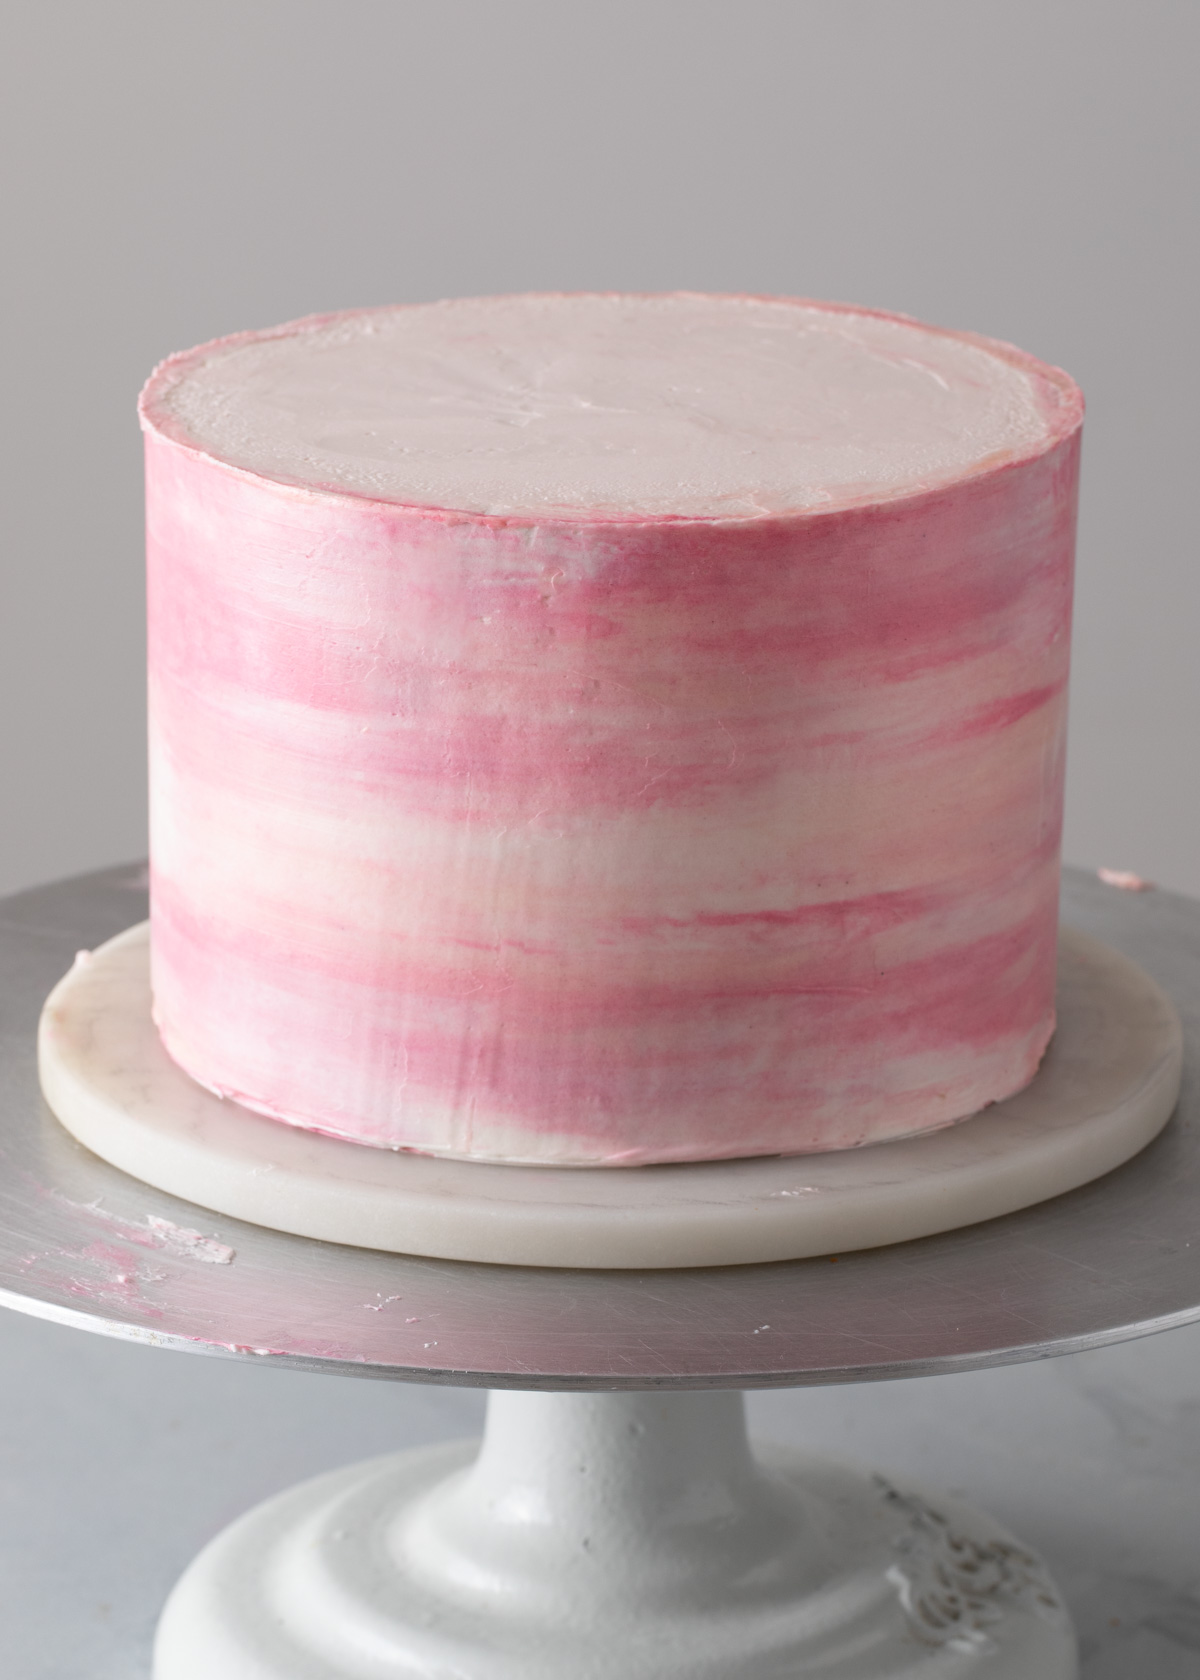
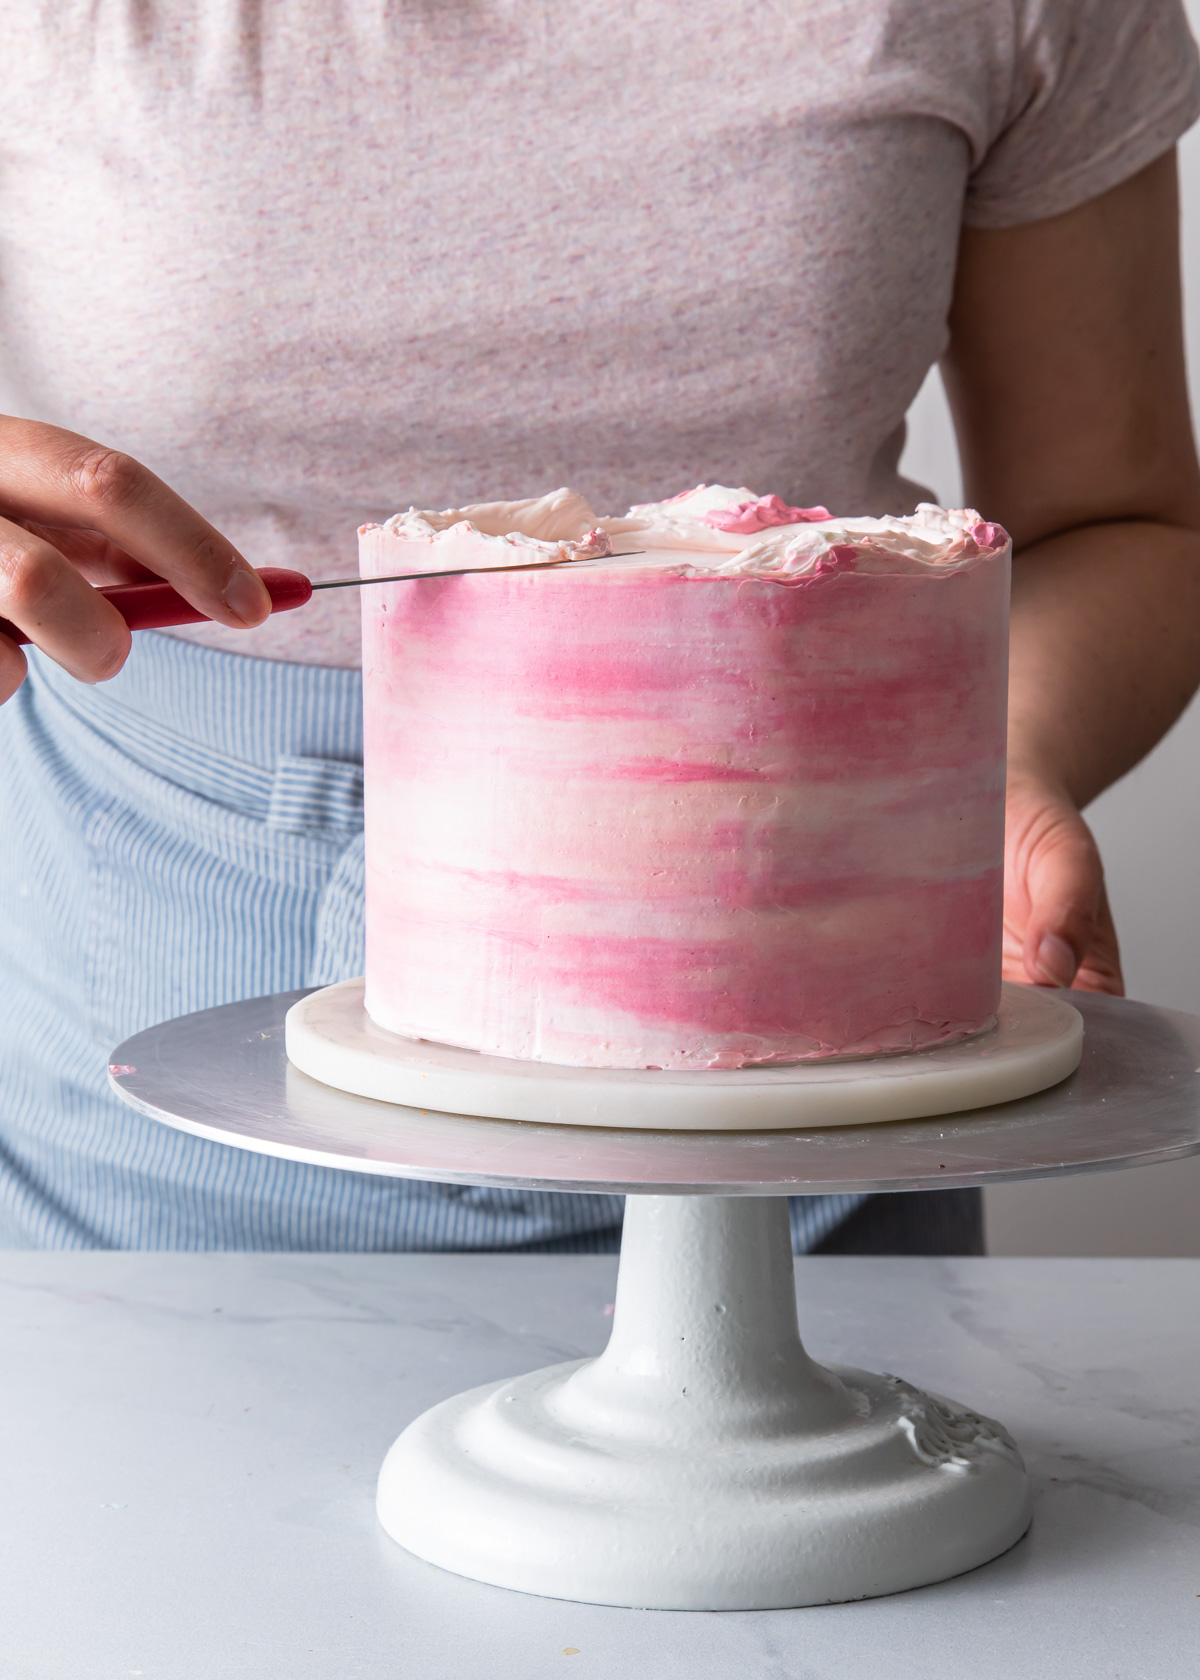
Trim the top - For a super clean and crisp top edge, trim off the excess buttercream with a paring knife. This technique works best if the buttercream is firm.
Why trim the top? This technique prevents the colored buttercream from smearing onto the top of the cake. Alternatively, use an offset spatula to pull the top edges towards the center of the cake and continue the watercolor pattern on the top.
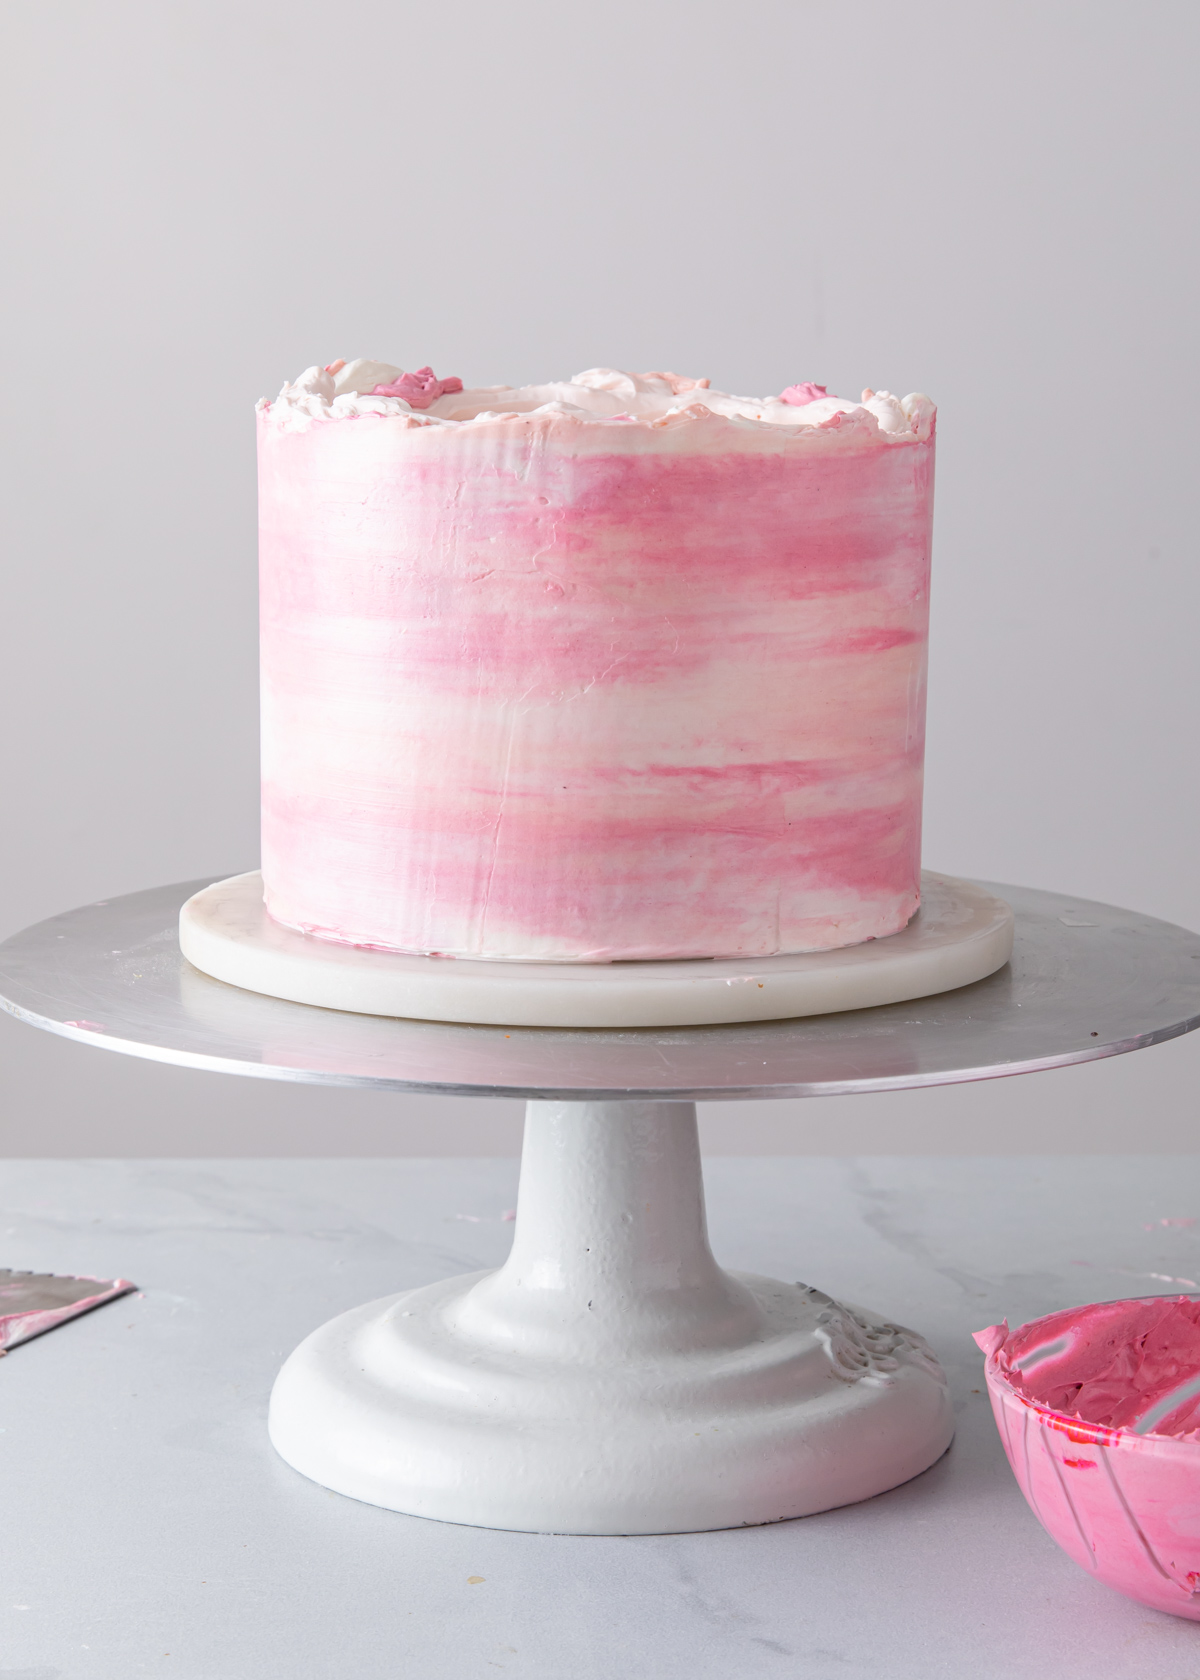
Clean – Like finishing any smooth cake, go back and clean up the sides and edges. A few, gentle passes should suffice, but again, don’t over-blend or the “watercolor” effect may get lost
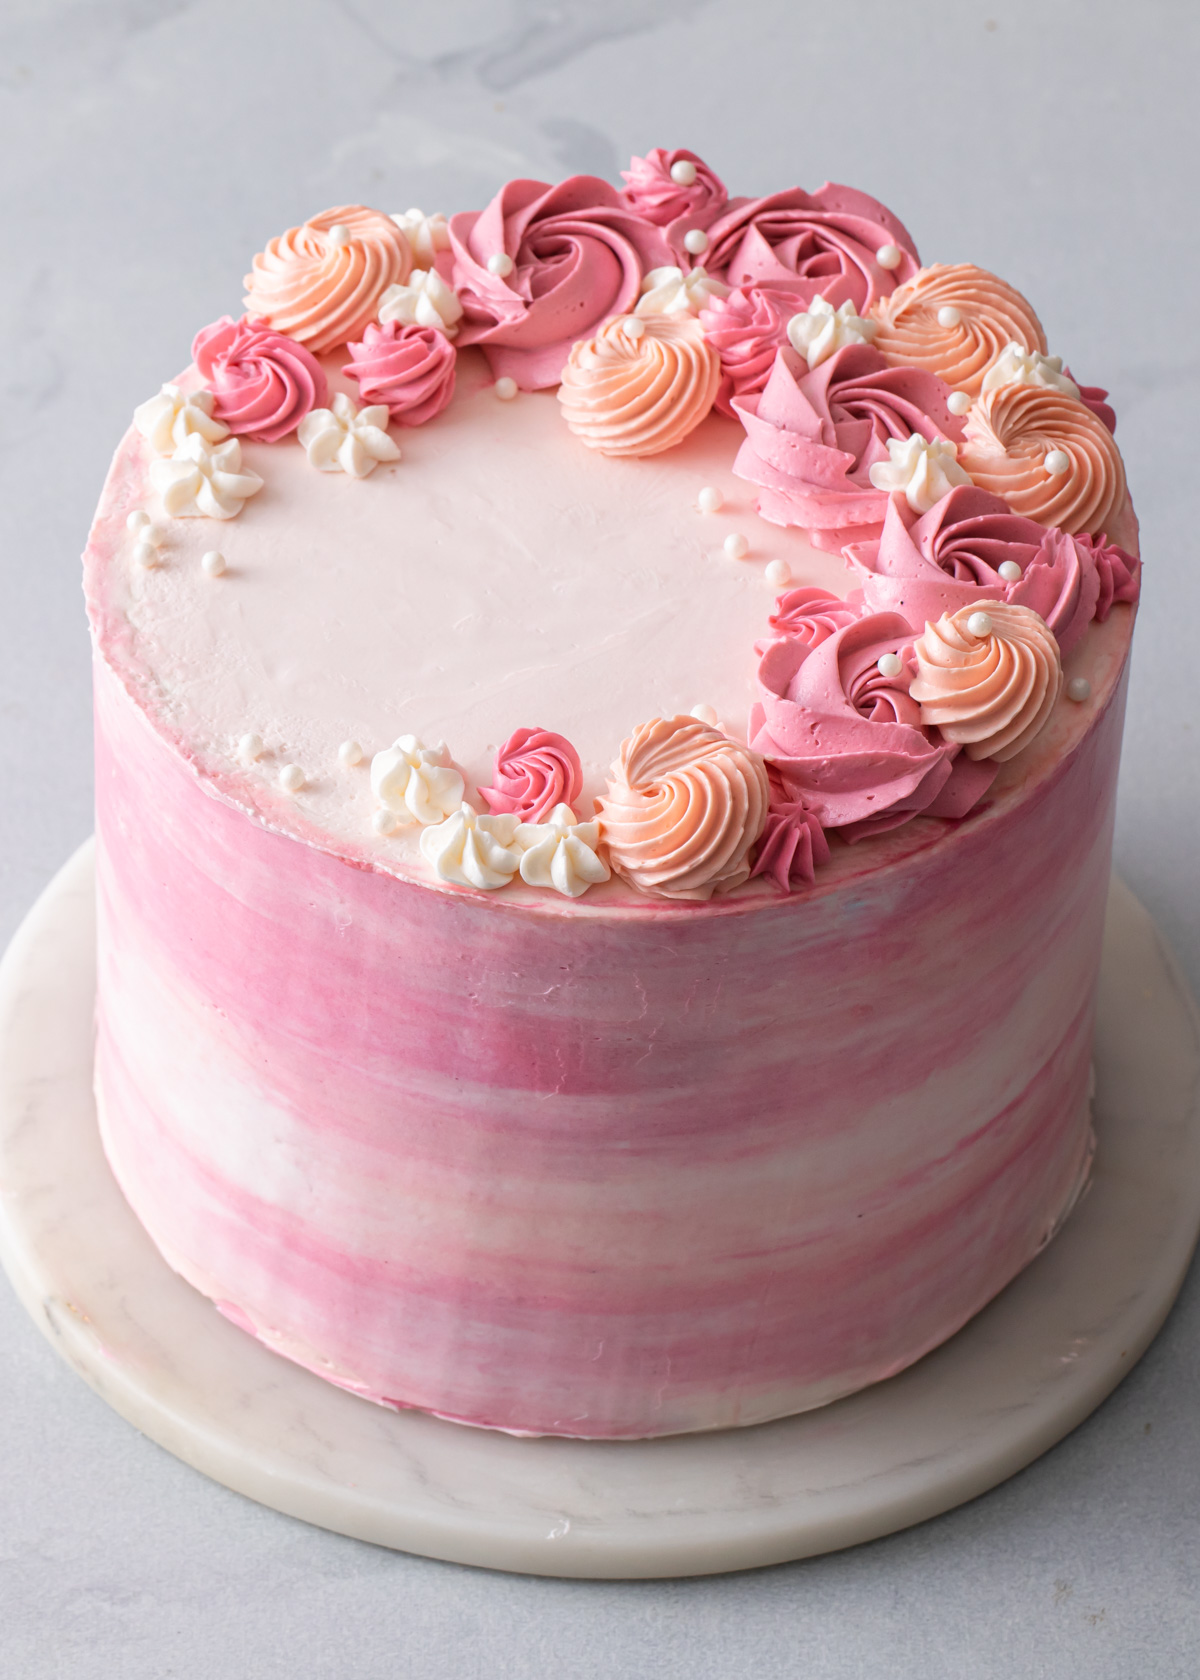
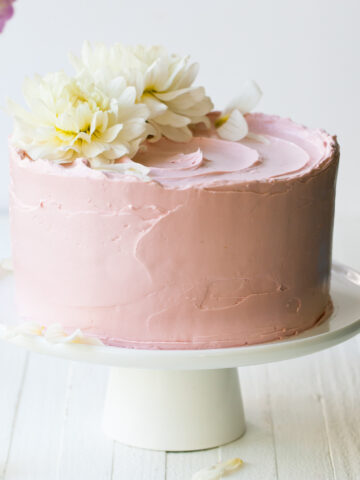
Embelish - Lastly, use any remaining buttercream to pipe details on the top of the cake. For the cake above, I used a variety of star piping tips to form the rosettes. To do so, pipe tight spirals of buttercream (starting from the inside then out).
Follow my buttercream flower cake tutorial for making a similar design as pictured.
Since I always select colors that blend well together, I am able to remix the buttercream scraped off the sides of the cake during the smoothing process. This buttercream can often be tinted a darker color or reused to pipe details after the cake is finished.
Layer Cake 101
New to cake decorating? Start here:
How to Make Beautiful Layer Cakes
Buy my books! Layered and Icing on the Cake
Join the Style Sweet Bake Club!
Get exclusive recipes and articles sent straight to your inbox. Become a subscriber today! Click to join.
Decorating FAQs
You can use American style, Swiss or Italian meringue buttercream.
Use a gel food coloring, like Americolor or Wilton.
Baker’s Notes
- Be mindful of your color choices and think about how the might blend together. To be honest, the first time I tried this design I used pink, orange, and green/teal. The greenish orange sections blended together to create an ugly brown.
- As mentioned in the tutorial, smooth only as much as necessary. The watercolor effect is certainly up to intertation, but keep in mind that the more you fuss with it, then more it tends to all blend together. So instead of a watercolor pink and yellow cake, you might just get an orange one.
- I’ve successfully made this cake design with both Swiss meringue buttercream and American buttercream. Swiss meringue takes a lot more gel food coloring to get the desired colors, FYI.
- Reserve a bit of plain, white buttercream to add as needed after smoothing or if you over-blend.
Quick Steps for Making A Watercolor Cake
Steps for Making a Watercolor Cake
- Frost the Cake
Smoothly frost the cake about 90% of the way. It does not need to be absolutely perfect yet since we will be adding more buttercream in Step 3.
- Color the Buttercream
Divide any remaining buttercream into two or three bowls. Using gel food coloring, tint the buttercream the color of your choice.
- “Paint” the Cake
Using an offset spatula, smudge the frosted cake with swipes of the colored buttercream.
- Smooth and Smear
As you would when smoothly frosting any cake, take an icing smoother and begin smoothing out the bits of colored frosting. Stop after each time around the cake to add more frosting when needed.
- Trim the top
For a super clean and crisp top edge, trim off the excess buttercream with a paring knife. Alternatively, use an offset spatula to pull the top edges towards the center of the cake and continue the watercolor pattern on the top.
- Clean
Like finishing any smooth cake, go back and clean up the sides and edges. A few, gentle passes should suffice, but again, don’t over-blend or the “watercolor” effect may get lost
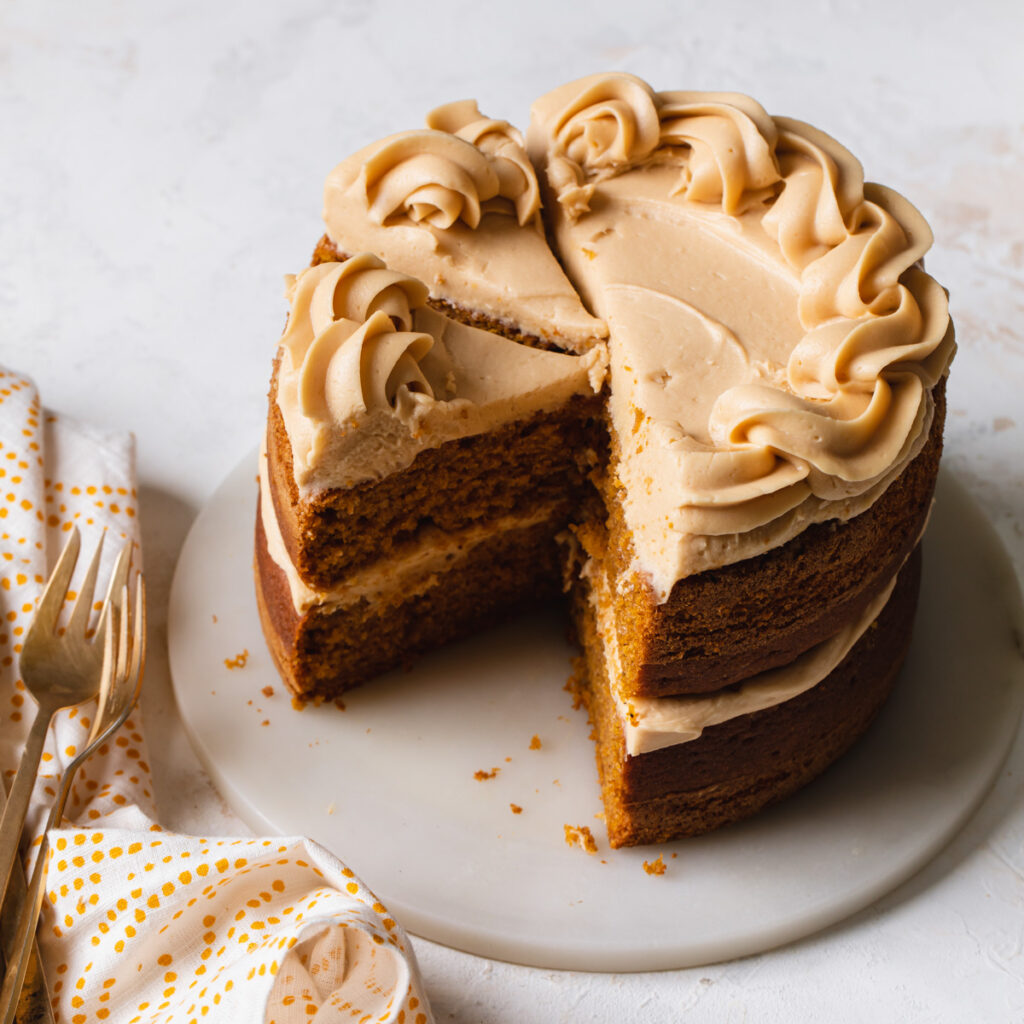
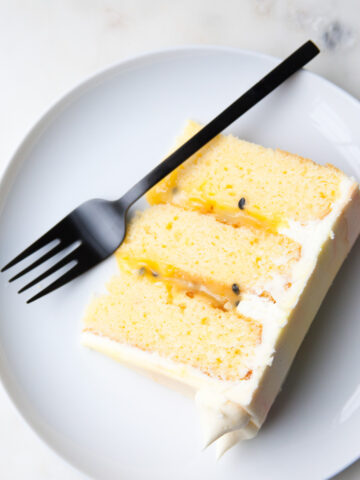
Recipe Pairings
These are my favorite cake recipes to frost with watercolor buttercream:
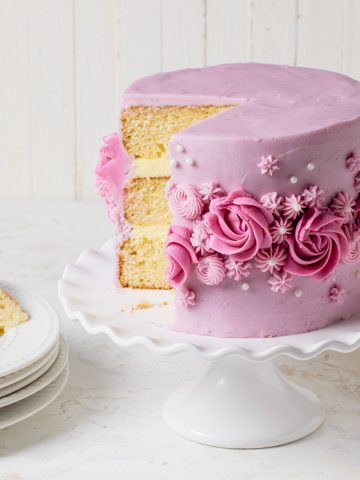
More Cake Decorating Ideas to Try
How to Make a Buttercream Flower Cake
Please leave a star review if you loved this recipe! Make sure to share your recipes and tag me on Instagram @stylesweetdaily.
Tori Cooper
This tutorial is so awesome, thanks for sharing! I love your gorgeous cakes and this one possibly a little more stunning than usual. Oh, and I love the gif!
Tessa Huff
Thank you so much! I really had fun making the GIF, so hopefully there will be more in the future =)
Christine Johnson
Love the watercolor frosting cake.
stylesweet
Thank you so much! One of my favorites =)
Stephanie @ Girl Versus Dough
Happy blog birthday! This cake is so gorgeous! I can barely frost a cake so this is a goal to work up to. 😉
Tessa Huff
Thank you!!! Practice, hehe. xoxo
Patrice Seibel
happy birthday! What brand/type of icing smoother do you use? I like how big and sturdy it is! Thanks!
Tessa Huff
Thanks!! The icing smoother is from Ateco - I love it!
Amanda Powell
Happy blog birthday!! The color palette here is just gorgeous! I am terrible at frosting cakes. I mean, just awful. You make it look so easy that I've made it my mission to become an expert at frosting cake before the year's end!
Tessa Huff
Thank you so much! Haha, I bet you are not awful. It does take some practice though. I bet you will be a pro in no time =)
Julia Bleck
Thank you for posting this! I have wanted to know how to do this for a while now, I am excited to try it out!
Julia - http://Bunnybaubles.com
Tessa Huff
yay!! I am so glad you like the post. Hopefully I will be adding more how-to's and GIFs/video soon xo
Bridget Olson
Amazing! Can't wait to try this. And happy blog birthday! 🙂
Tessa Huff
Yay! I hope you give it a try. It's pretty fun and hard to "mess up" since there is really no right or wrong way to "watercolour." Happy Baking!
Autumn Epstein
I absolutely LOVE your website and all of your cakes and tutorials! You are my go-to person whenever I am making a cake. I am making a mermaid cake for my daughter tomorrow and I am trying to get some ideas on the watercolor style so I can make the cake look like a watery ocean...we will see how it goes! Thank you for your help!!
Rosie
What size tips did you use please?
stylesweet
Hi! The rosettes were piped with a Wilton 1M tip. The smaller ones oranges ones were made with a Wilton 4B.
Laura K
Wow this turned out sooo good. My guests loved it. Thank you so much!
Jean G
OMG I love this. Can’t wait to try it out!
Nathan
I love this so much. Very helpful and informative!
Sarah
I love your cake stand/spinner. Where did you get it?
stylesweet
Hi! It is from Ateco. It is on the pricier side, but very sturdy. I've had the same one for about 15 years!
Bree
Would this technique work with cream cheese frosting or would the texture give me trouble? I am thinking of making the lavender blackberry cake on your blog but following the decoration instructions for the blueberry galaxy cake in Icing on the Cake.
stylesweet
Hi! Cream cheese frosting can be a bit more tricky to work with and get perfectly smooth, but you would probably have similar results.
Hallie David
Best cake ever! So pretty and easy too.
Jackie
Hi Tessa. Gorgeous cakes and wonderful tips. Thank you! I have a question: I used gel food coloring once and it added a bitter tase to my classic American buttercream. Are there brands that you use? The one that did not work for me was from the grocery store. Thank you!
stylesweet
Hi! I mostly use Americolor. The gels are concentrated so you don't have to use too much. But yeah, if you use a lot for a really dark color, you will probably be able to taste it.
Alanna
For your colors you said you used pink, peach, and yellow. I don’t see the yellow on your first photo - was that to mix the peach color or was it put on later? Love this cake it’s beautiful! Also what tip did you use to pipe the tiny white flowers?
stylesweet
Hi! Great point! I re-made the cake for new photos and used different colours than the original. Thank you for pointing this out. The main idea is two choose about 3 colours that blend well together - this one was more peach, pink, and dark pink/mauve. The white flower was made with a drop flower tip 225. Thank you!!