Last updated on August 28th, 2024 at 05:27 pm
Learn how to make a buttercream flower cake that is fun and flirty with just a few piping tips and your favorite frosting! This cake design looks fancy, but even beginner bakers can make it. Piping buttercream stars and rosettes directly onto a frosted cake couldn't be any easier.
Jump to:
Why We Love this Cake Design
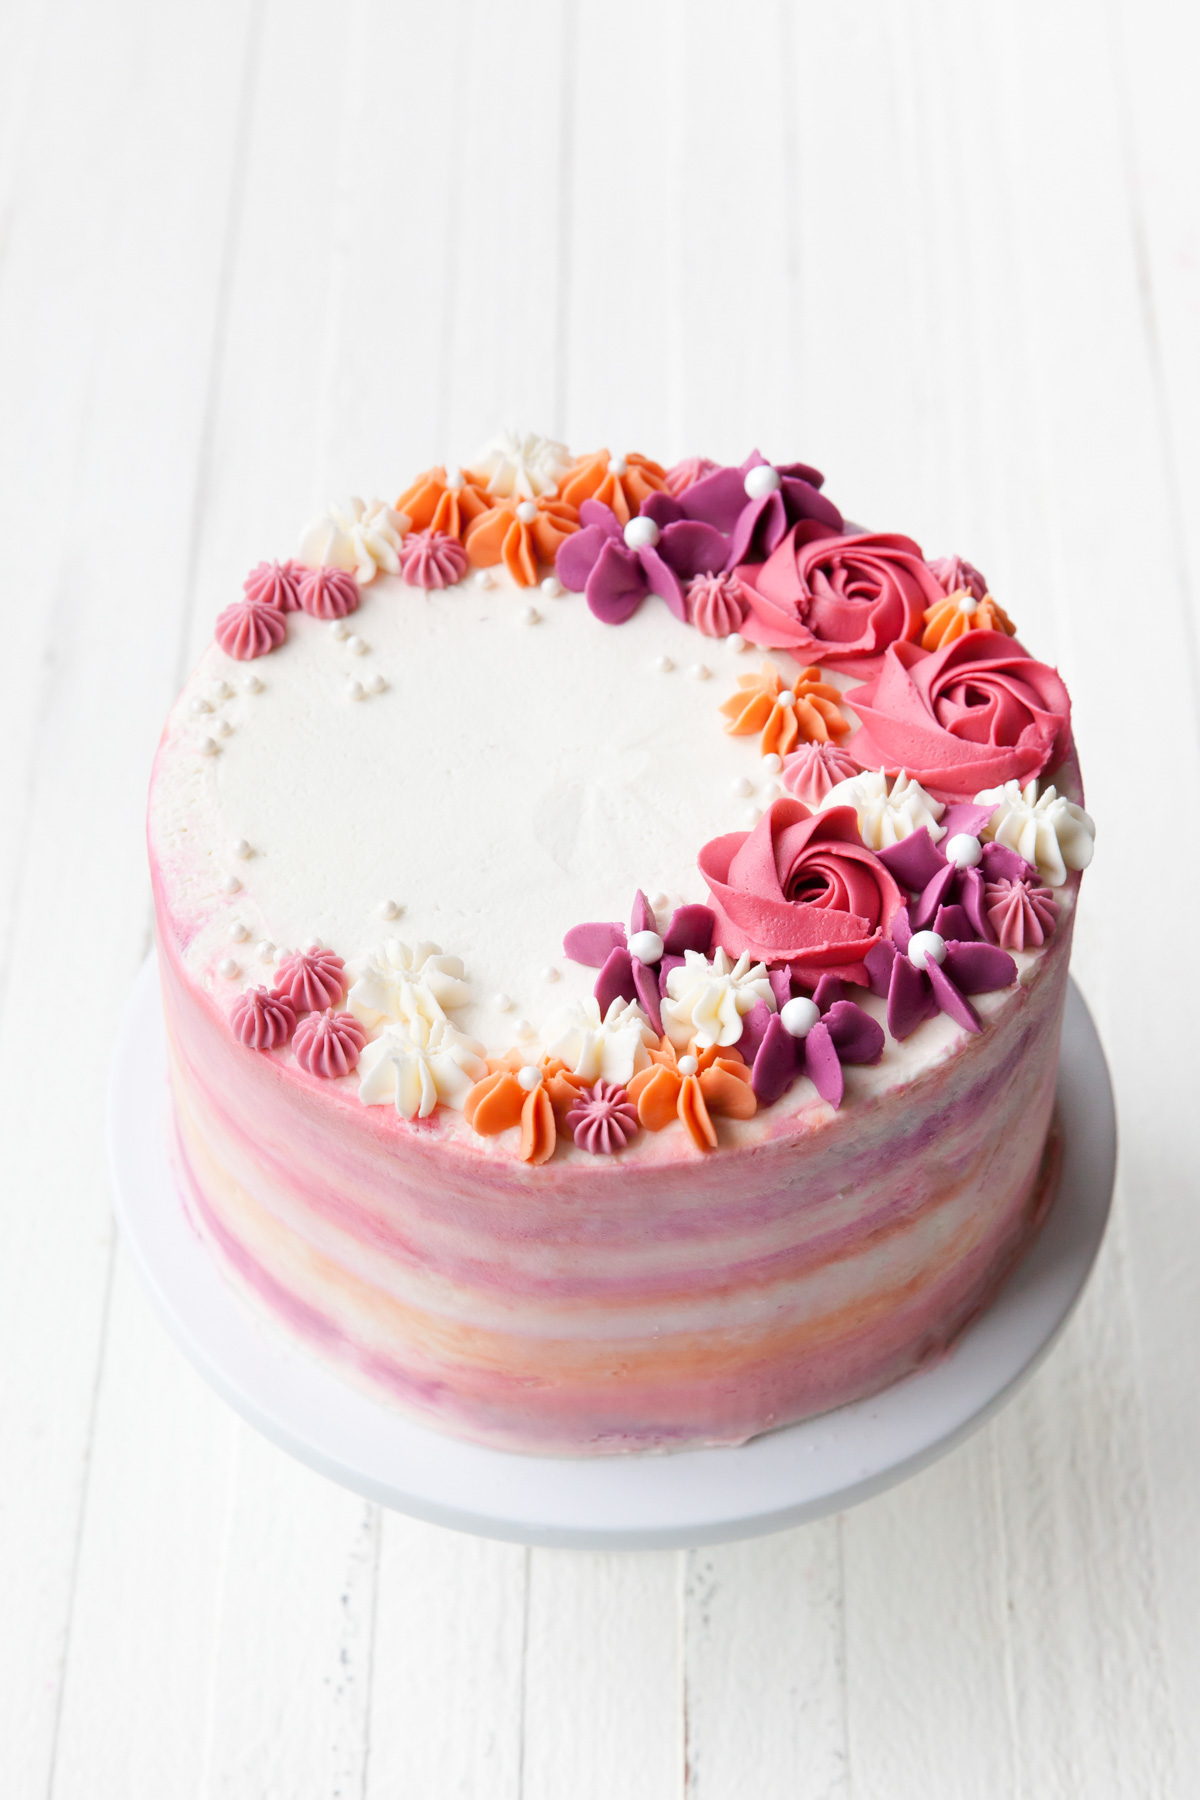
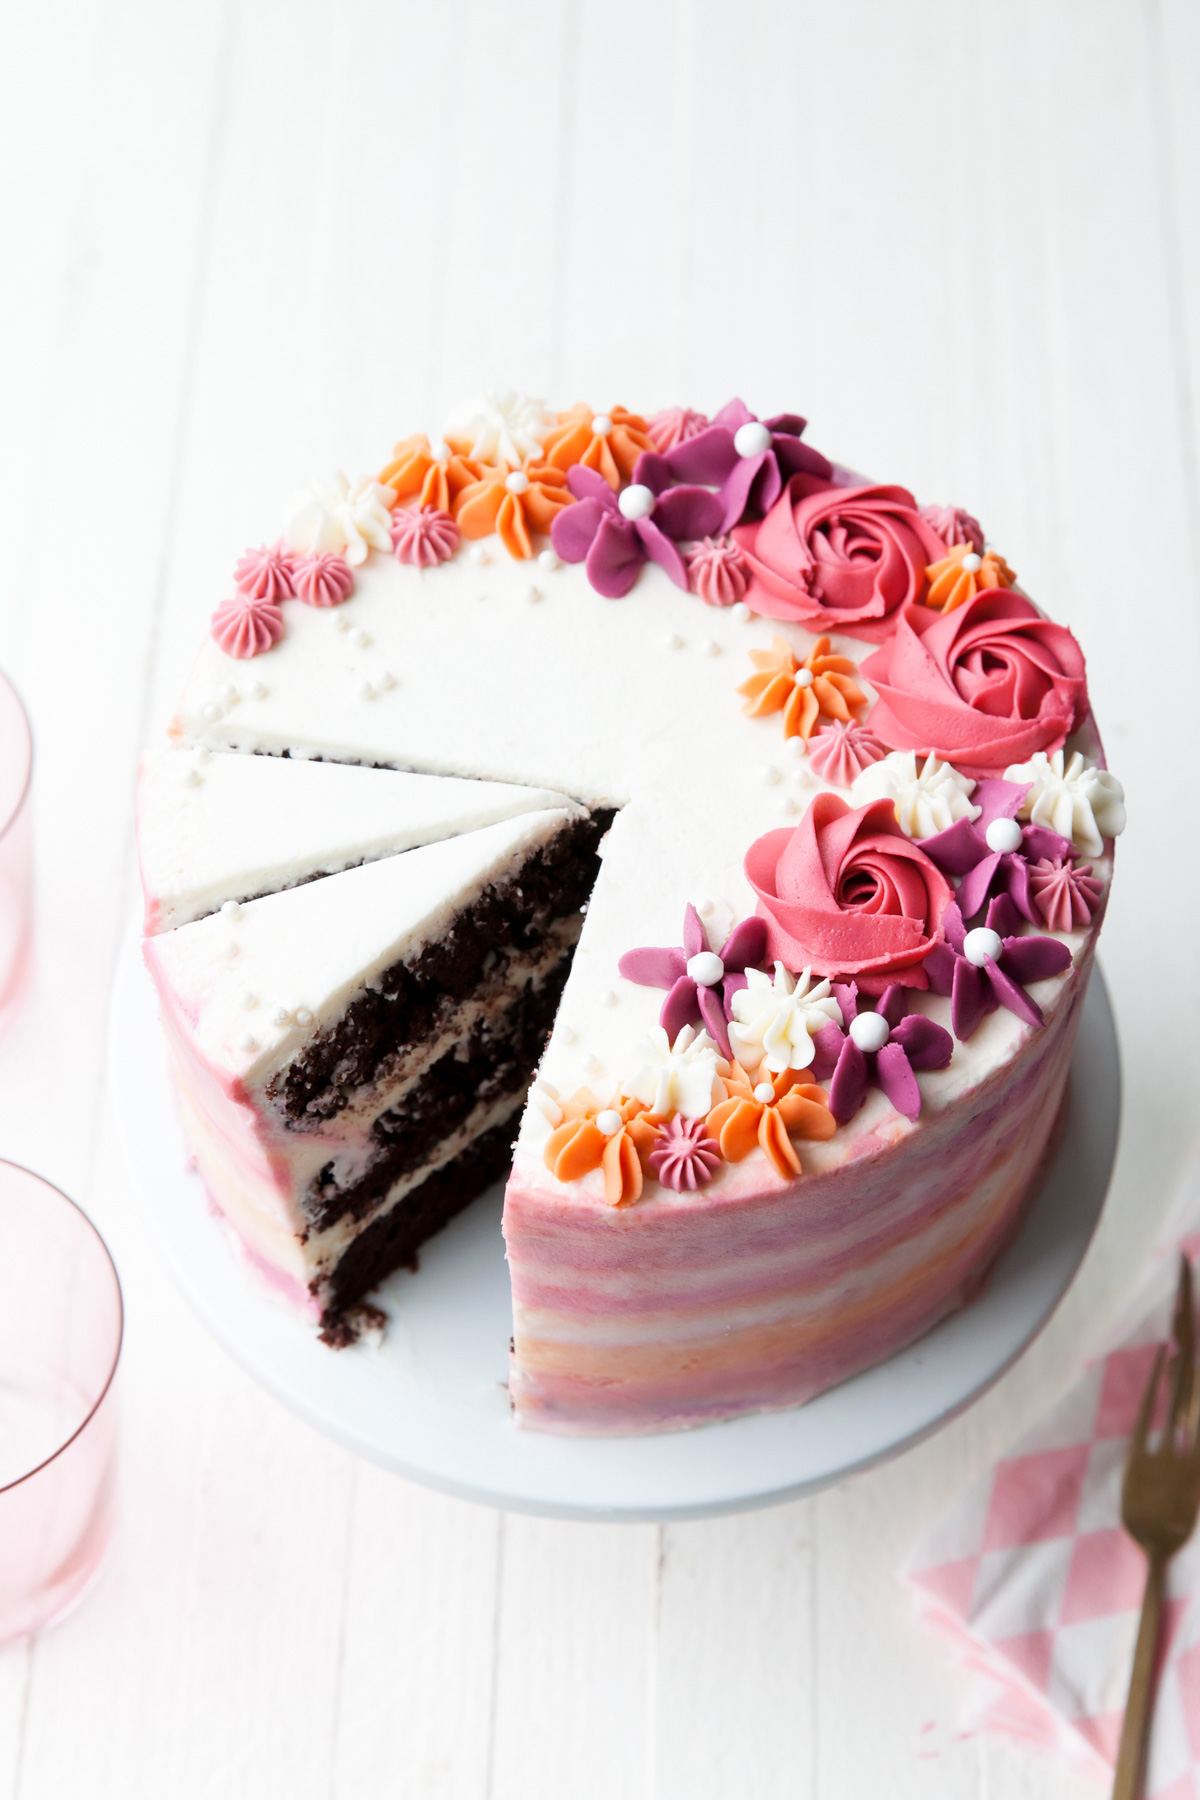
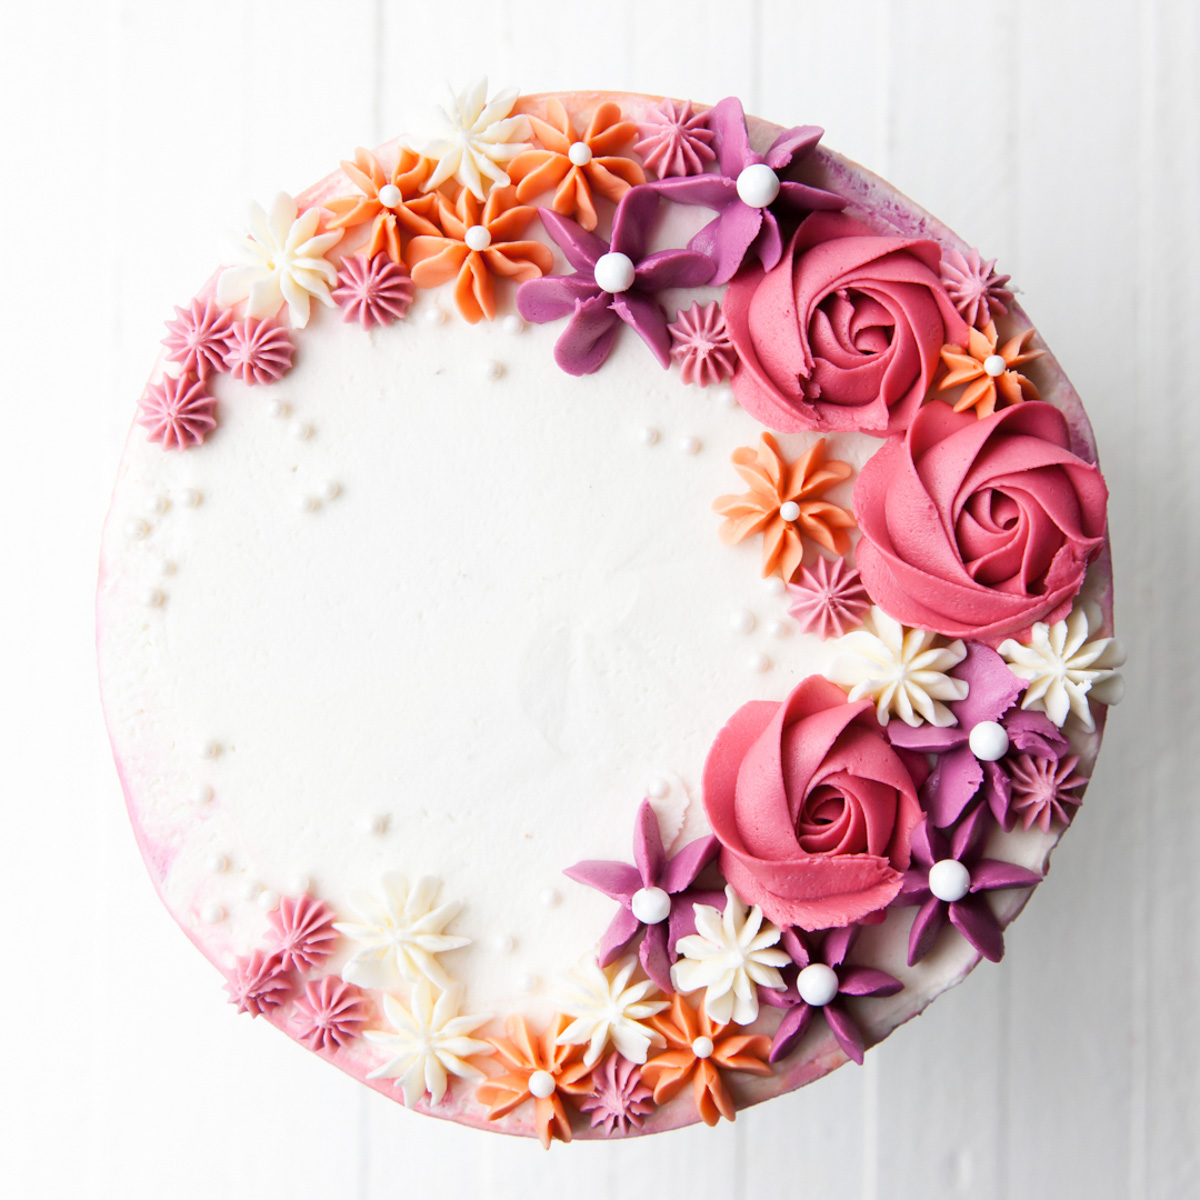
The cake starts with a watercolor finish around the sides. Select a color palette that blends together beautifully. Here, I used different shades of pink, orange, and purple.
This is one of my favorite techniques because not only does each cake have a unique pattern of colors, but also because it is impossible to mess up. The watercolor finish is organic and always looks beautiful.
Follow this Watercolor Cake tutorial to learn how to decorate the sides of the this cake.
I had the opportunity to take over the Wilton Cakes Instagram account to share this cake. Be sure to follow along with us. Keep reading for a more detailed look at the design:
Tools and Equipment
- Rotating cake stand
- Offset spatula
- Gel food coloring
- Icing smoother
- Piping tips 1M, 1G, 2F, 2C, 32
- Piping bag
- Sugar Pearls
How to Make Buttercream Flower Cake
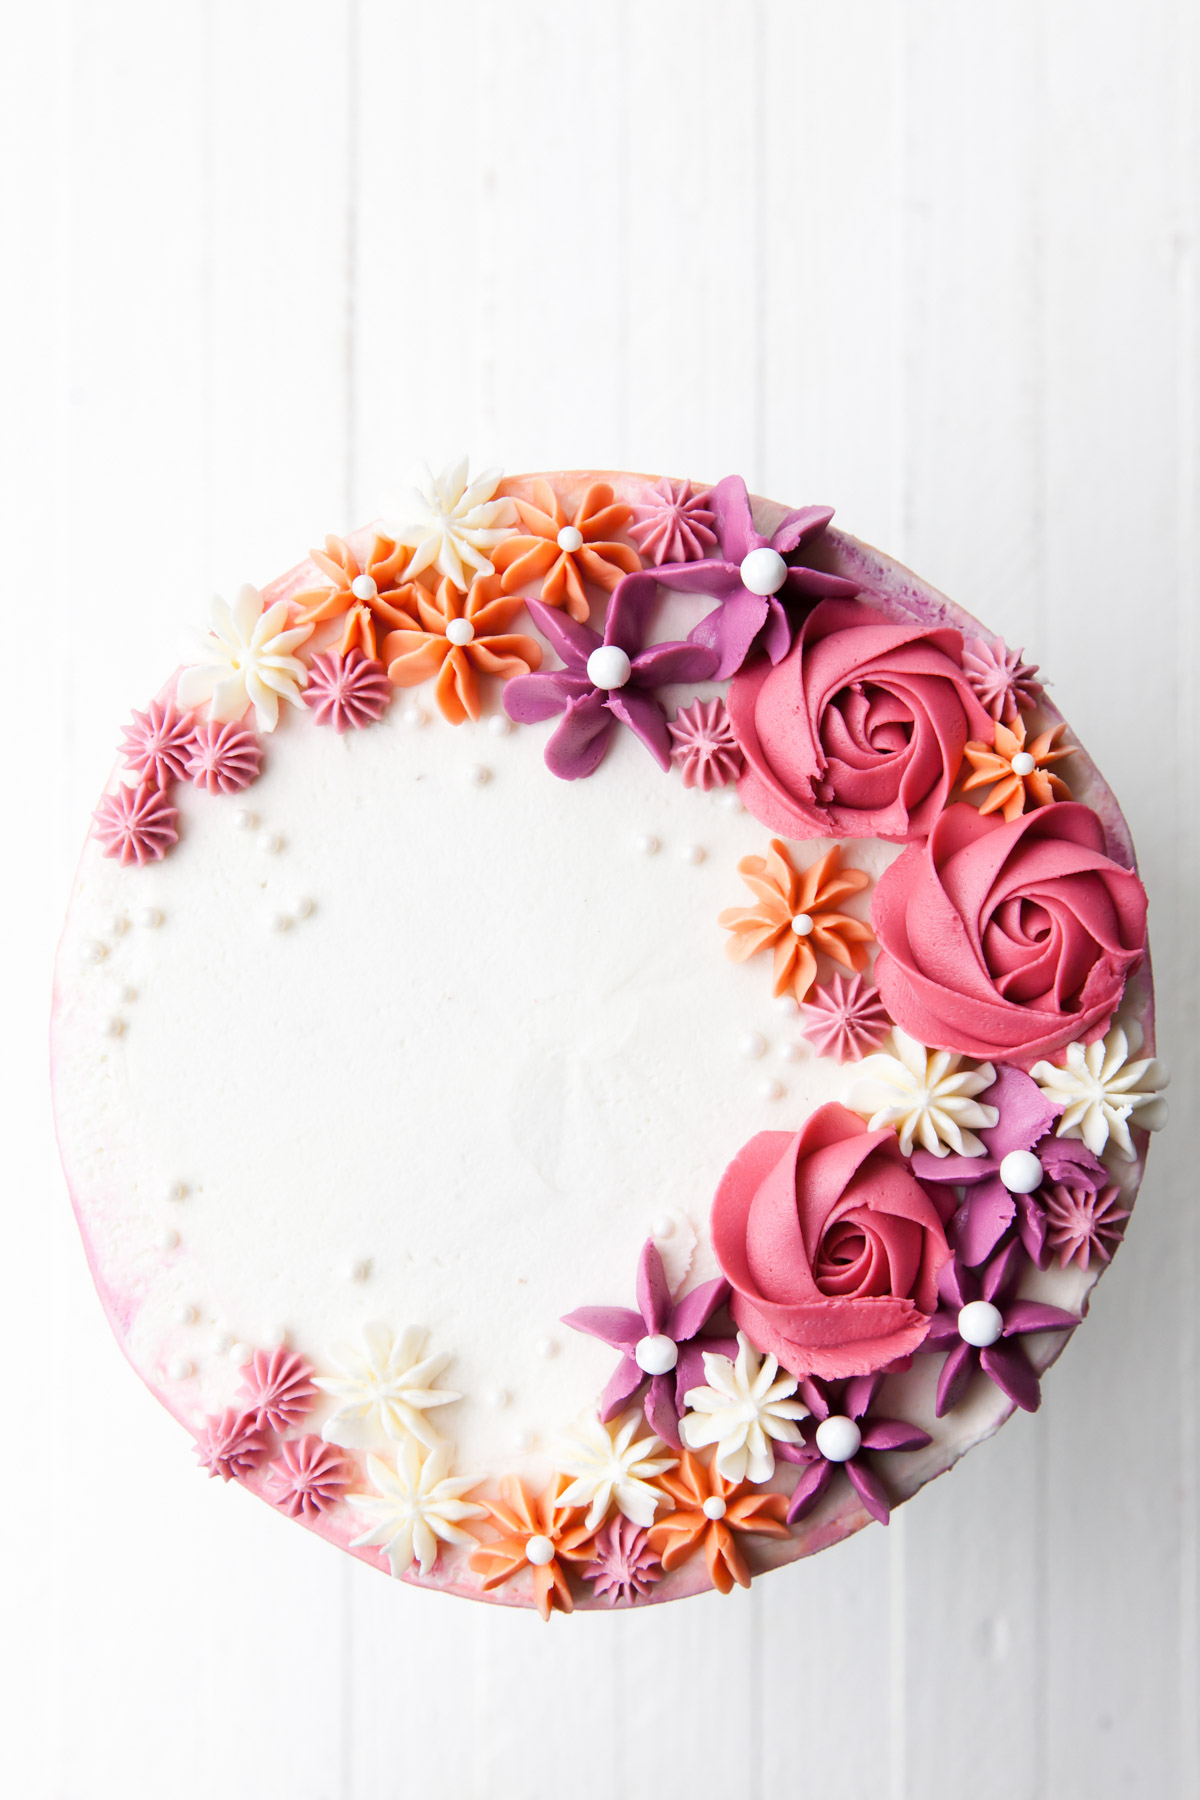
Using a variety of Wilton piping tips, it’s super easy to create this vibrant buttercream flower pattern. Each tip creates a different shape and adds loads of texture. Let’s take a closer look to see which tip creates which buttercream flower:
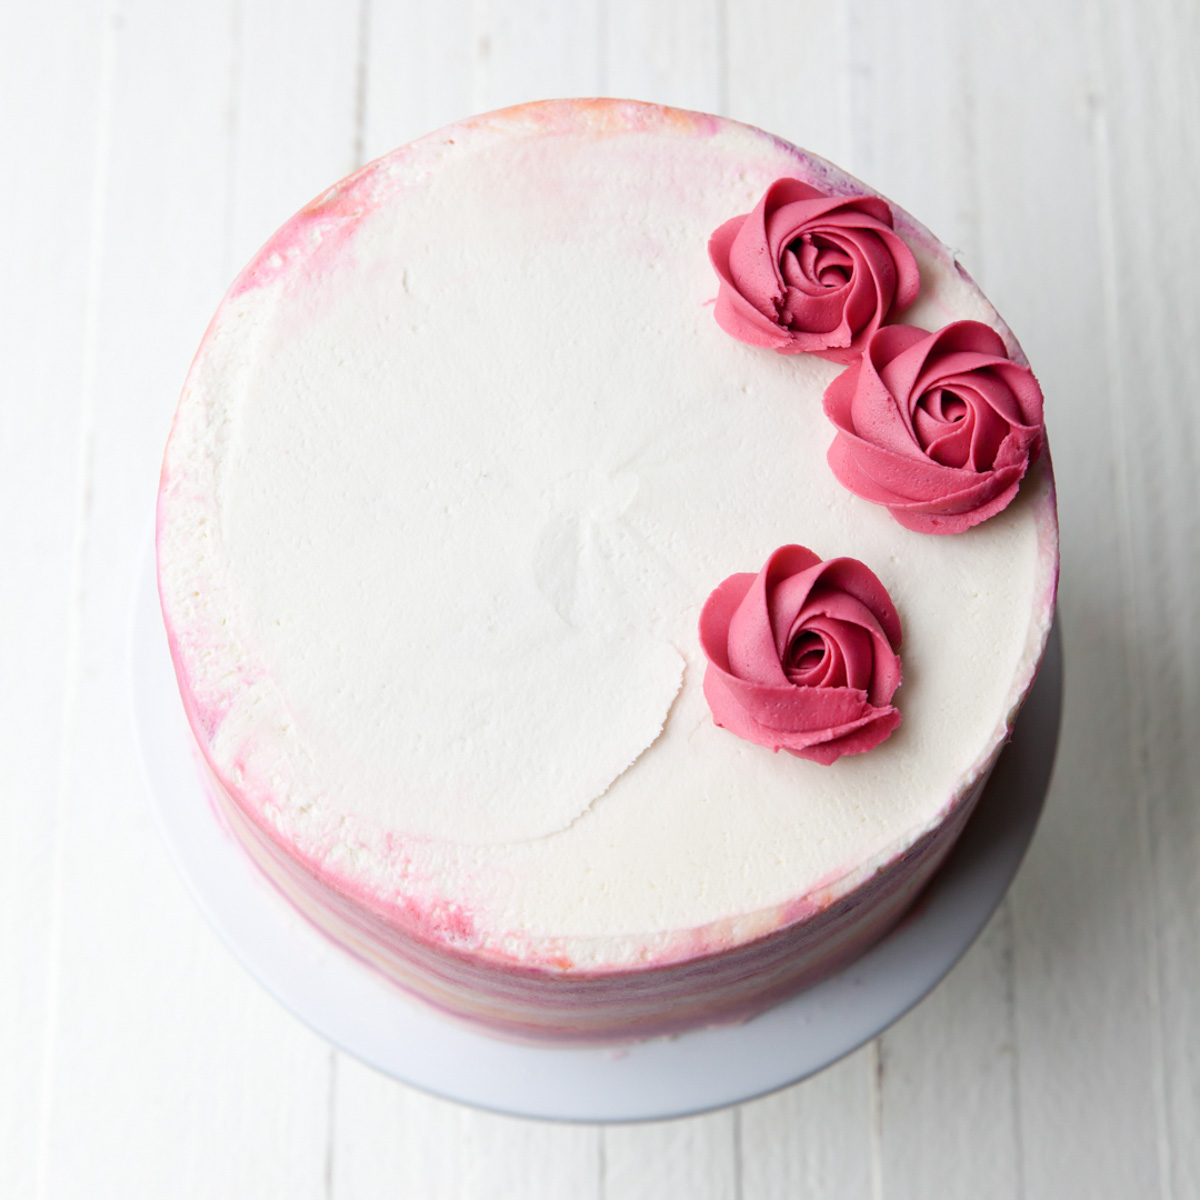
My favorite piping tip is the Wilton 1M. It makes perfect rosettes.
Firstly, pipe out the large rosettes (the deep pink ones).
Buttercream Rosette
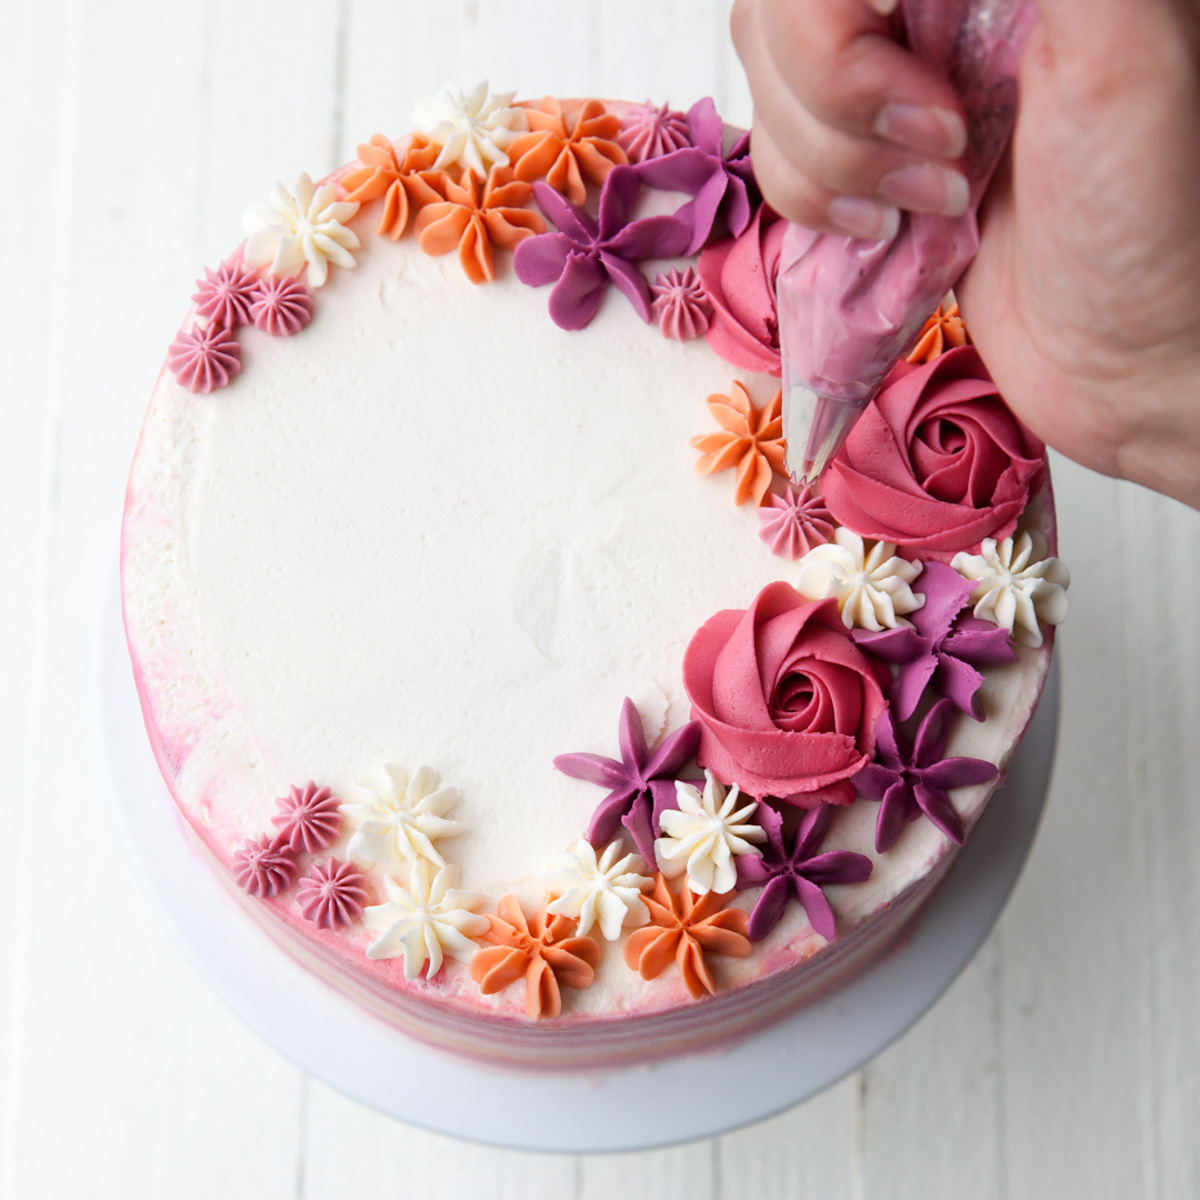
Hold the piping bag straight up (perpendicular to the surface of the cake) and hover it above the top of the cake a half-inch or so. Starting from the inside then out, pipe a tight spiral of buttercream.
As you complete the spiral, release the pressure on the piping bag so that the tail tappers around the rosettes.
Continue and pipe 3 to 5 rosettes (I find that odd numbers look more organic).
Easy Buttercream Drop Flowers
Moving in size order, select the second largest tip. I used tip 1G to create the large purple blossoms. Use them to fill in the gaps around the rosettes and create a crescent shape.
To create these types of flowers, simply hold the piping bag with tip straight up above the surface of the cake, squeeze the piping bag until the buttercream creates a flower, then release the pressure on the piping bag before pulling it up and away.
Be sure to hover the piping bag over the cake so that the buttercream can build. If it is touching the surface of the cake, the buttercream has nowhere to go.
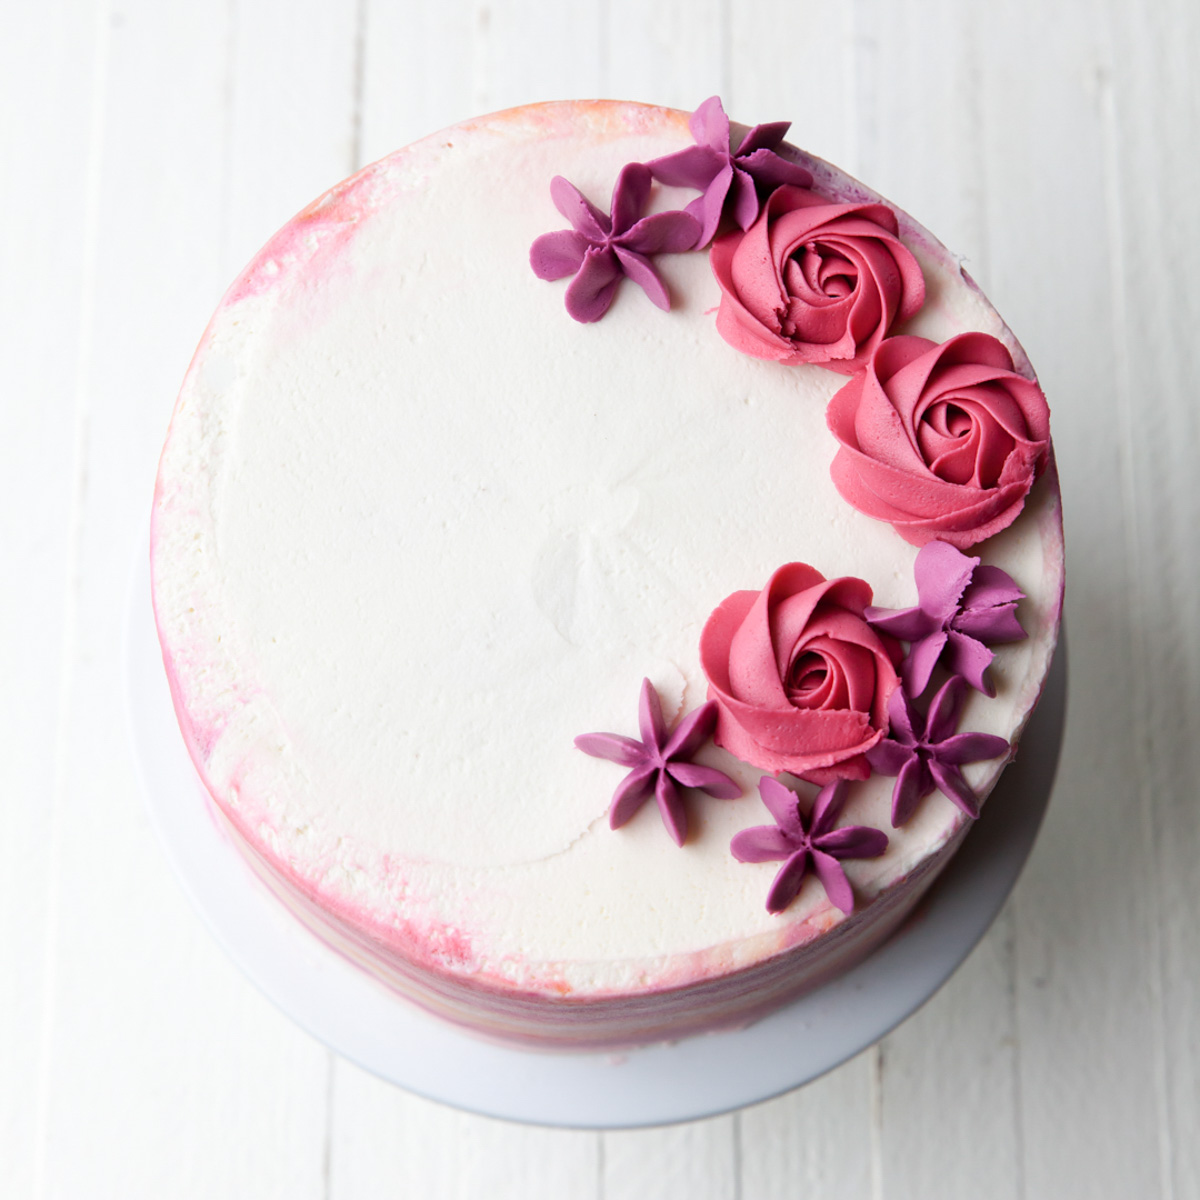
Continue filling in the crescent shape with buttercream flowers using various-sized tips. Use the smallest tips to fill in small gaps and to tapper off the half-moon shape on each end.
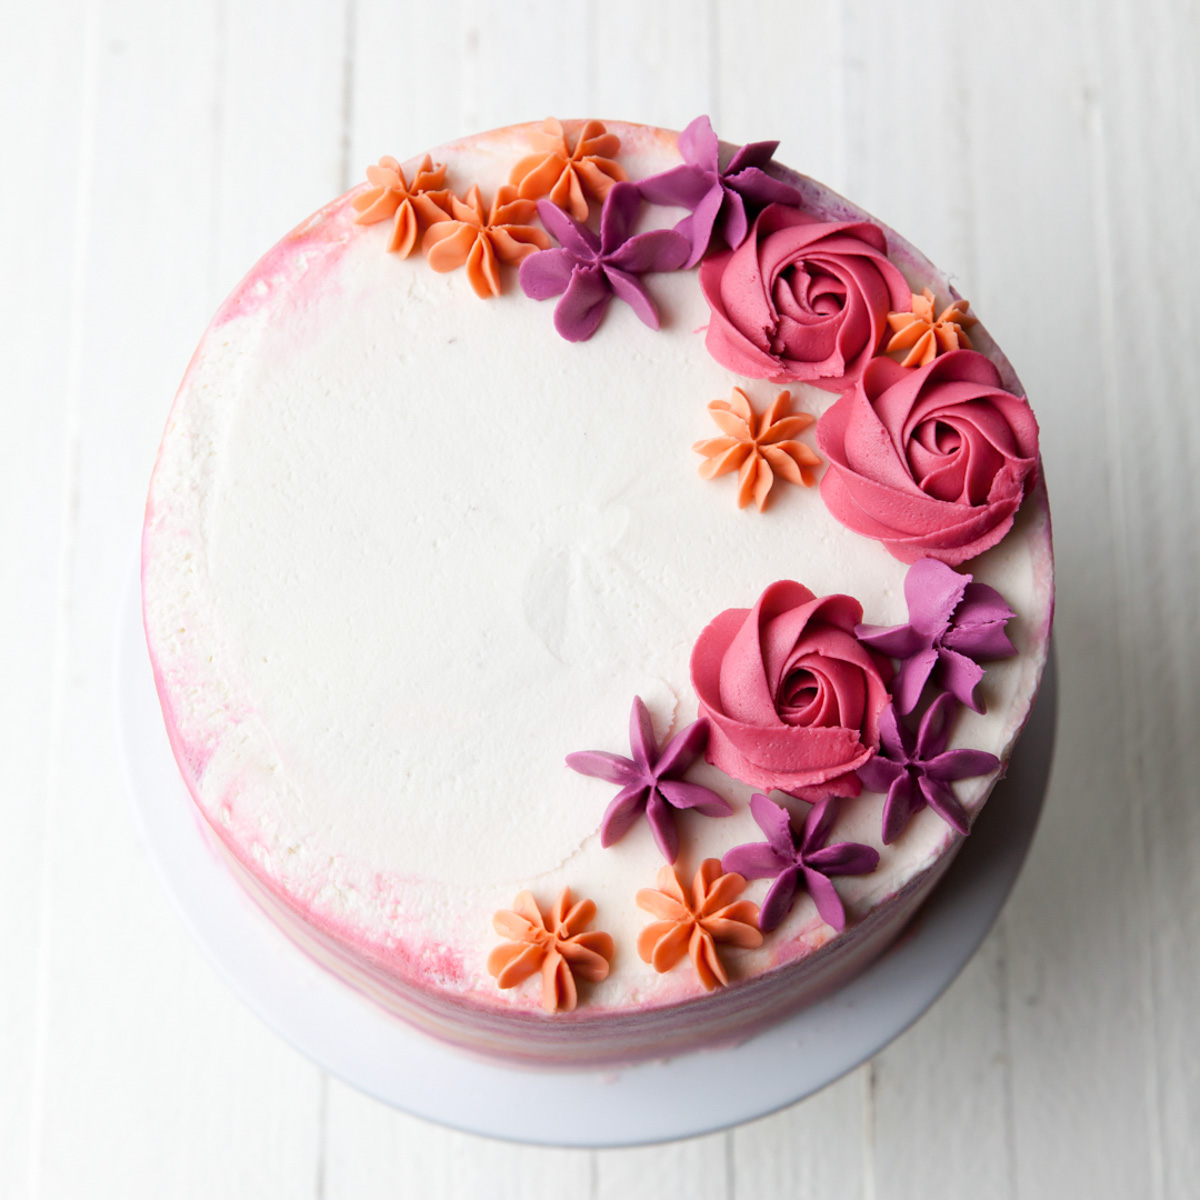
The remaining flowers were created with the following piping tips: 2F (orange), 2C (white), and 32 (light pink).
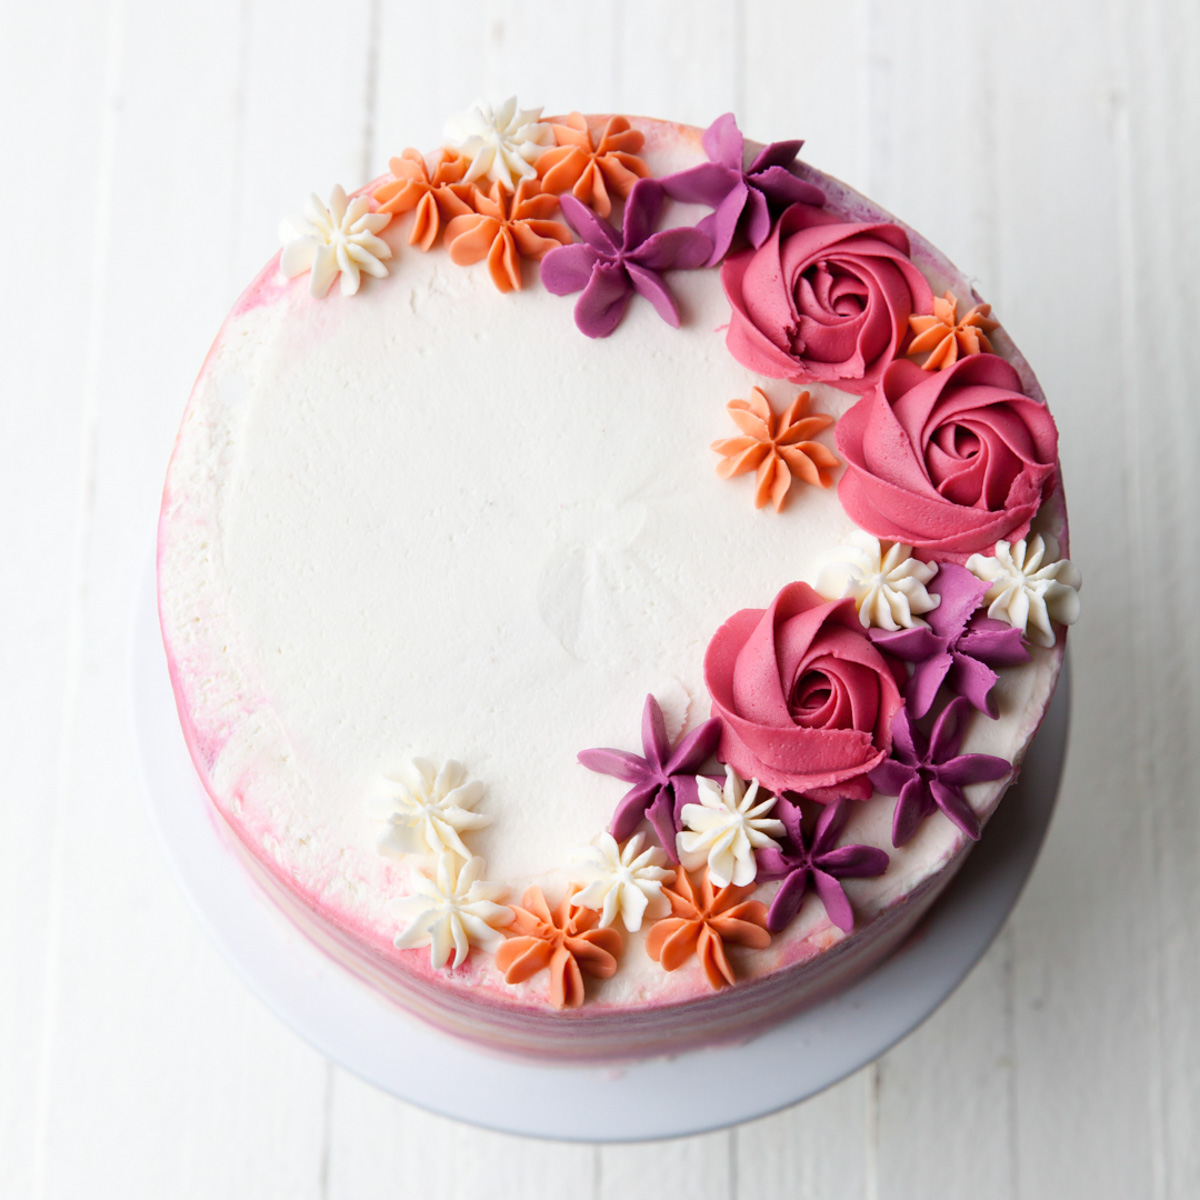
Lastly, add sugar pearls the center of the piped buttercream and instantly turn them into flowers! Use smaller sugar pearls to fill in the gaps and scatter around the cake.
Decorating FAQs
You can use American style, Swiss or Italian meringue buttercream.
Use a gel or paste food coloring, not liquid.
Tips for Piping Buttercream Flowers
- Hold the piping bag with your dominant hand and gently squeeze. Use your other hand to guide the tip and create your flowers.
- If the buttercream becomes soft and the flowers no longer hold their shape, pop the piping bag in the refrigerator for about 5 minutes then try again. The heat of your hand may warm the piping bag over time.
- If the buttercream is too stiff to pipe, try massaging the frosting within the piping bag to soften it up a bit.
- Carefully scrape off any unwanted flowers with an offset spatula. You may also chill the cake first to firm up the buttercream, then remove the flowers.
- Always remember to stop squeezing the piping bag before pulling it up and away from the design.
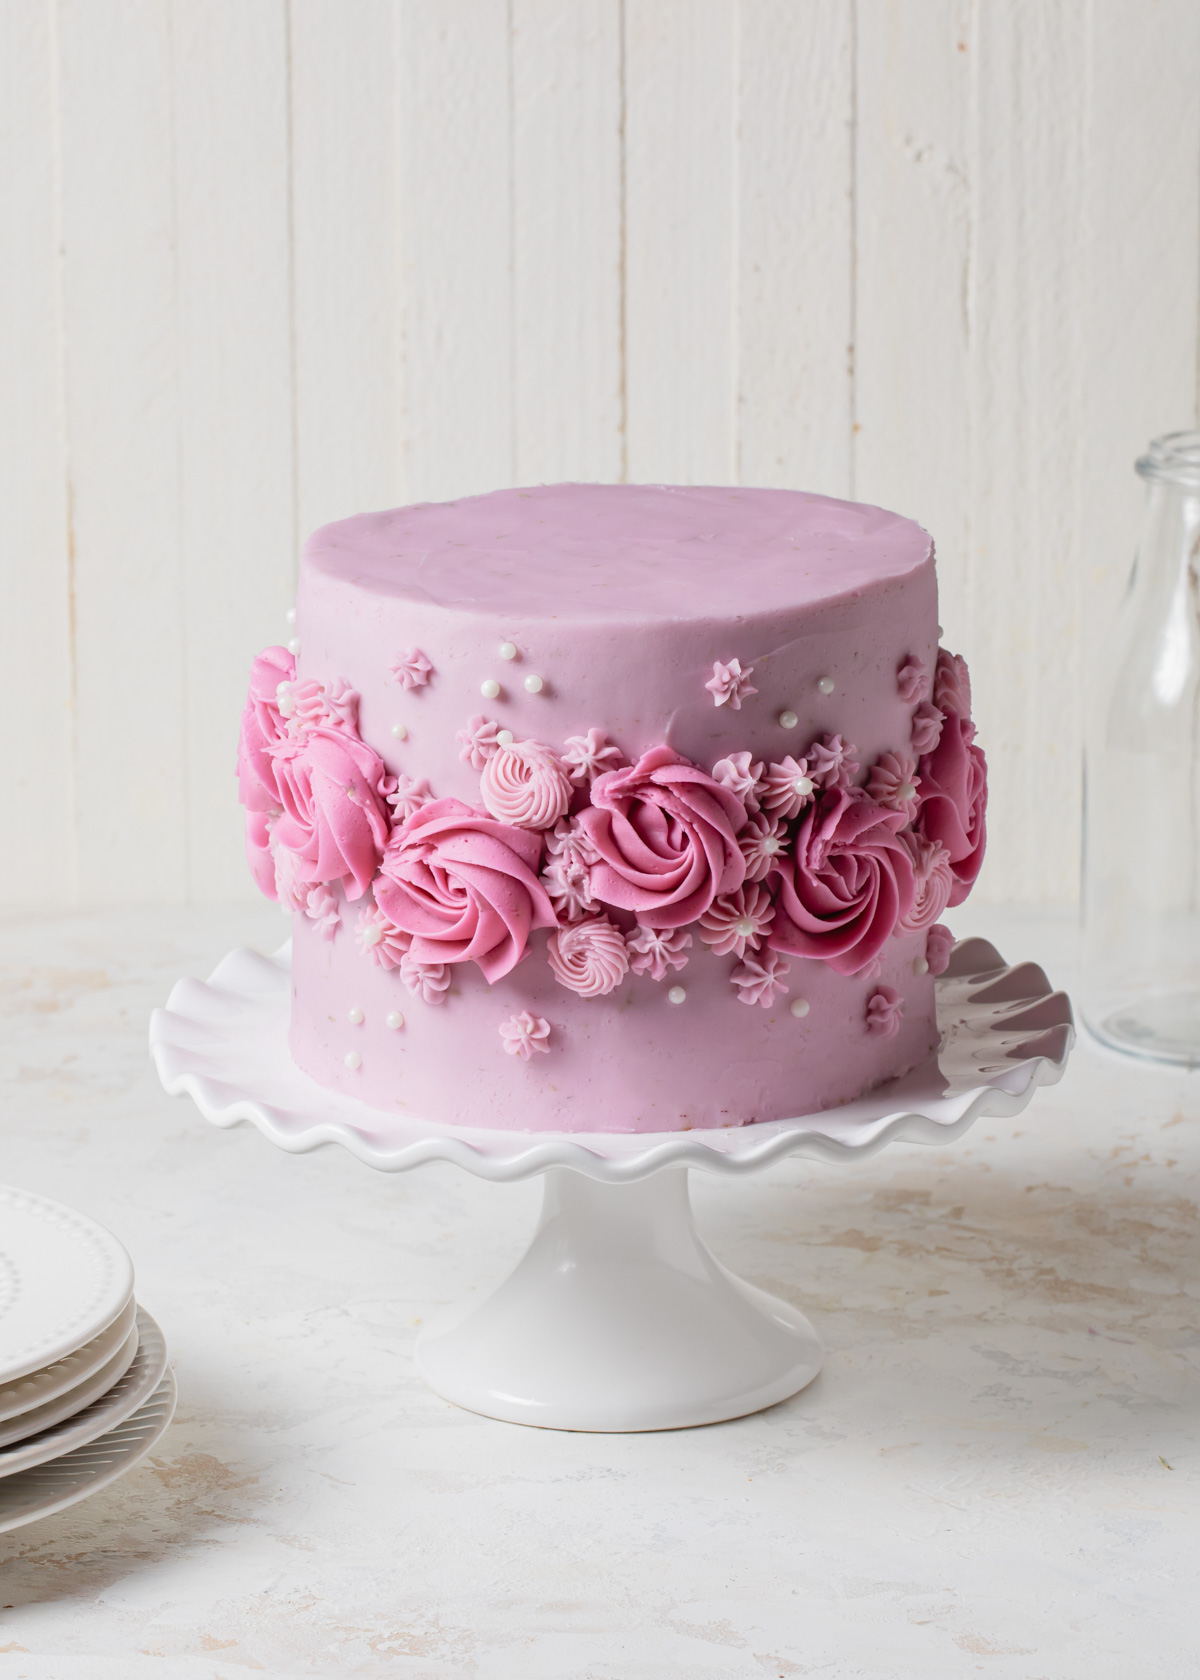
Try this technique on the sides on a cake like on this Lavender Cake!
More Cake Decorating Ideas to Try
Easy Textured Buttercream Cakes
Please leave a star review if you loved this recipe! Make sure to share your recipes and tag me on Instagram @stylesweetdaily.
A big THANK YOU to Wilton for providing the products used to create this cake design. For more cake decorating ideas, be sure to check out Wilton’s Birthday page!
Thank you for supporting the brands that make Style Sweet happen. All thoughts and options are my own.
Francesca Wosiek
I love this design and I was just hoping to find out your recipe for the buttercream icing. Would your vanilla swiss meringue buttercream recipe work with this or is it better to use the classic butter cream icing recipe?
Savitri Maharaj
hello. Do you have a video for this cake?
Thank you
stylesweet
HI! No, I don't have a video for this particular cake. But I should make one! Will try to do so soon. Thanks!
Hayley The Floral Delivery
Love these cakes! So pretty! Love the flowers!
Hayley
http://www.thefloraldelivery.co.nz
Charo Mae Manaay-Gabunilas
What brand if butter can you suggest for first time to froat a cake like me
Gina Leppart
I really want to make this cake but can't find the information about each color you used. Please could I have the information regarding the ratios of each color. Thank you in advance for your help!