Last updated on November 6th, 2024 at 03:48 pm
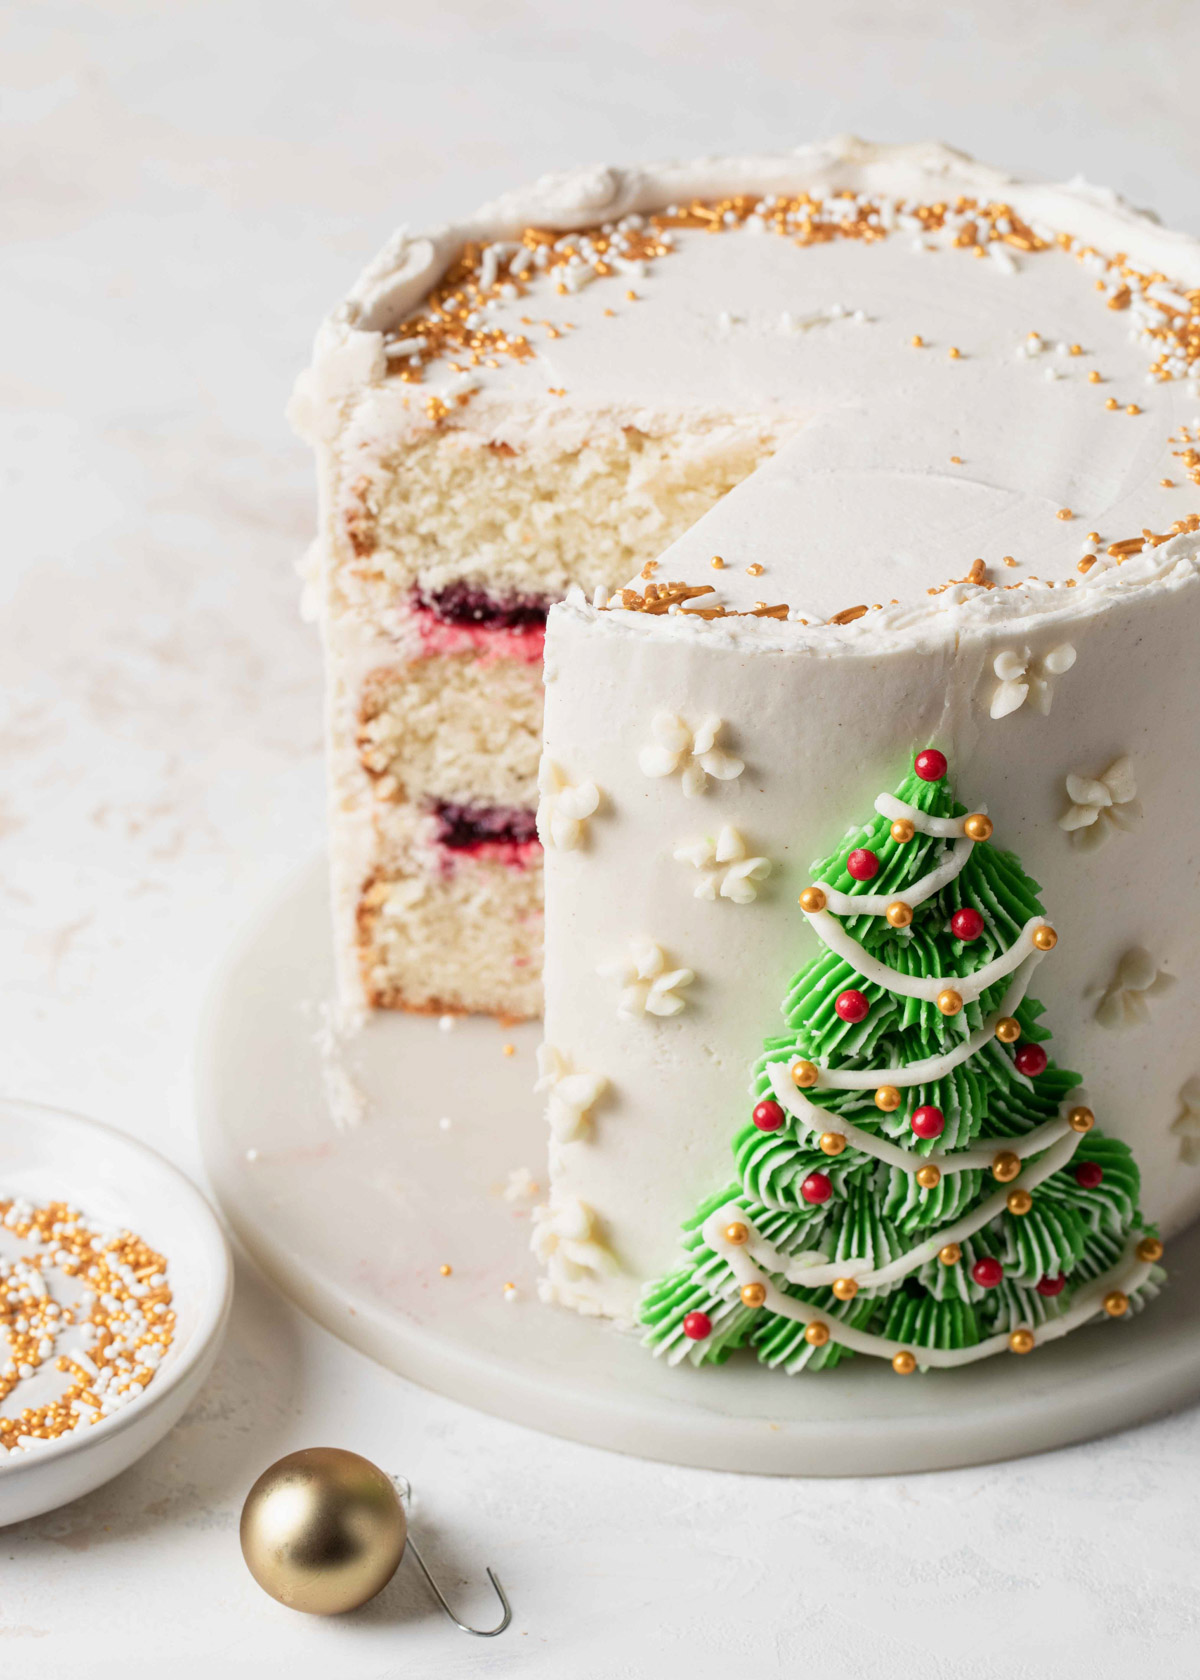
Rock around the Christmas tree with this classic Christmas tree cake! If you are looking for simple Christmas cake ideas, then you are going to love this buttercream tree design! The fluffy white cake and spiced cranberry filling are delightful, but we know the star of the show is really the tree and its whimsical decorations.

Piping for Simple Christmas Cake Ideas
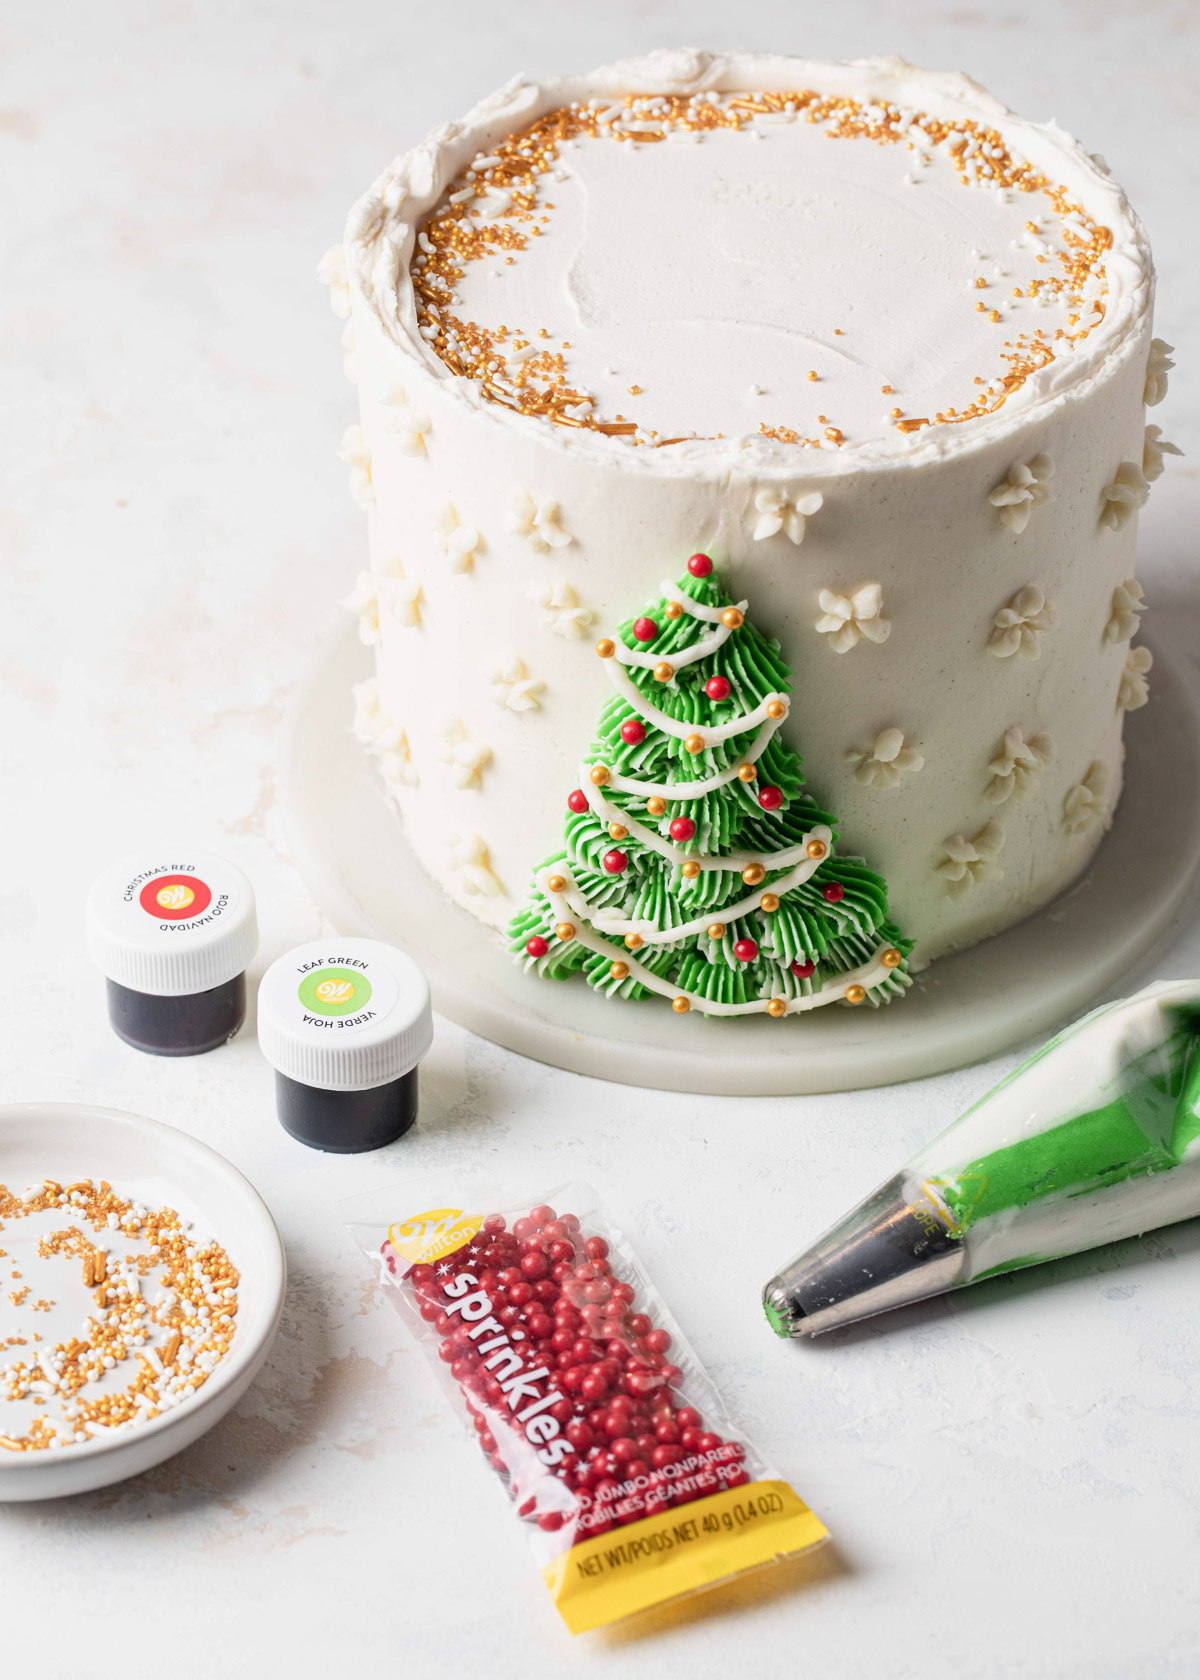
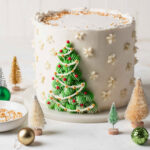
My favorite #4B tip makes piping the tree super easy. Gently scoring the cake helps guide the shape of the tree. I like to stripe the inside of the piping bag with a little plain white buttercream to give it even more texture.
The best part? Trimming the tree, of course! Get creative and add edible ornaments and string lights to the tree.
White on white buttercream snowflakes (using a drop-flower tip #129) add interest while gold and white sprinkles add a bit of glitz and glamour to the top.
Simple Christmas Cake Decorating Tools
- Cake board
- Offset spatula
- Rotating cake stand (optional)
- Icing smoother
- Piping bags
- 1M piping tip, 4B piping tip, #3 piping tip, #129 piping tip
- Piping bag ties
- Leaf green gel food coloring
- Christmas Red icing color
- Gold sugar pearls
- Gold and white holiday sprinkles
- Red sprinkles
Elegant and fun - this simple Christmas tress cake design is perfect for any holiday celebration. If you've decided against the 3D Christmas Tree Cake, then this layer cake version is for you.
I promise it is easy to make while still being highly decorative. A few piping tips, your favorite holiday sprinkles, and you are good to go!
Another thing to love about this cake? The fluffy white cake layers and the cranberry fillings are absolutely delicious.
Ingredients
This fluffy white cake has a spice cranberry filling. Here are some of the extra ingredients beyond that basics you need to bake this cake:
- Egg whites
- Fresh or frozen cranberries
- Orange or cranberry juice
- Cinnamon
- Cardamon
- Cloves
See recipe card for quantities.
This post is in paid partnership with Wilton. Thoughts and opinions are my own.
Tasting Notes
The cake itself is festive, but also delicious. Plain white cake might not seem so flashy, but it is one of the fluffiest you will ever make.
Using the reverse creaming method, it has a plush, tender crumb that pairs nicely with just about everything.
Homemade cranberry filling is sweet and tangy, but I love adding real vanilla bean and a bit of spice to combat the tart berries. Any fruit preserve would do in a pinch.
I opted for whipped buttercream frosting because it makes decorating cakes so easy. It is the perfect consistency for piping, but also takes on color very well.
I added a few of the spices that I used in the cranberry filling to make it even more festive and flavorful.
Substitutions
Cranberry filling - if you can't find cranberries or want to skip this part, you can easily fill the cake with your favorite store-bought jam
Swiss meringue buttercream - I love SMBC. It is so silky and smooth without being overly sweet. You may use it to ice the cake, but please note that it does not take on color very easily and you may need more green food coloring.
Recipe FAQs
Yes! You can use this recipe to make two 8 or 9-inch cakes. Adjust the baking time accordingly. However, you will lose a lot of height and won't have much room to pipe the Christmas tree. Make sure to only fill the pans ⅔ of the way full.
Choose a good quality aluminum cake pan with at least 2-inch tall sides.
Serving and Storage
Serve the cake at room temperature. Store the cake at a moderate room temperature overnight (preferably in a cake box or under a glass cake dome).
Wrap leftovers loosely in plastic and store in the refrigerator for up to 4 days.
Freeze unfrosted layers wrapped well in plastic for up to 3 months.
Join the Style Sweet Bake Club!
Get exclusive recipes and articles sent straight to your inbox. Become a subscriber today! Click to join.
Layer Cake 101
New to cake decorating? Start here:
Easy Textured Buttercream Cakes
How to Make Beautiful Layer Cakes
Buy my books! Layered and Icing on the Cake
Recipe
Simple Christmas Cake Ideas
Ingredients
Fluffy White Cake
- 2 cups all-purpose flour
- 1 ½ cups granulated sugar
- 3 ¼ teaspoon baking powder
- 1 teaspoon salt
- 10 tablespoon unsalted butter diced and at room temperature
- ¾ cup + 1 tbsp whole milk
- 2 teaspoon vanilla bean paste or pure extract
- 5 large egg whites
Cranberry Filling
- 6 oz fresh or frozen cranberries
- ¾ cup granulated sugar
- 3 tablespoon orange or cranberry juice
- 1 teaspoon vanilla bean paste
- ½ teaspoon cinnamon
- 1 pinch cloves
Spiced Buttercream Frosting
- 1 ½ cups unsalted butter softened
- 4 to 6 cups confectioners' sugar
- 2 to 4 tablespoon milk
- 2 teaspoon vanilla bean paste or extract
- ½ teaspoon ground cinnamon
- ½ teaspoon ground cardamom
- ⅛ teaspoon ground gloves
Instructions
Fluffy White Cake
- Preheat the oven to 350°F. Grease, flour, and line the bottoms of three 6-inch cake pans with parchment paper. Set aside.
- In the bowl of a stand mixer fitted with paddle attachment, add the flour, sugar, baking powder, and salt. Mix on low speed just to combine. Add the butter and mix on medium speed until the mixture becomes crumbly and the butter pieces are coated in flour.
- Add the vanilla to the milk. Pour in about half of the milk mixture into the butter mixture. Mix on medium speed until evenly moistened. The batter will still be quite lumpy.
- Mix the remaining milk with the egg whites. With the mixer on low speed, slowly stream in about ⅓ of the egg mixture at a time. Mix until the egg mixture is completely incorporated then stop the mixer and scrape down the sides of the bowl. Repeat this two more times using the remaining egg mixture. If there are still some lumps in the batter at the end, that is okay. Do not over mix.
- Evenly distribute the batter among the prepared pans. Bake for 24 to 27 minutes or until a toothpick inserted in the center of the cakes comes out clean. Allow the cakes to cool on a wire rack for 10 to 20 minutes before removing them from the pans. Let the cakes completely cook before filling and frosting.
Cranberry Filling
- Place the cranberries, sugar, and juice in a saucepan over medium heat. Cook the cranberries until the liquids start to release from the fruit and come to a simmer. Lower the heat to low and simmer for about 10 minutes.
- Remove from the heat and blender the mixture with an immersion blender. The cranberry filling won’t be very smooth, but that is okay.
- Return the cranberry filing to the stove and stir in the vanilla, cinnamon, and cloves. Simmer for another 3 to 4 minutes to thicken.
- Scrape the mixture into a heat-safe container, cover, and refrigerate until cool and thick.
Spiced Buttercream Frosting
- Using a stand (or hand) mixer fitted with the paddle attachment, beat butter on medium-low speed until smooth and creamy (1 to 3 minutes).
- Stop the mixer and add 4 cups of confectioners' sugar. Mix in the sugar on low speed until just combined. Add 2 tablespoons of milk, vanilla, and spices and mix until blended.
- Turn the mixer up to medium-high speed and mix for 3 to 5 minutes, until the buttercream is light, airy, and nearly white. If needed, add the additional confectioners’ sugar or milk until desired consistency is achieved. The buttercream should spread smoothly without tearing the crumb of the cake but thick enough that it holds shape when piped and spread between the layers.
- Reduce the mixer speed to low and mix for about a minute or two to smooth out the air bubbles.
Assembly
- Fill a piping bag fitted with a 1M star piping tip with buttercream and set aside.
- Place one layer of cake on a cake board or serving plate. Spread on ¼ cup of buttercream with an offset spatula until smooth. It will be a rather thin layer of buttercream. Pipe a ring of buttercream around the outer edge of the cake to create a frosting dam. Fill the dam with about ⅓ cup cranberry filling and spread it out with the back of a spoon.
- Place the next layer of cake on top and repeat. Place the final layer of cake on top and crumb coat the cake in a thin layer of buttercream. Chill the cake in the refrigerator for 15 minutes.
- Reserve 1 to 1 ¼ cups of buttercream for decorating. Smoothly frost the cake with the remaining buttercream, leaving the top edge unfinished.
To Decorate
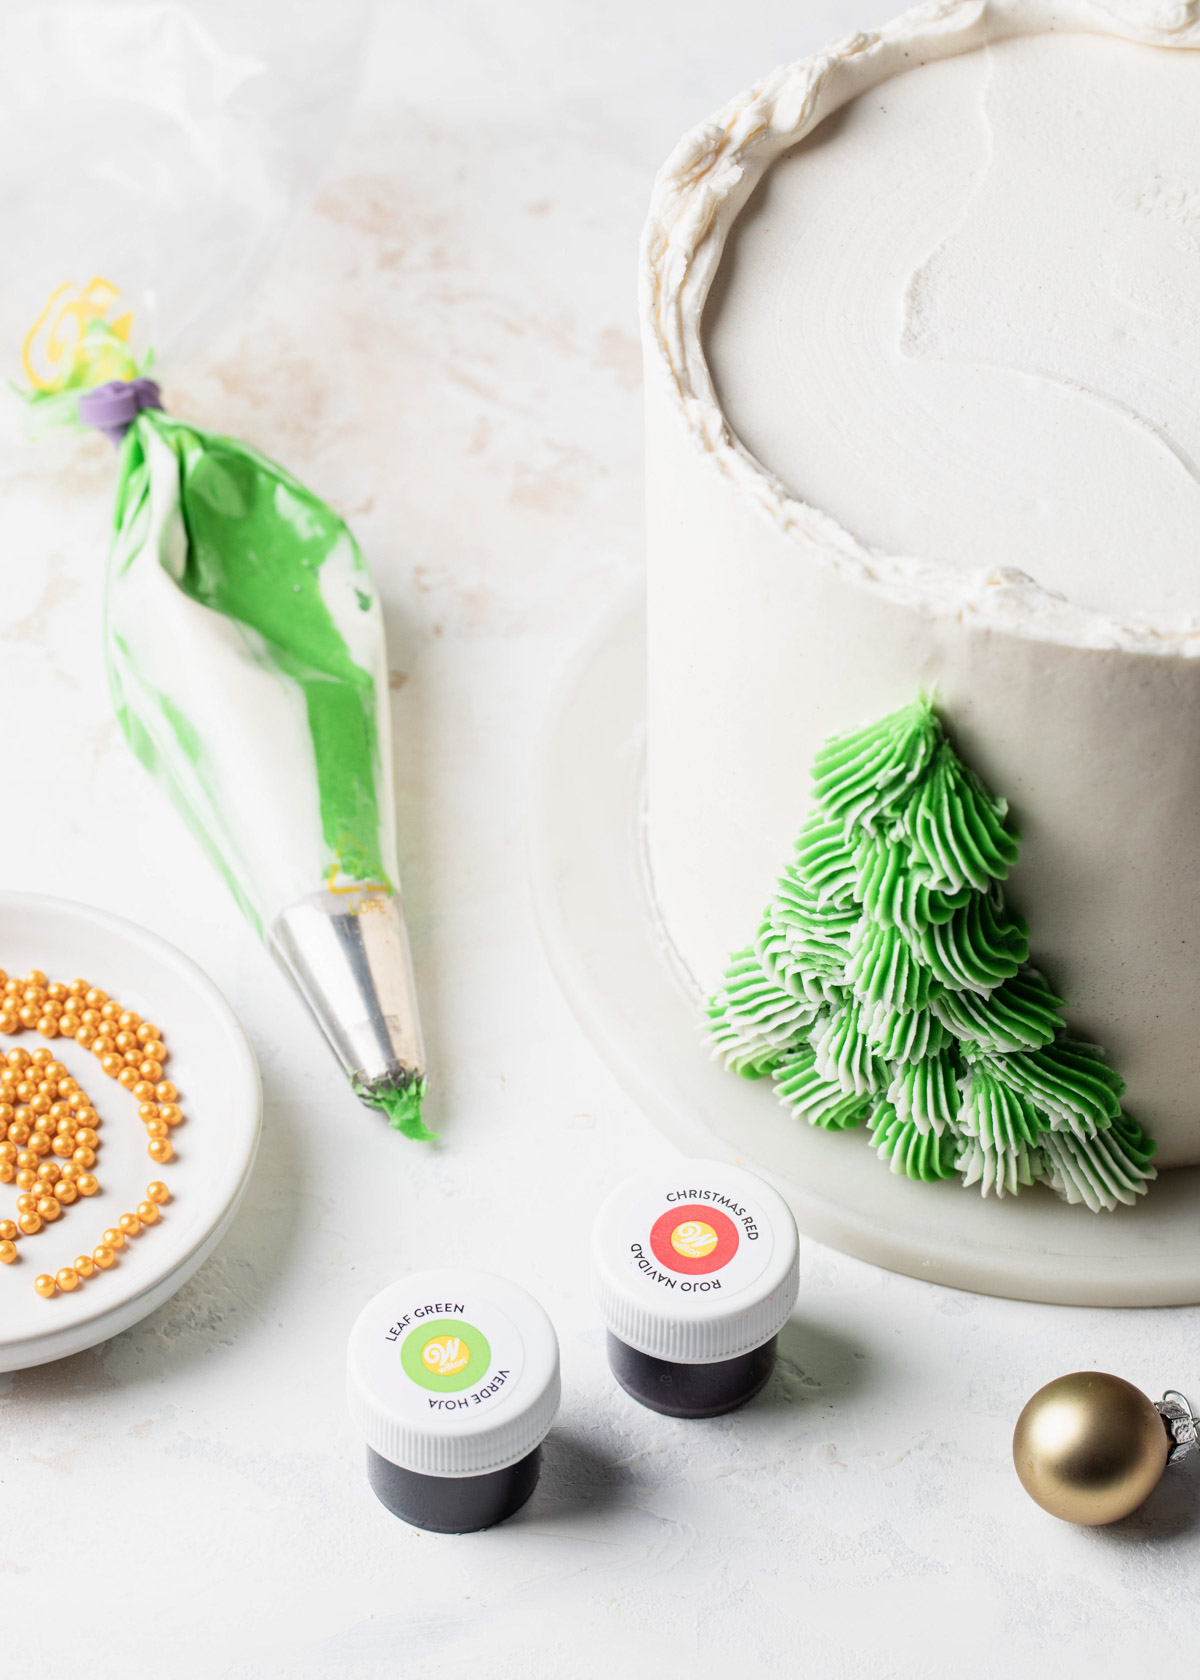
- Reserve about ½ cup of the buttercream and tint the remaining portion green. Fit a #4B piping tip in the bottom of a piping bag. Using a small offset spatula, stripe the inside of the piping bag with some of the plain buttercream. “Paint” the inside of the piping by swiping up the sides of the bag in a few different spots. Fill the piping bag with the green buttercream.
- Use the edge of an icing smoother or offset spatula to lightly mark a triangle shape on the side of the cake. Starting at the bottom of the cake, pipe shell patterns with the 4B piping tip to fit the triangle shape, one row at a time. Allow the rows to slightly overlap and the shells on the sides to fan out as you work your way up to the top point of the tree. Be sure to release the pressure on the piping bag between shells to create clean tails.
- Fill a piping bag fitted with the #3 piping tip with plain buttercream. Pipe swags down the length of the tree. Place gold and red sugar pearls on the tree to resemble lights and ornaments.
- Switch the piping tip to a #129 and pipe snowflakes around the sides of the cake as desired.
- For the top of the cake, spoon a mixture of your favorite gold holiday sprinkles around the edge. Enjoy!
Find the Wilton supplies I used at Wilton.com or purchase at a local retailer!
Supriya Singh
I made this for my Christmas party last year and it was a huge crowd pleaser. Definitely recommend
Brennan H
What a cute design and so easy to replicate. Thank you!!!