Last updated on March 28th, 2023 at 02:41 pm
I've iced a lot of cakes over the years. But here's a secret - you too can ice a cake like a pro! After 15 years of professional cake decorating, follow my tips for learning how to ice a cake with buttercream frosting.
I learned how to ice cakes in a local bakery at the beginning of my career. I filled, stacked, and frosted dozens of cakes each day.
While not all large production recipes and techniques translate to the home kitchen, I still stand by this way for icing cakes because it requires the least amount of tools. No extra piping bags or acrylic disks required.
This technique for icing a cake works for all types of frosting. Once you learn how to ice a cake, the decorating options are endless!
How to Ice a Cake Video
Tools for Icing a Cake
Rotating Cake Stand - I’ve had my Ateco turntable ever since I had my own bakery nearly 13 years ago. It’s a bit more of an investment, but as you can see, it will last you a lifetime. When I teach, I use the same plastic turntable as my students and it works just fine. Whichever fits your budget, a rotating turntable is seriously going to up your icing game.
Offset Spatula - My offset spatula is likely my most used kitchen tool. Period. As you can imagine, it is especially valuable for spreading fillings and frosting cakes. The offset handle makes it so that you can smooth out the frosting without your fingers getting in the way. For most cakes coming out of a home kitchen, either a small (5 to 6 inches) or medium (around 8 inches) should work.
Icing Smoother - For super smooth frosting, you will need an icing smoother. Either metal or plastic, anything with a straight edge should do. A basic bench scraper works fine, but I stand by this versatile Ateco icing smoother/comb. Again, this is a tool that I’ve had since the very beginning of my cake days. It’s seriously cheap, has different ridges on the sides to create various patterns, and will last forever.
Before you get to frosting, it's important to start with a properly stacked and filled layer cake with a chilled crumb coat.
How to Ice a Cake
Start with a crumb coated cake that has been chilled for about 15 minutes. A crumb coat is a thin layer of frosting that goes on all sides of the cake that traps in any loose crumbs and keeps them out of the final layer of frosting.
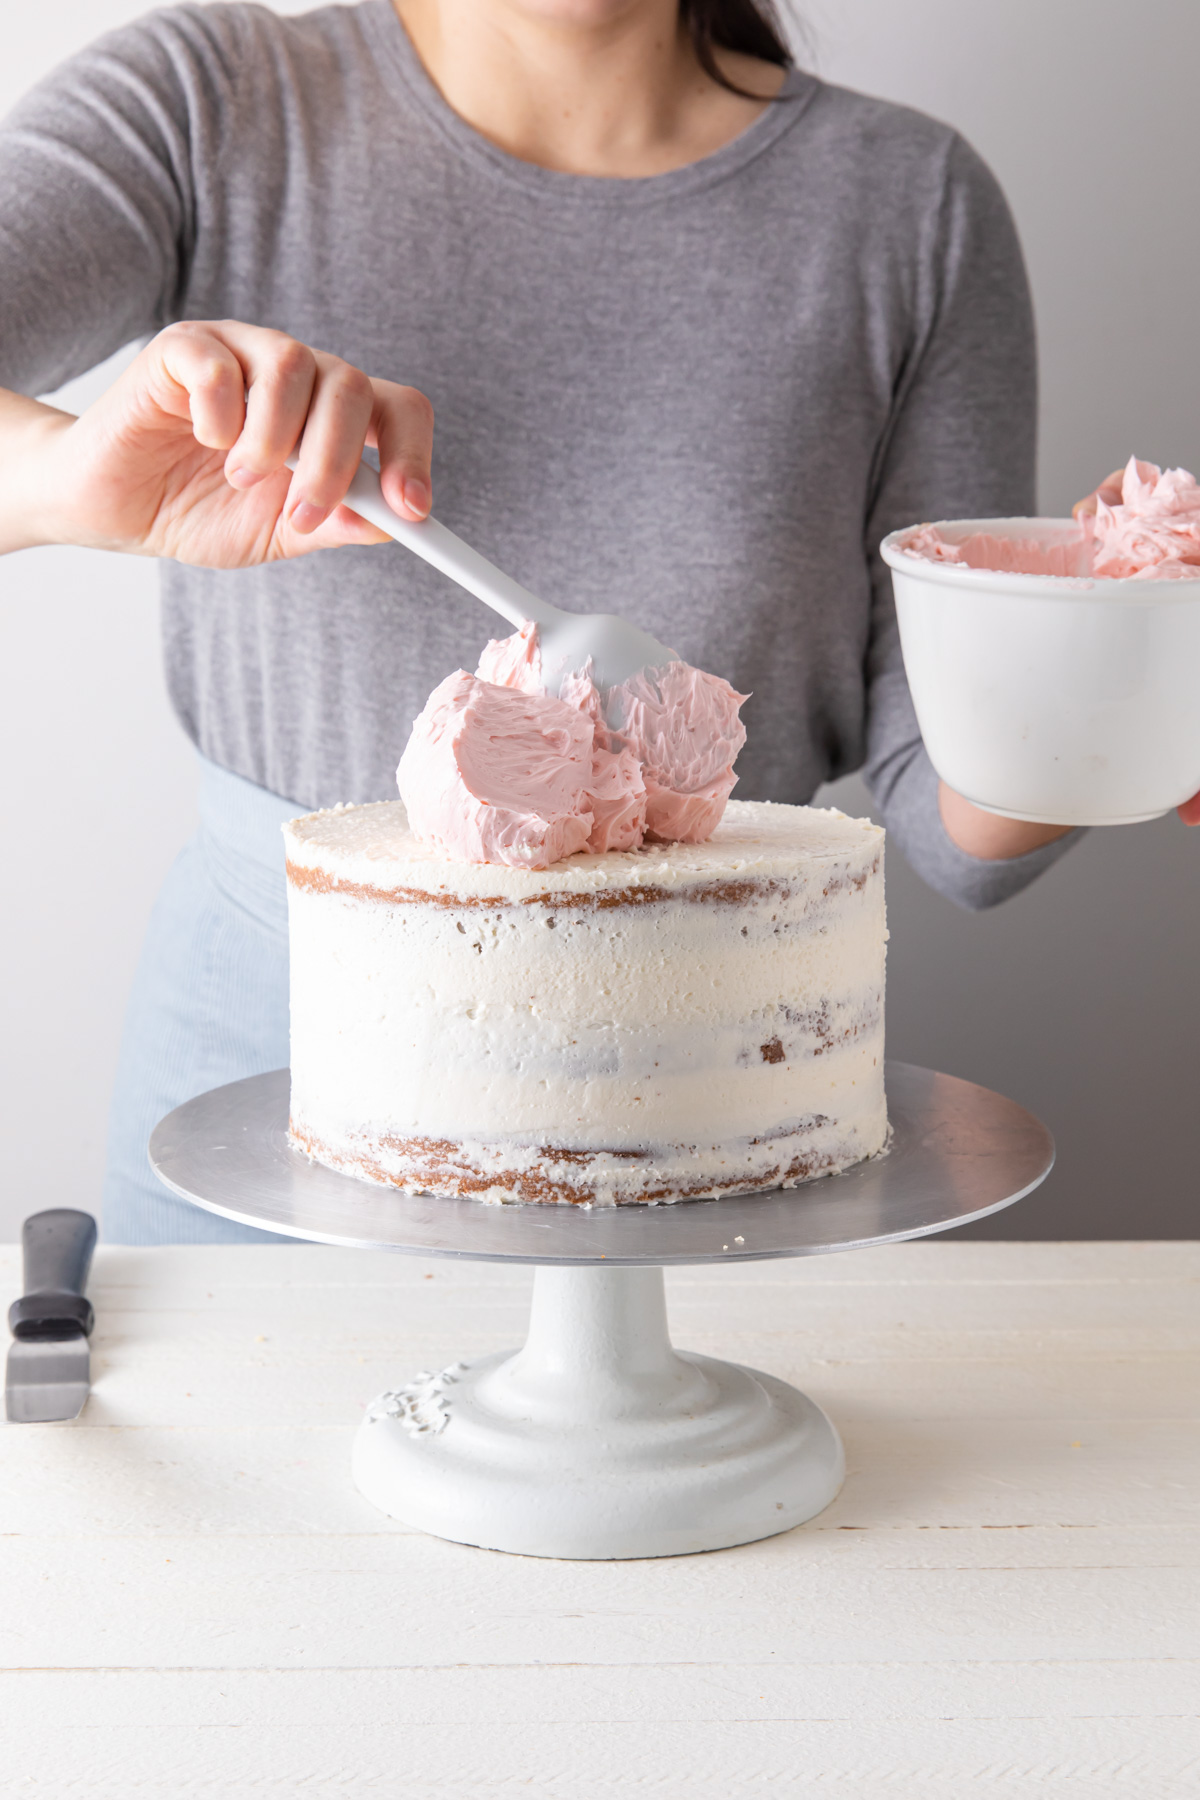
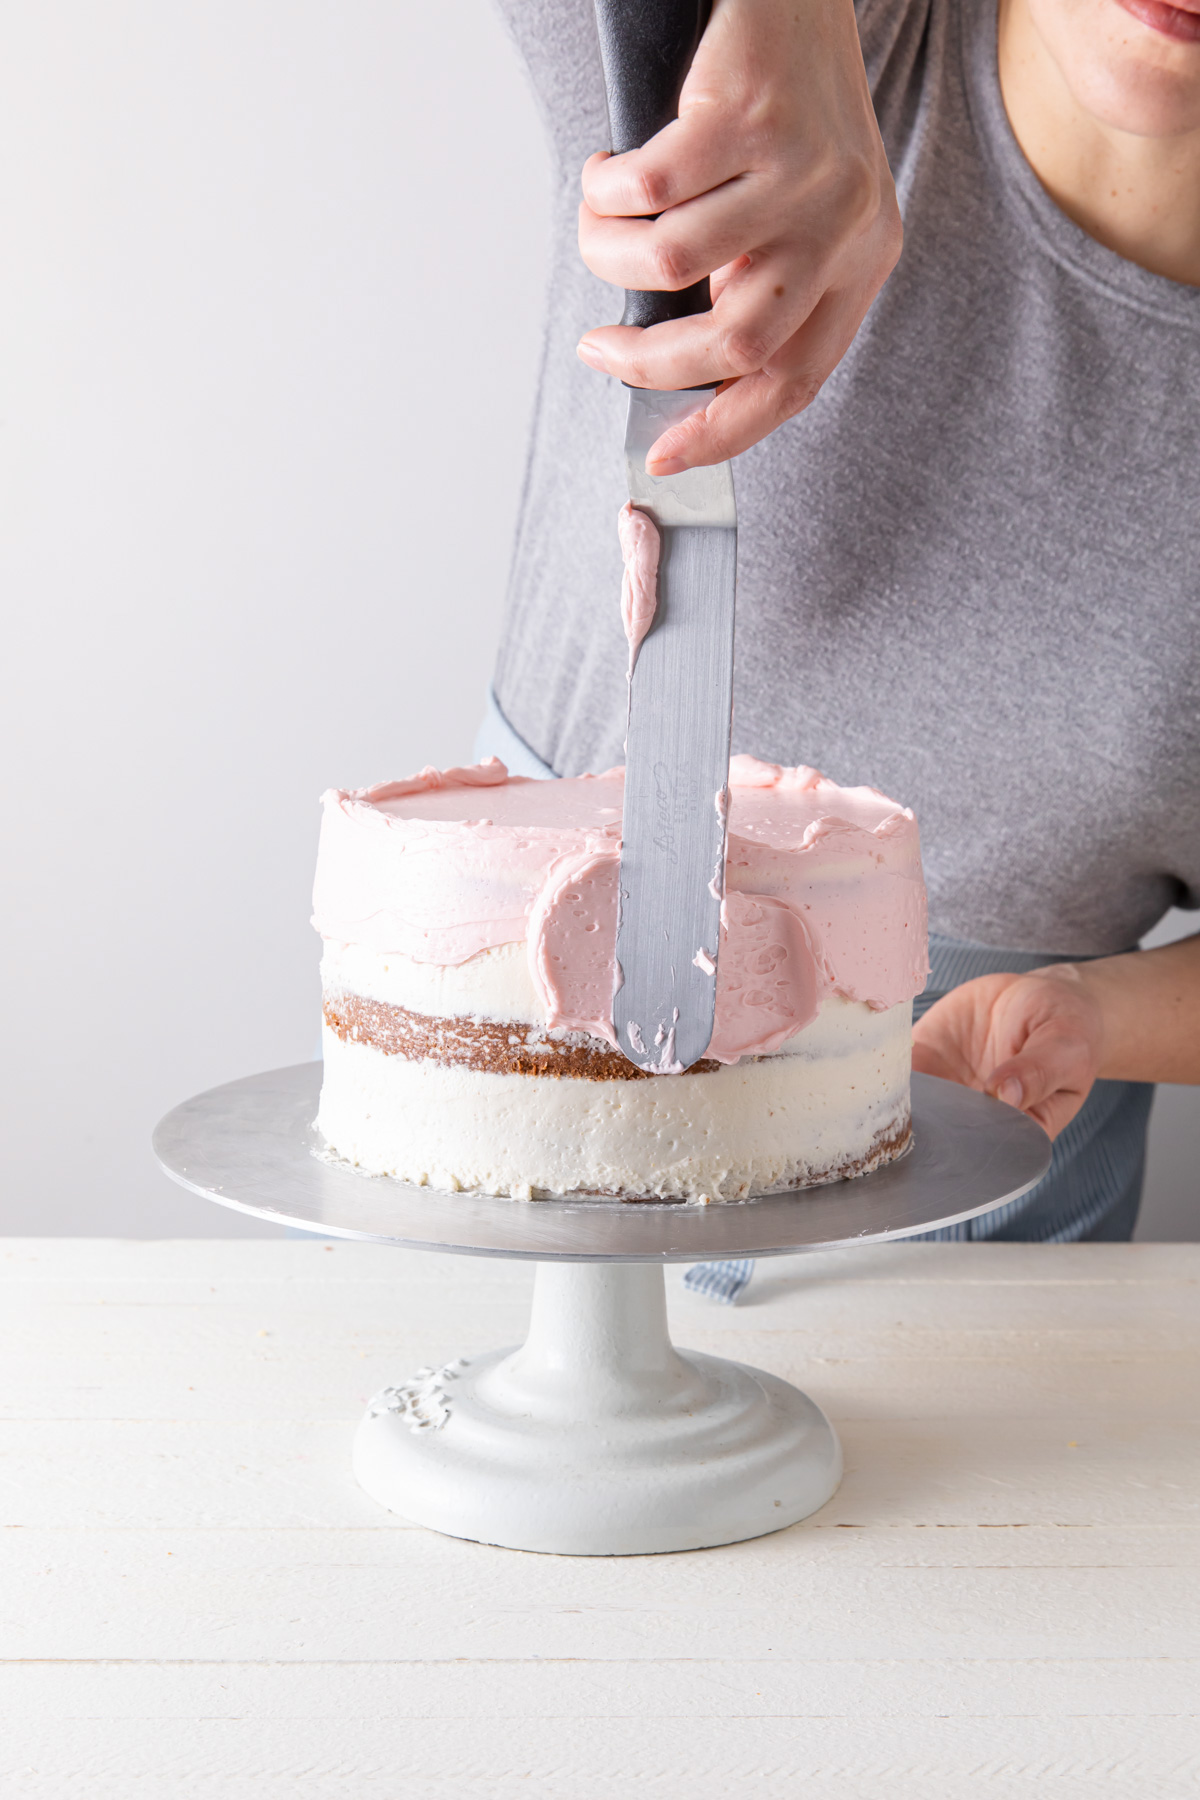
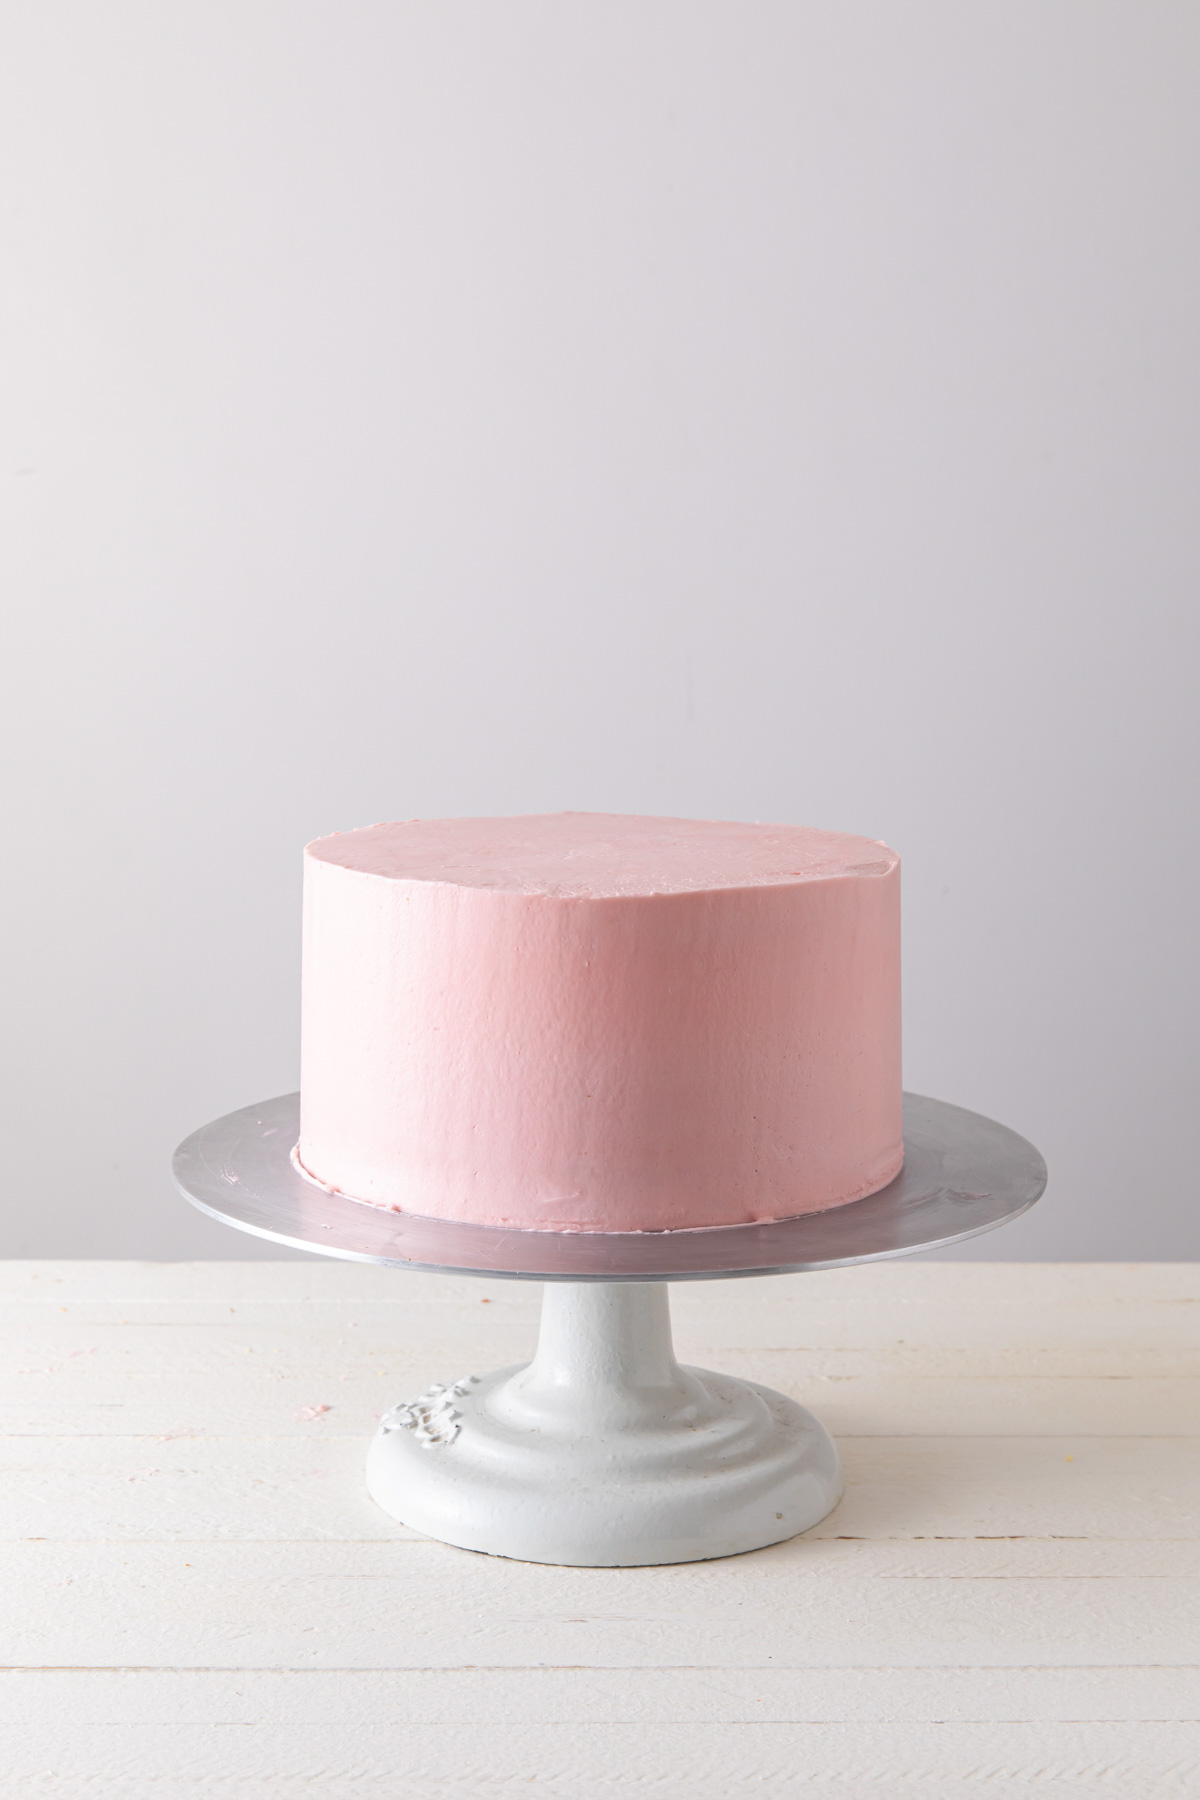
Next, place a large dollop of frosting on top of the cake. Use your offset spatula to spread the frosting over the top of the cake. To make it flat and smooth, hold the spatula still and spin the cake stand. This action will help even out the frosting and push any excess frosting towards the edges, allowing it to overhang slightly.
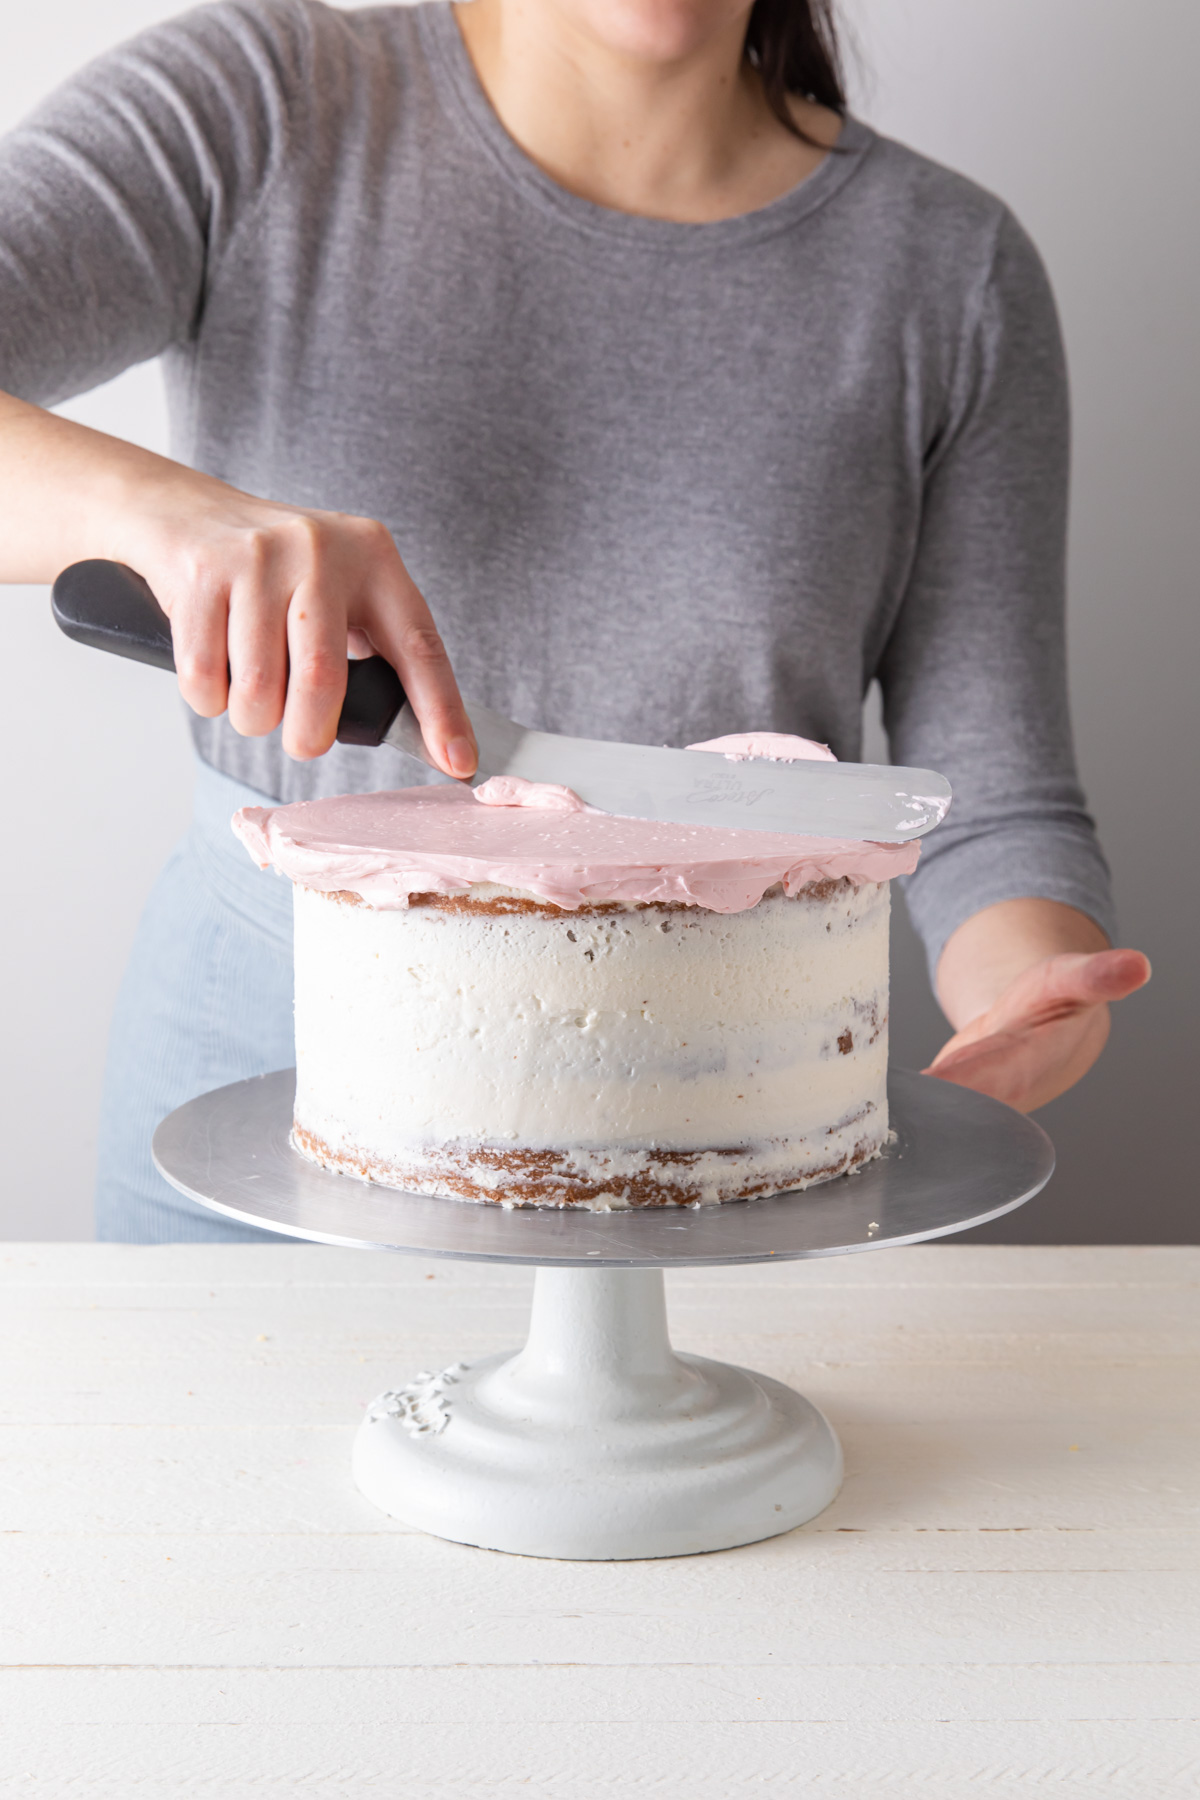
Adhere any excess frosting from the top of the cake that may overhang to the sides of the cake. This will help establish a crisp top edge for the end.
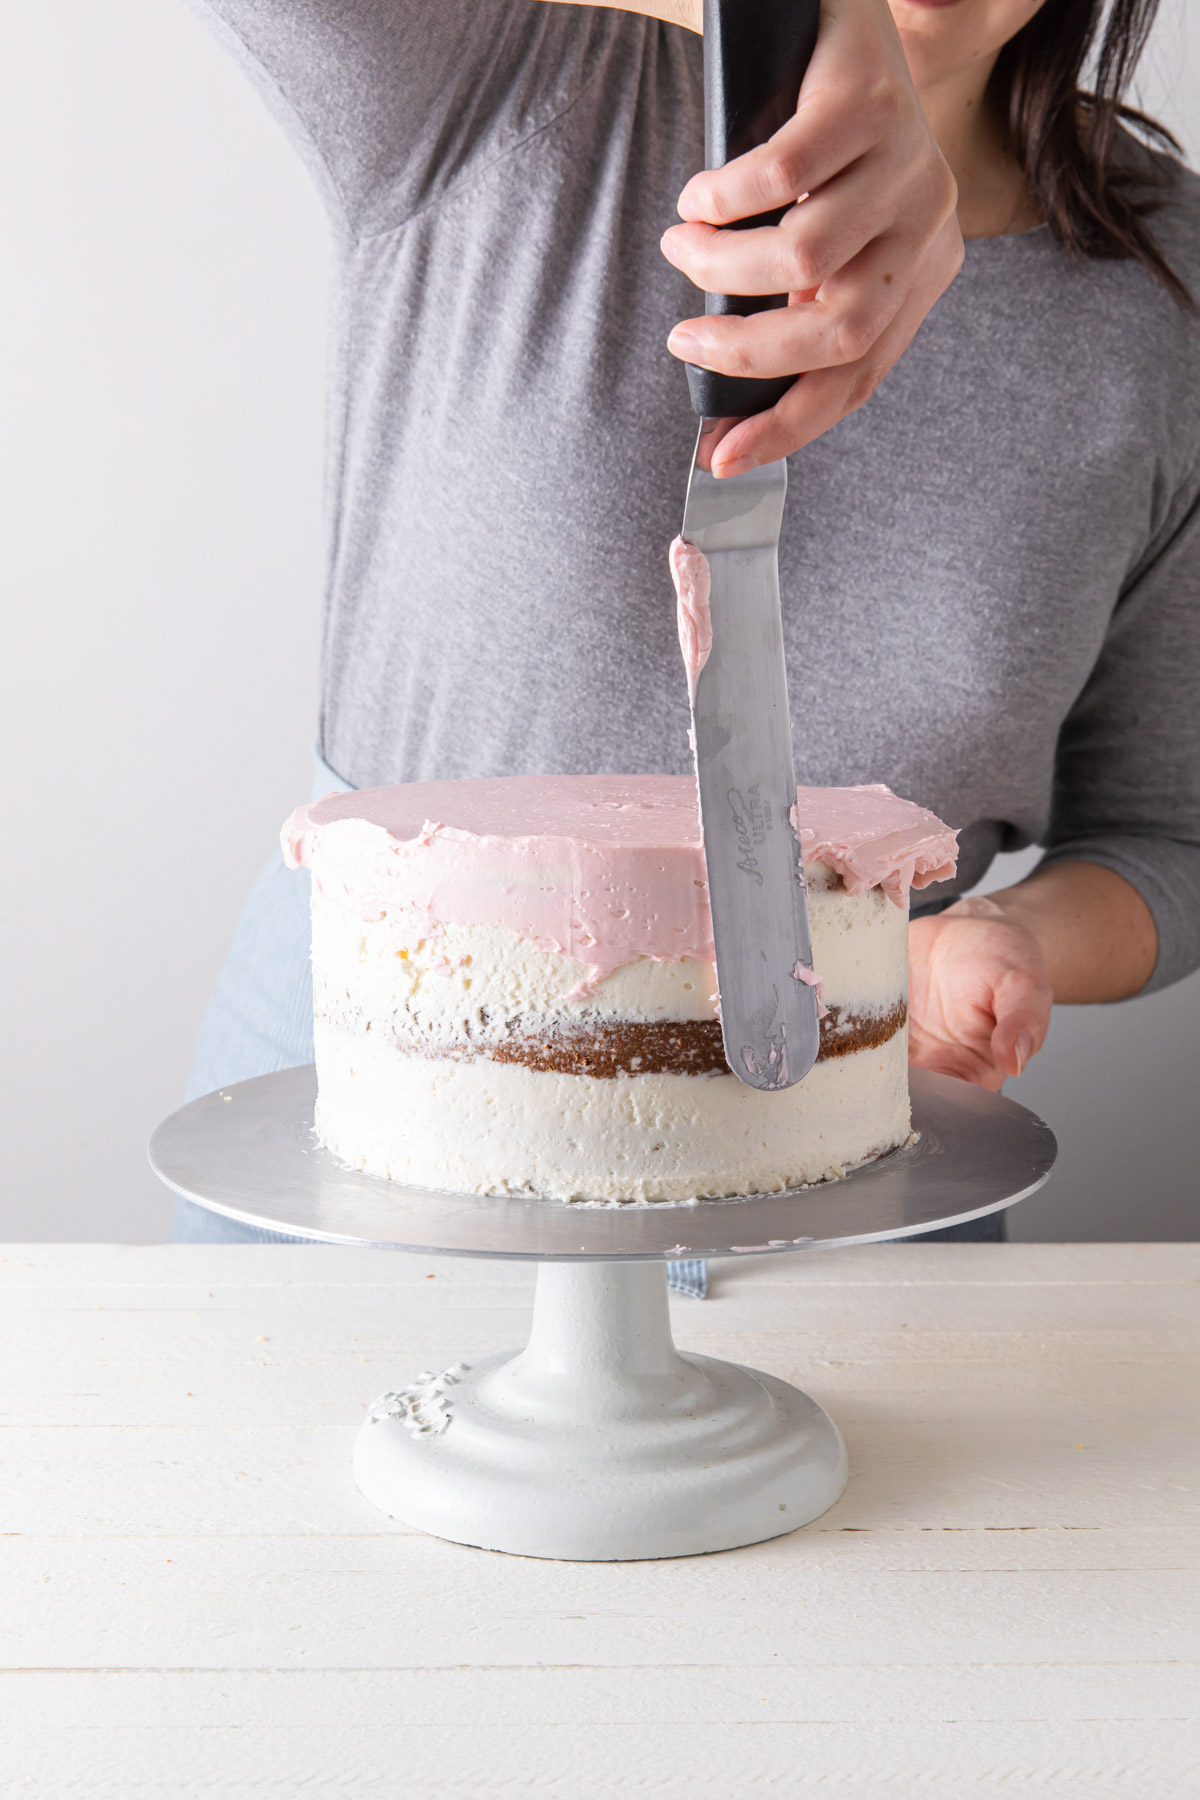
Add frosting around the sides of the cake. To start, work with only a little bit of frosting at a time for more control. Continue around until there is an even layer of frosting on all sides. It does not have to be completely smooth yet, just even.
For this six-inch round cake, I am most comfortable using a small offset spatula. I typically apply the frosting in sections - working on the top half, then the bottom. I feel like I have more control of the frosting this way and it helps prevent the frosting from slopping all over the place and sliding off the sides. Be sure to clean off your spatula between applications.
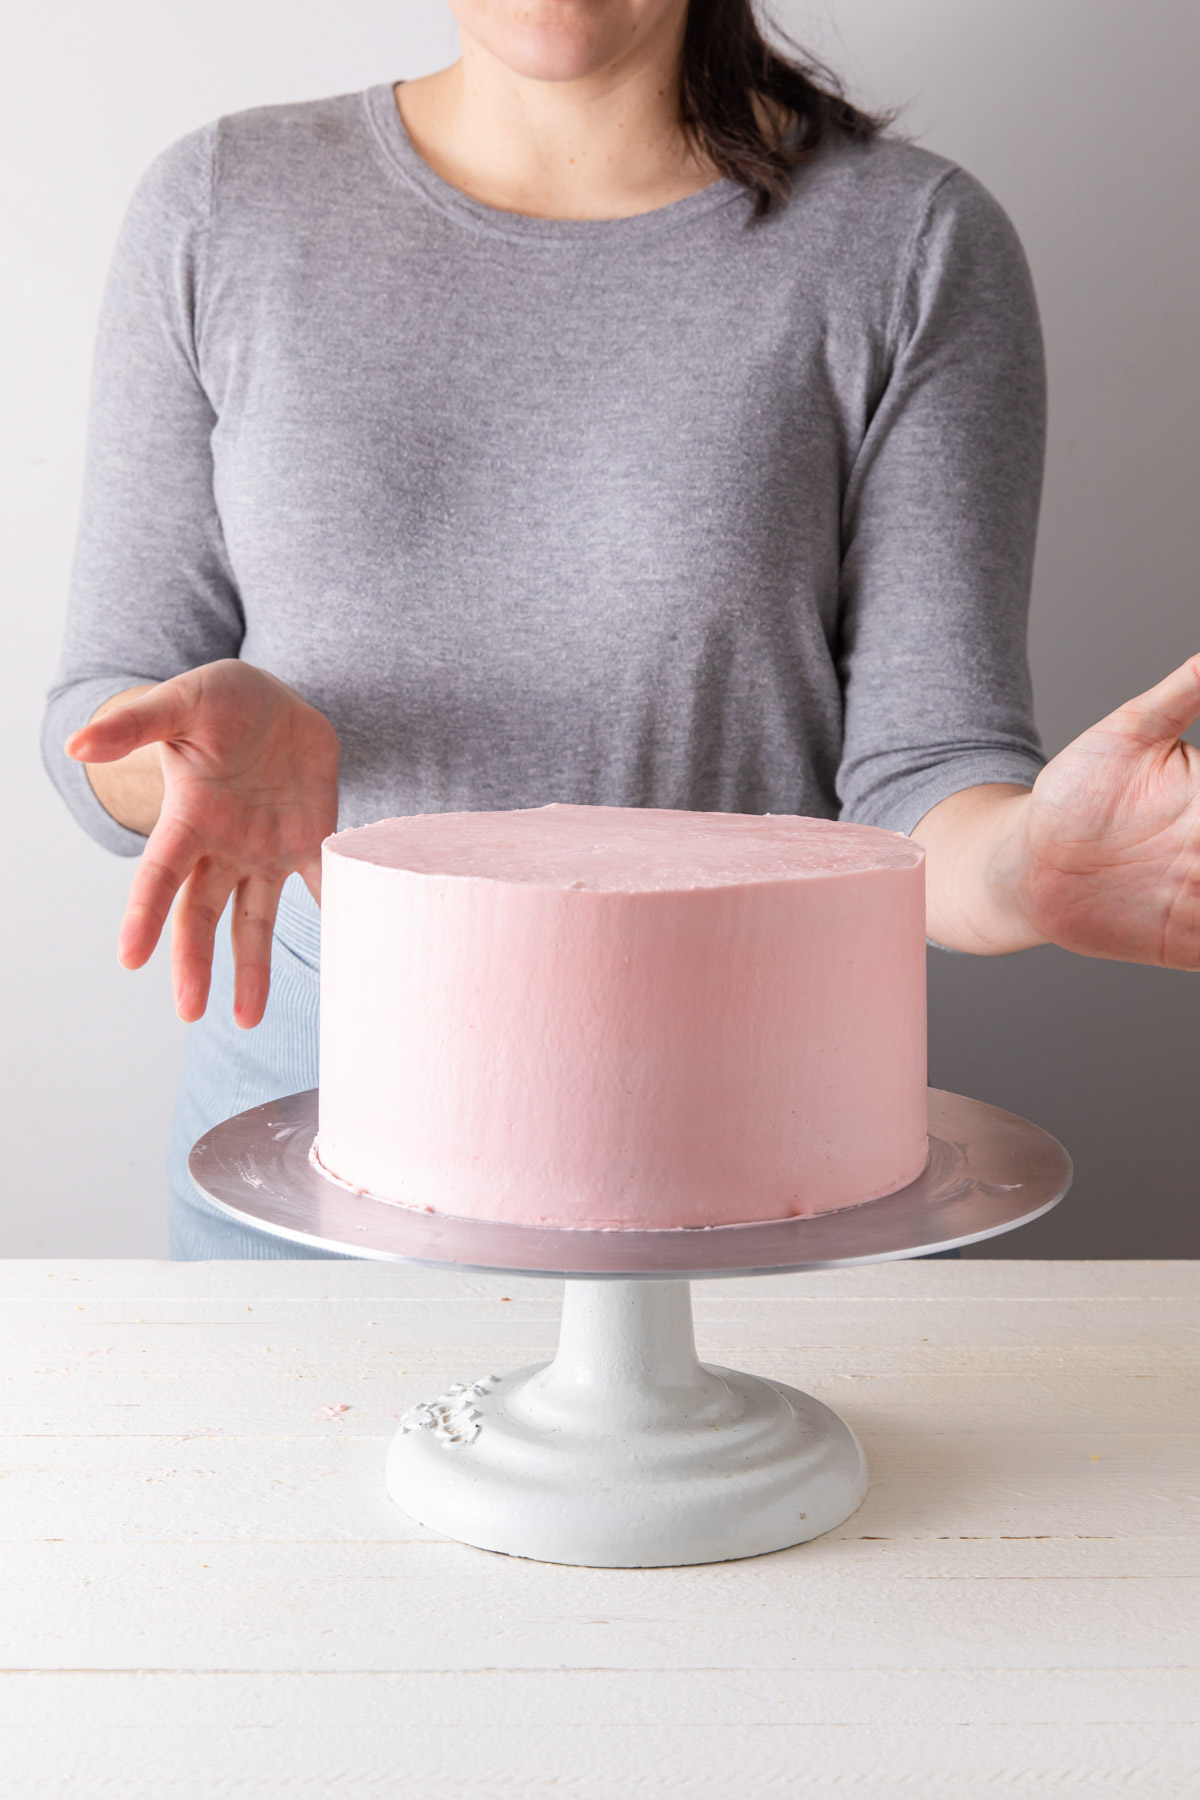
Once there is an ever layer of frosting around the whole cake, begin smoothing with you just your spatula. Hold your spatula completely perpendicular to the turn table/parallel to the sides of the cake. Begin smoothing and turning the turn table to remove excess frosting.
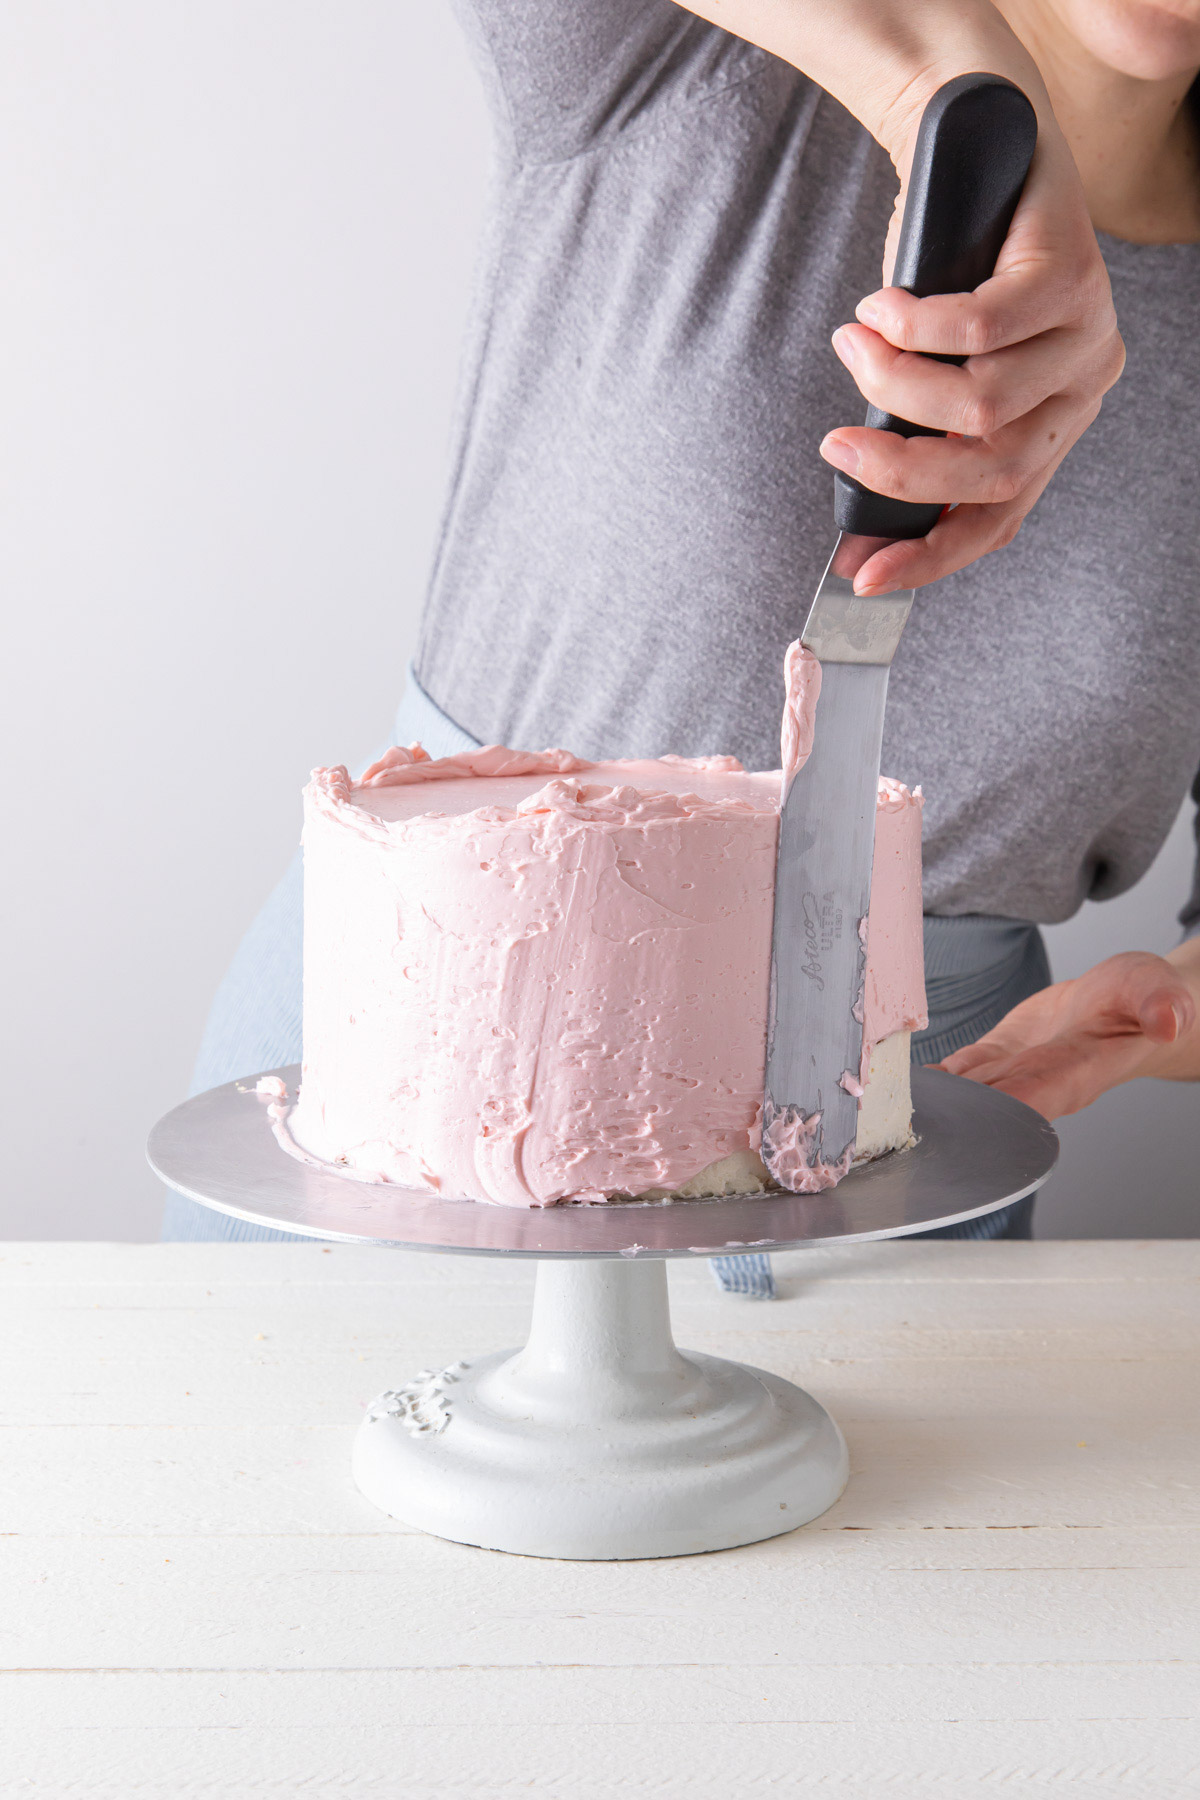
As the frosting starts to smooth out, trade your spatula for a frosting smoother. Again, holding the long, straight edge parallel to the side of the cake (and slightly touching), rest the base on the turn table to create a nice 90-degree angle. Keeping the frosting smoother in place, begin to spin the turn table. As the turn table spins, the frosting smoother should pick up any excess frosting and fill in any minor holes.
Clean off your smoother in between every few spins, stop and repeat. Fill in any major gaps with frosting and smooth again. At this point, take a step back to make sure the sides of the cake are still nice and straight. Add or remove frosting as needed.
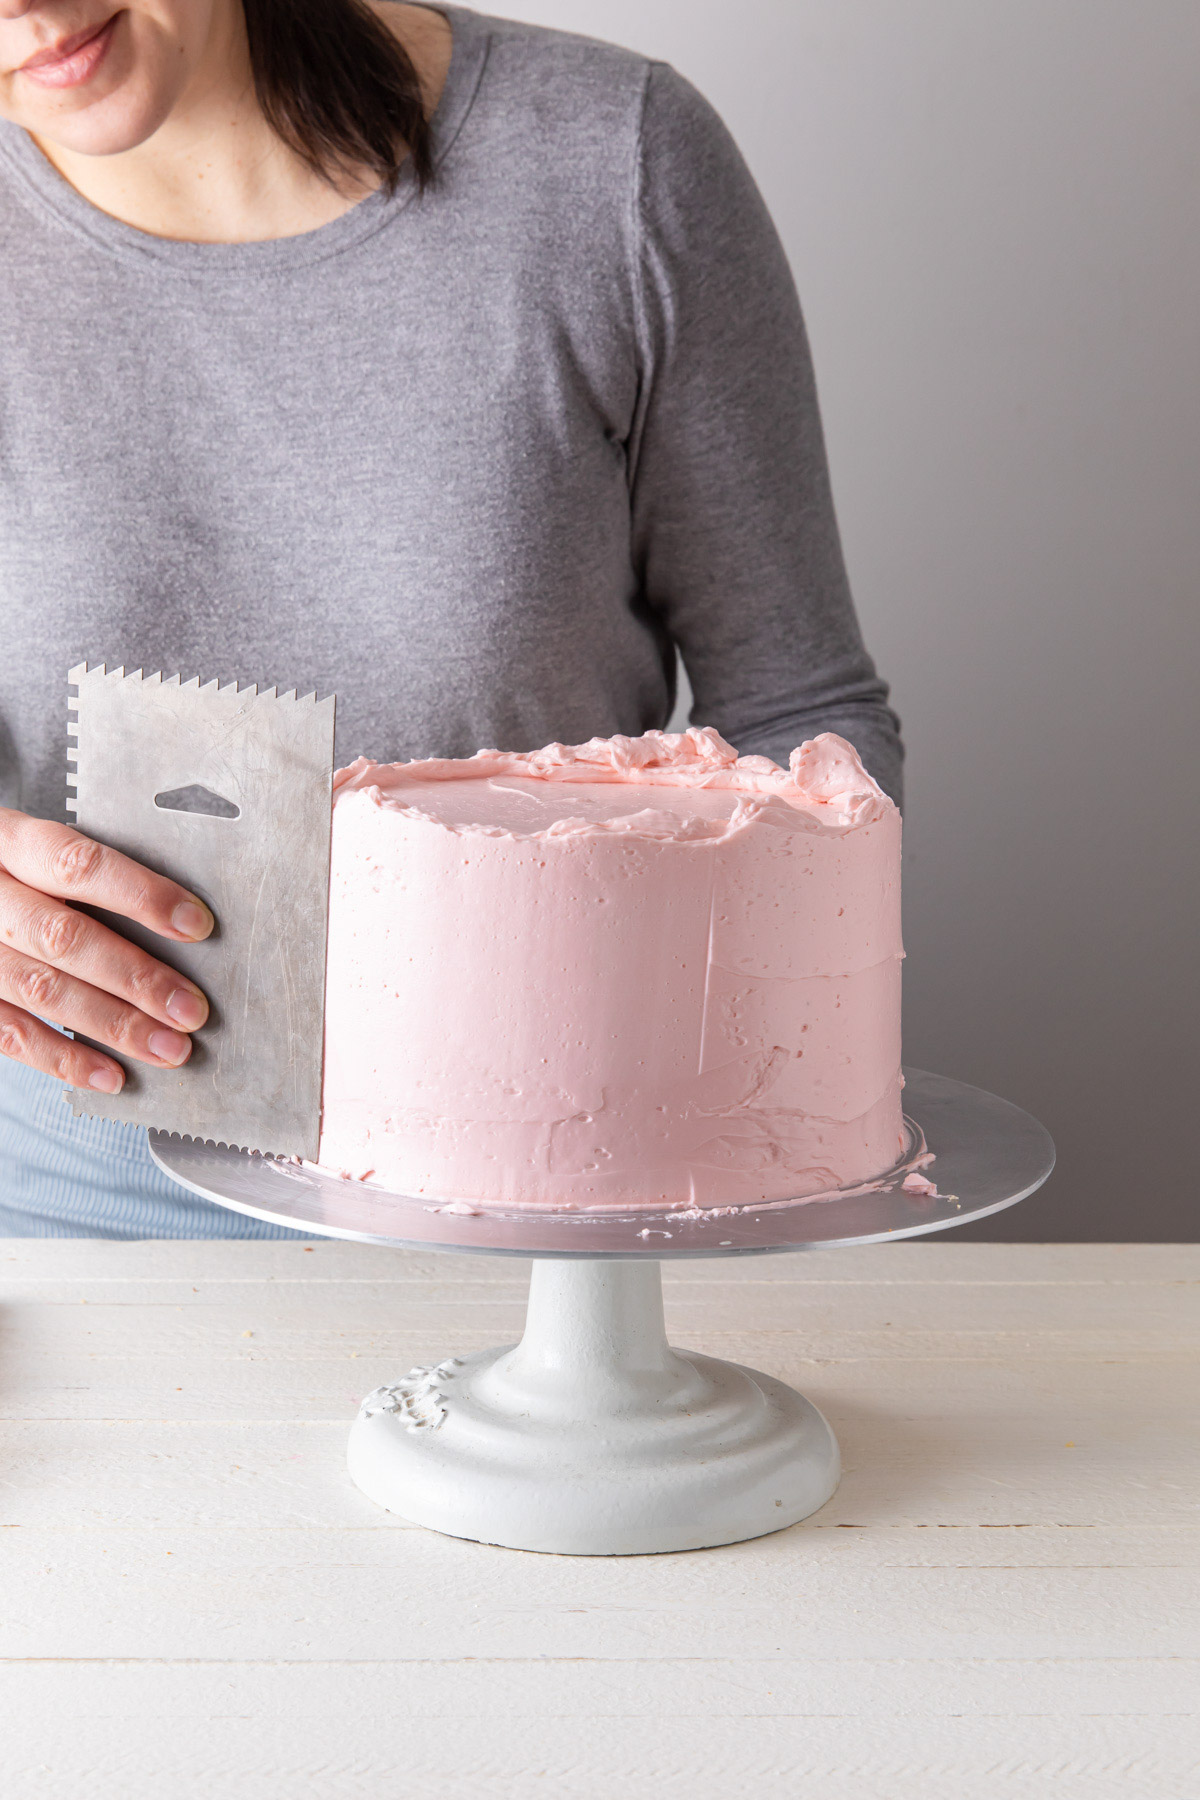
As the sides are smoothed, excess frosting will be pushed up towards the top of the cake. Using the edge of your offset spatula, gently pull this frosting "lip" towards the centre of the cake. Continue around the entire top of the cake

Take you frosting smoother and place the long edge gently on top of the cake. Give the turn table a couple of turns to further even out the top of the cake.
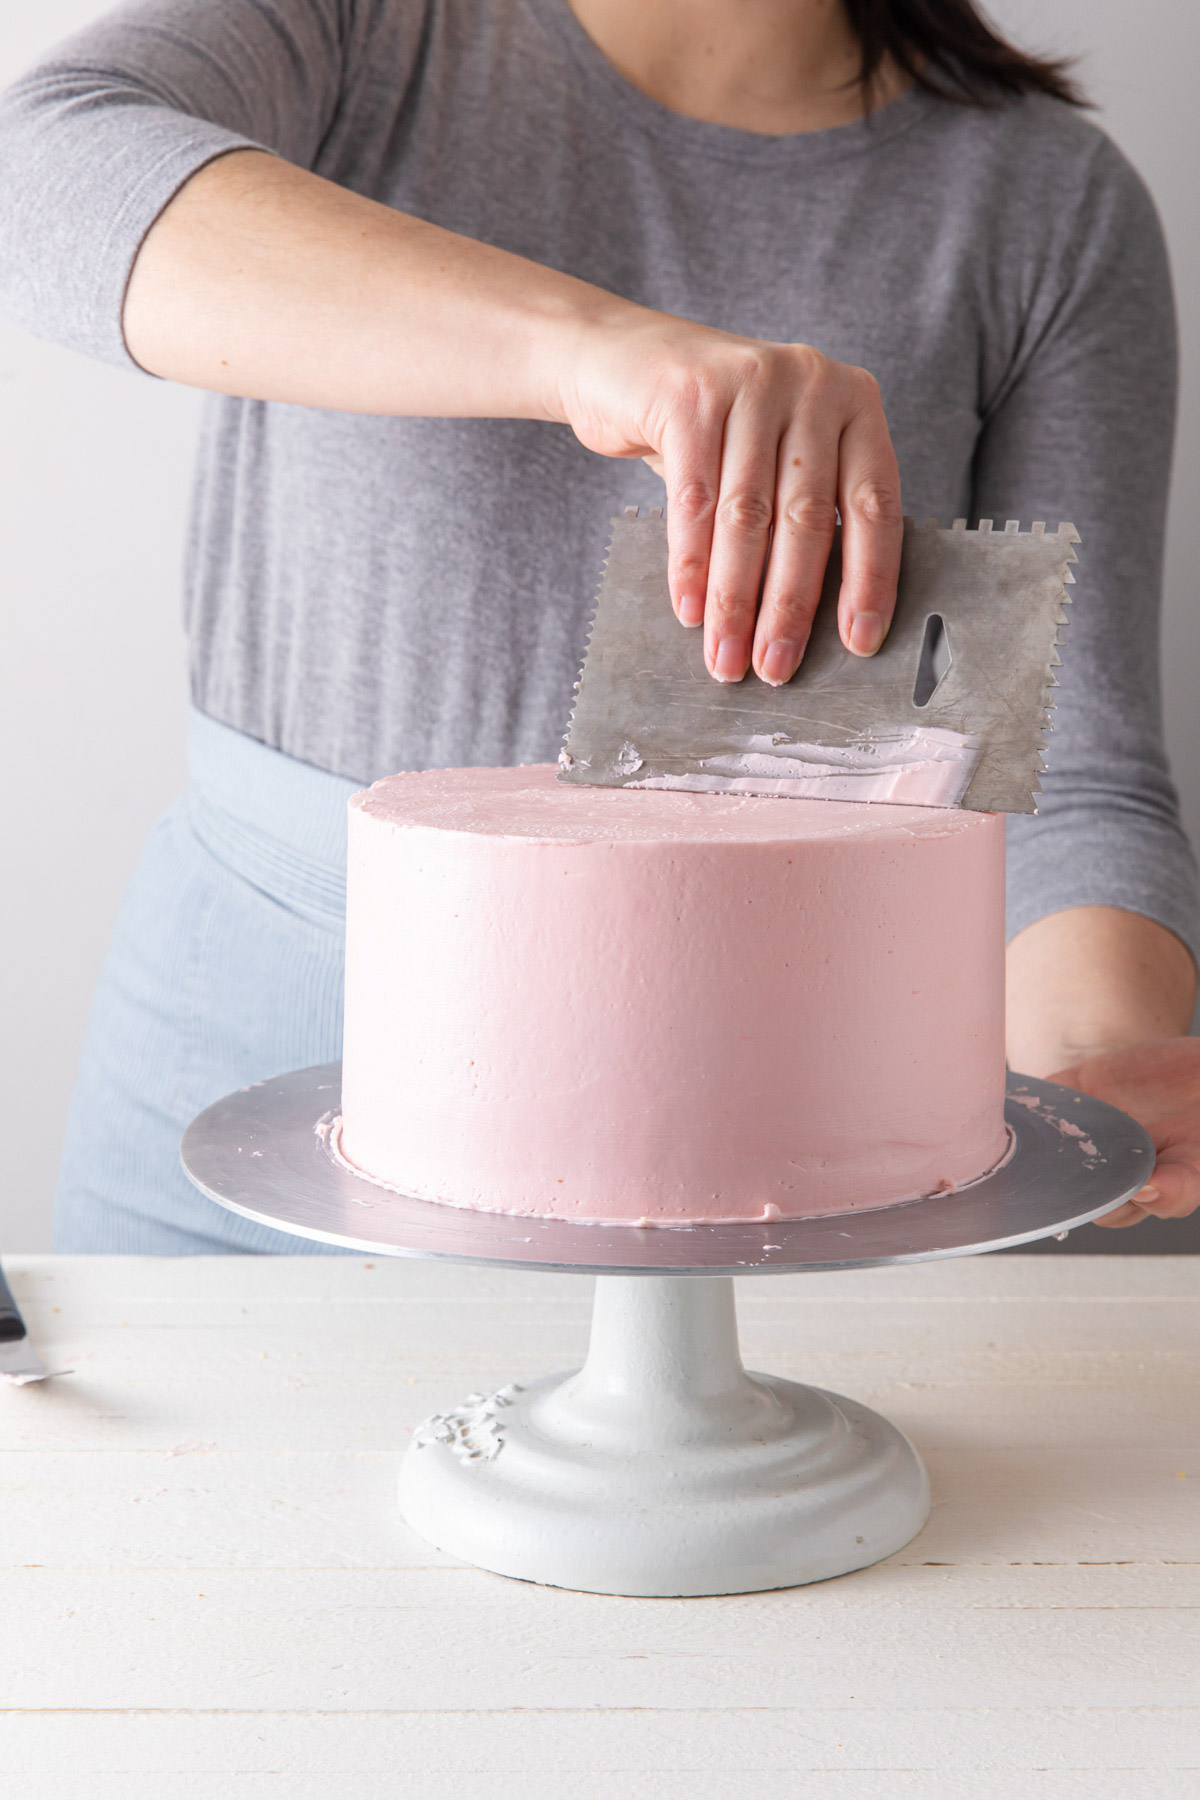
Feel free to go back and smooth out the sides and top until you are satisfied with the finished cake. I find myself going back a few times, taking extra care to make sure that top edge is crisp.
To get extra extra smooth, pop the finished cake in the fridge until slightly firm. Run the metal blade of your spatula or frosting smoother under hot hot water. Dry the spatula/smoother and use the heat of the blade to gently warm and melt the buttercream slightly by repeating smoothing on the sides and the top.
Tips for Icing a Cake
- If there appears to be a lot of bubbles or holes in your meringue buttercream, it might need to be mixed further before using. Running your mixer on low with the paddle attachment (and buttercream inside the bowl, of course) for a couple of minutes will help eliminate air bubbles.
- To transfer a cake to a cake stand or serving dish (either from the turn table or from a cake board), gently run an offset spatula completely around the base of the cake to release it, then carefully slide the spatula under the cake and lift. It may help to chill the cake before moving to help prevent any bumps or smudges to the freshly applied frosting.
- I find that the consistency and temperature of my buttercream really effects the smoothness and how much work it takes to get the cake smooth. If the buttercream is perfectly room temperature and silky, the turn table does all the work for me and the process is quite quick. If the buttercream is too cold, the process may take longer and the buttercream needs to be "worked" with the tools to really get smooth. If you find the buttercream to be at all soupy or too soft, try placing the cake in the refrigerator for a bit.
Heather (Delicious Not Gorgeous)
thanks for all the helpful tips! my current "technique" is more a crapshoot.
Tessa
Heather,Thank you! For me, it's mostly about the sturdiness of the cake layers and a super smooth buttercream =)
Alana
THIS POST!! Thank you for all the tips!! And congrats on getting closer to finishing up YOUR BOOK!! Can't wait to see the finished product--lucky hubby!
Tessa
Alana,Yay! Thank you! I can't believe the book is still like 9 months away, but it feels like it is getting soooo close, lol.
Katie Wahlman
LOVE LOVE LOVE this, Tessa! I've never tried stacking my cakes upside down, but now that I think about it, it makes SO much sense! Now all I can think about is ditching work to go practice. 🙂
Tessa
Katie,Thanks, gal! Forget work - make cake! Is that a saying? It should be =)
Michele @ Alwayzbakin
Thank you for the wonderful tutorial. Your cakes are so smooth and beautiful. Congrats on the book! Can't wait to check it out!
Tessa
You are very welcome! I am glad you liked it, and hope you enjoy the book too!
Natasha @ The Cake Merchant
Great tutorial, Tessa. I'm so excited for your book to come out!
Tessa
Thank you, Natasha!! I'm so excited, too - hehe. Hope you enjoy it when it comes out!
melissa irwin
wow looks great!! Can i ask what choc cake this is? It looks sooooo delicious
Tessa
Thank you! It is my classic chocolate, but with rum. Recipe going up tomorrow! Or search chocolate cake in the archives =)
Joise
Hey Tessa,
this tutorial is great and the finish is neat. Dos you use buttercream with butter and shortening?
Tessa
Josie - thank you! I usually use Swiss Meringue Buttercream. I am working on a post for tomorrow (or later this week) that will have the full recipe =)
Maritza
Love your postings.
Tessa
Thank you!
First Grade Lunch Box Cake (Funfetti PB&J + Gummy Bears & Chocolate-Covered Potato Chips!) - Butterlust
[…] you’re looking to hone your cake decorating skills, check out this awesome tutorial by Tessa of Sweet Style CA, then stay a while to check out her GORGEOUS cakes. Girl’s got […]
Patrice Seibel
Hey Tessa! What bench scraper do you use? Do you recommend? I've been using an OXO one and it's quite small! The one in your photos looks more versatile. Thank you!
Tessa Huff
Hi there! The one I use is Ateco brand (https://www.amazon.com/Ateco-Decorating-Comb-Icing-Smoother/dp/B0000VOOXI). I've had it for years!