Last updated on October 14th, 2022 at 02:27 pm
Wow! Thank you all for the well wishes and support on my 2nd blog birthday! I've enjoyed reading all of your comments and have been reminded once again why I enjoy blogging. Heart = Full. Thank you!
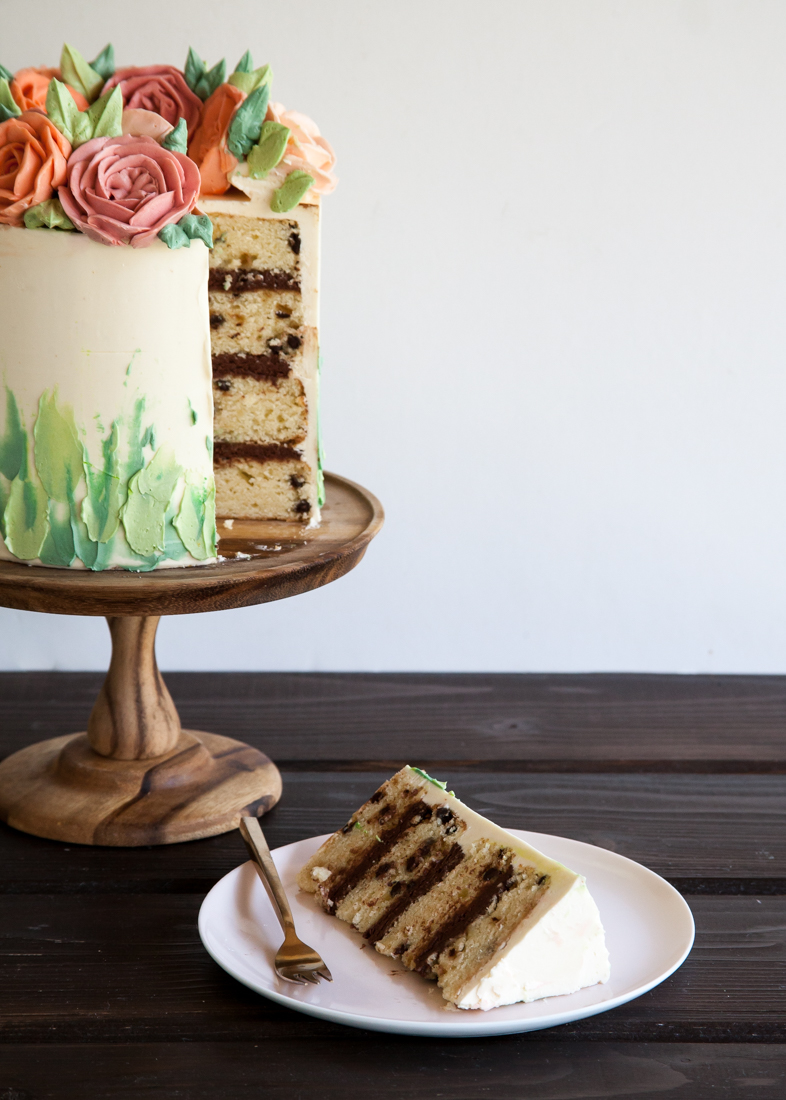
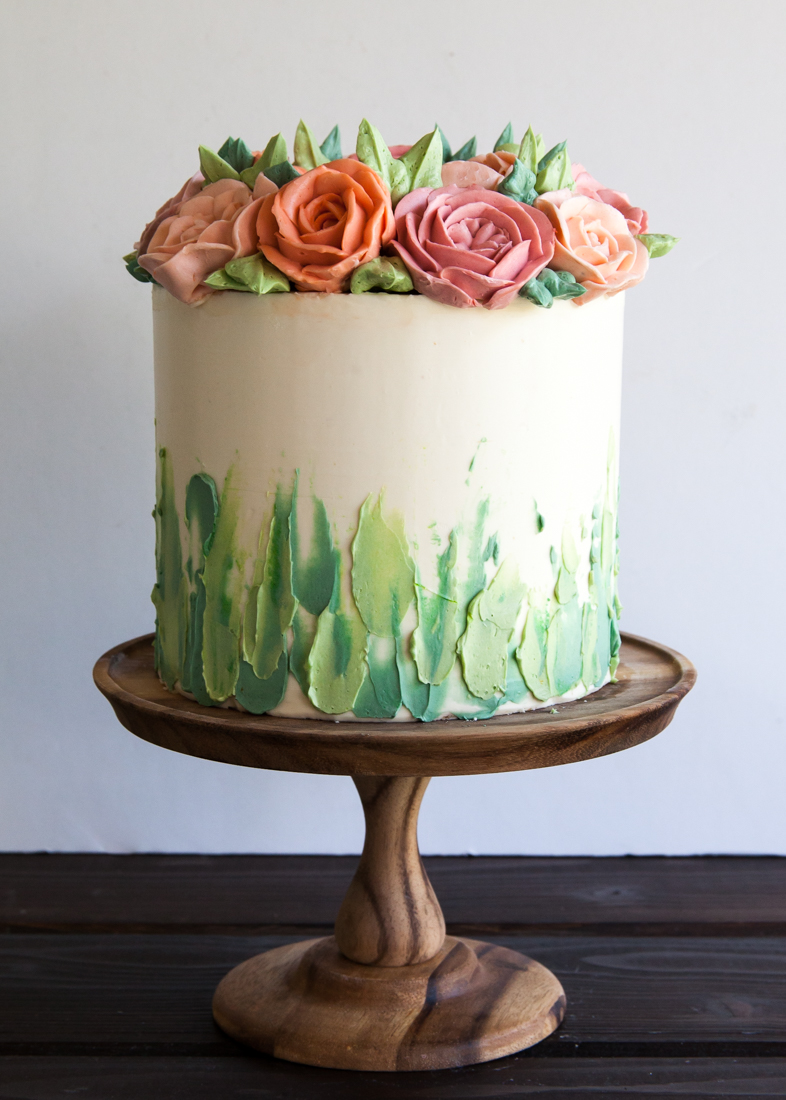
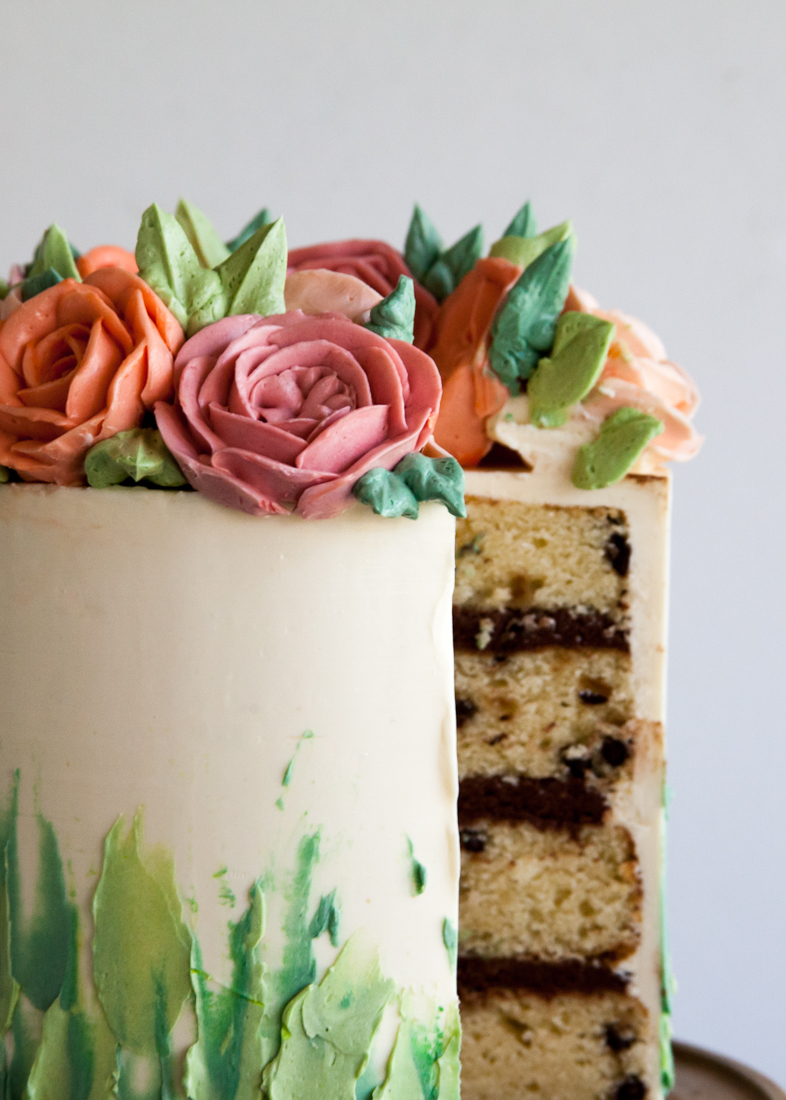
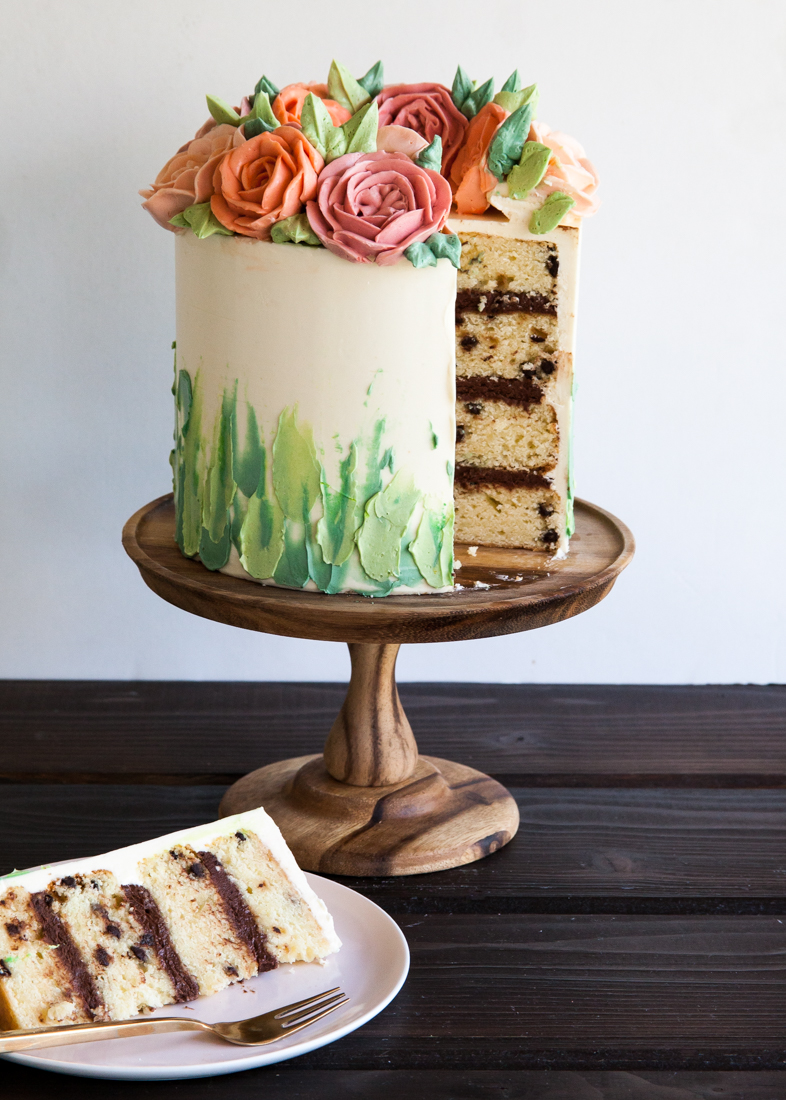
As promised, I am sharing the recipe for the delicious cake inside the pretty buttercream exterior. Cocoa Cannoli Cake with mini chips.
What happens when you have a Costco-sized tub of ricotta that is nearing its expiration date? Throw it in everything you can! I absolutely love putting ricotta on toasted bread to make sweet and savoury crostini. My favourite is to top it with a drizzle of honey, a pinch of salt, and some fruit. Grilled or broiled fruit it the best! From pears and plums to roasted apricots and even grapes - your topping options are endless. And for a heartier, more savoury option - there is always prosciutto. Yum!! Well, in a small effort to be a bit healthier, I stopped buying my weekly baguette (yes, I still eat cake and sweets, so how can I really expect to be "healthier" you ask? It's all about finding balance somewhere hehe). Without my beloved bread to top my ricotta with, I needed to find alternative uses for the stuff.
To me, ricotta doesn't taste too cheesy. It does have some tang to it, but hardly any more than buttermilk or sour cream - both usual suspects in my cake recipes. I figured, why not swap in some ricotta as the dairy for a new cake? And, success! The ricotta created an extremely moist and tender crumb, but still sturdy enough to suspend handfuls of mini chips. I decided to turn this ricotta cake into a cannoli cake by adding in some mini chocolate chips and pairing it with a super creamy filling. I added a bit of cocoa powder to a luscious mascarpone-cream cheese filling to slather between layers of ricotta chip cake. The cocoa cuts some of the sweetness but keeps the slight tang that makes cream cheese frosting soooo good. I'm telling you, this might be the very best tasting cake I have made yet!
I am not usually one to shy away from trying out new pastries, accepting most recipes as a challenge. However, I really don't see myself making homemade cannoli any time soon (I'm not great when it comes to frying things), so I am glad my tastebuds and belly can be satisfied with this cake version. Perhaps one day I will tackle the Italian treat! But for now, this cake:
Cocoa Cannoli Cake
Ingredients
- ¾ cup unsalted butter, softened
- 1 ½ cups granulated sugar
- 4 egg yolks
- ¾ cup ricotta cheese
- 2 teaspoons vanilla extract
- 1 teaspoon orange zest (optional)
- 2 ½ cups all-purpose flour
- 2 ½ teaspoons baking powder
- ½ teaspoon baking soda
- ½ teaspoon salt
- 1 cup whole milk
- ¾ cup mini chocolate chips
- 4 tablespoons unsalted butter, softened (½ stick)
- 2 ounces cream cheese, softened
- 2 cups confectioner's sugar
- 3 tablespoons unsweetened cocoa powder
- ½ teaspoon vanilla extract
- ¼ cup mascarpone, softened
- Vanilla buttercream
Instructions
- Preheat oven to 350 degrees. Grease and flour four 6-inch baking pans.
- Sift together the dry ingredients and set aside.
- In the bowl of an electric mixer fitted with a paddle attachment, beat the butter until smooth. Add in the butter and mix until light and fluffy (3 to 5 minutes).
- Stop the mixer and scrape down the sides and bottom of the bowl.
- With the mixer on low, add in the vanilla, zest (if using), and egg yolks - one at a time.
- Add the ricotta and mix until combined.
- Stop the mixer and scrape down the bowl.
- With the mixer on low, add in half of the dry ingredients. Stream in the milk while the mixer is still running.
- Add in the remaining dry ingredients and mix until just combined.
- Stop the mixer and fold in the chocolate chips.
- Evenly distribute the batter between the prepared pans and bake for 25-28 minutes, or until a toothpick inserted in the centre of the cakes comes out clean.
- Let cool on a wire rack for 10 to 15 minutes before removing the cakes from their pans.
- For the filling, place the 4 tablespoons butter and cream cheese in the bowl of an electric mixer fitted with the paddle attachment. Mix until smooth.
- Carefully add in the sugar, coco, and vanilla and mix on low until just combined.
- Turn mixer up the medium and mix until smooth.
- Stop the mixer and fold in the mascarpone until combined.
Assembly: Evenly distribute the cocoa cream filling between the layers of cake and frost with your favourite vanilla buttercream. Be sure to check out my tutorial for the buttercream flower crown!
Anne@BaptismalGownsPlus.com
The outside of the cake looks too pretty to cut, but wow, to get to the inside, it would be worth it to dig in!
Judy Johnson
Wow! What a beautiful cake. I just finished making cupcakes from your recipes and they turned out beautiful and so delicious, even without the frosting. I'm waiting for them to cool so I can fill them and frost with my favorite Swiss Meringue Butter Cream recipe. Thank you so much for sharing your recipe and for the previous post on how you decorated your beautiful cake.
Tessa
Thank you! I am so glad you gave the recipe a try =)
G
Question for you. In step 3, you have "Add in the butter and mix until light and fluffy (3 to 5 minutes)". I am assuming that should be add in the sugar and mix until light & fluffy. Am I correct?
Tessa
YES! Great catch, thank you! Add the sugar AFTER the butter and mix.
Diana
Could you use 3 8 inch pans or 2 9 inch pans instead of 4 6 inch pans? If so...at what temperature and for how long?
Thank you : )
Tessa
Yes, I think that would work! Two 9-inch would be best. Same temp (350). Bake time would probably be between 23 to 26 minutes =)
Scherrei Bohnenberger
I want to make this for a friends 50th in 3 10" rounds and then 6" rounds (chocolate) for a two tier cake. 1. Should I double recipe and divide evenly ?
Tessa Huff
Hi there! Since I've never tested that combo myself, I can't say for certain. You can try doubling the recipe and making sure to only fill your cake pans about 2/3 to 3/4 full to prevent the cake from spilling over. If you have leftover batter, you could always make a few cupcakes =)