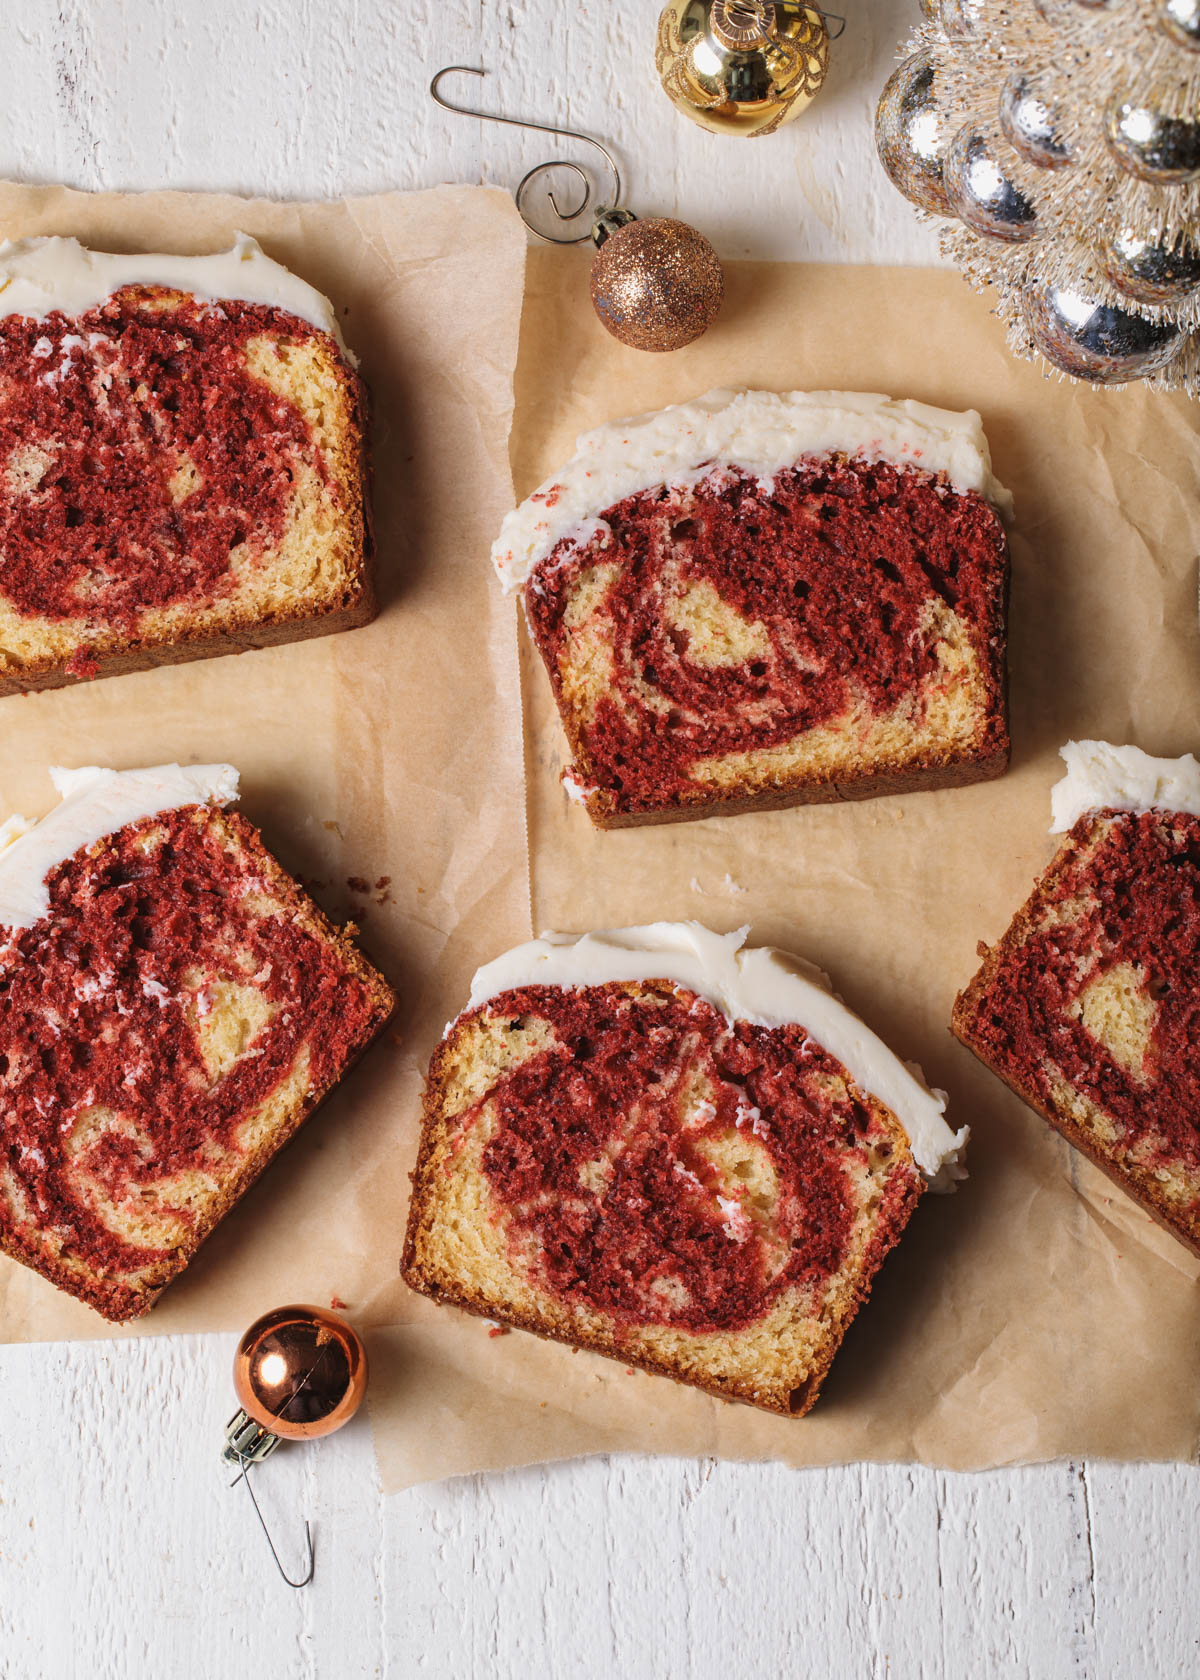
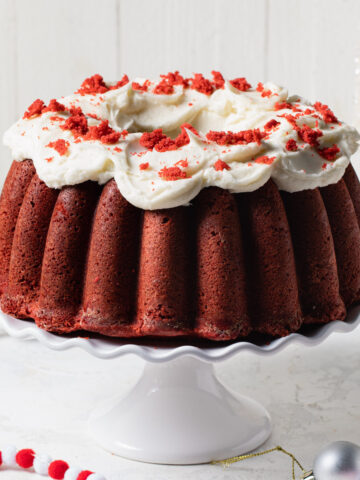
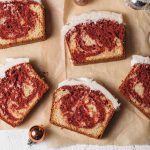
This moist Red Velvet Pound Cake is stunning with its marbled swirl and fluffy vanilla frosting. Made with just one batter, you get swirls of vanilla and red velvet pound cake in this super fun and festive recipe.
How to Make Red Velvet Pound Cake
- Whisk together the dry ingredients. Mix the flour, baking soda, baking power, and salt in a bowl and set aside.
- Mix together the butter and sugar. Using the creaming method, beat together the softened butter and granulated sugar together with an electric mixer until they are light and fluffy.
- Add the eggs. Working in one at a time, add the egg and mix until blended. Add the oil and vanilla and mix to combine.
- Alternate the flour mixture and sour cream. By adding only half the dry ingredients followed by the sour cream, the batter will be smoother without over-mixing. Add the second half of the dry ingredients and stir by hand just until the batter comes together.
- Split the batter. Divide the batter in half and place the second portion in a mixing bowl. Set aside. Add the cocoa powder and red food coloring to half of the batter and mix to combine.
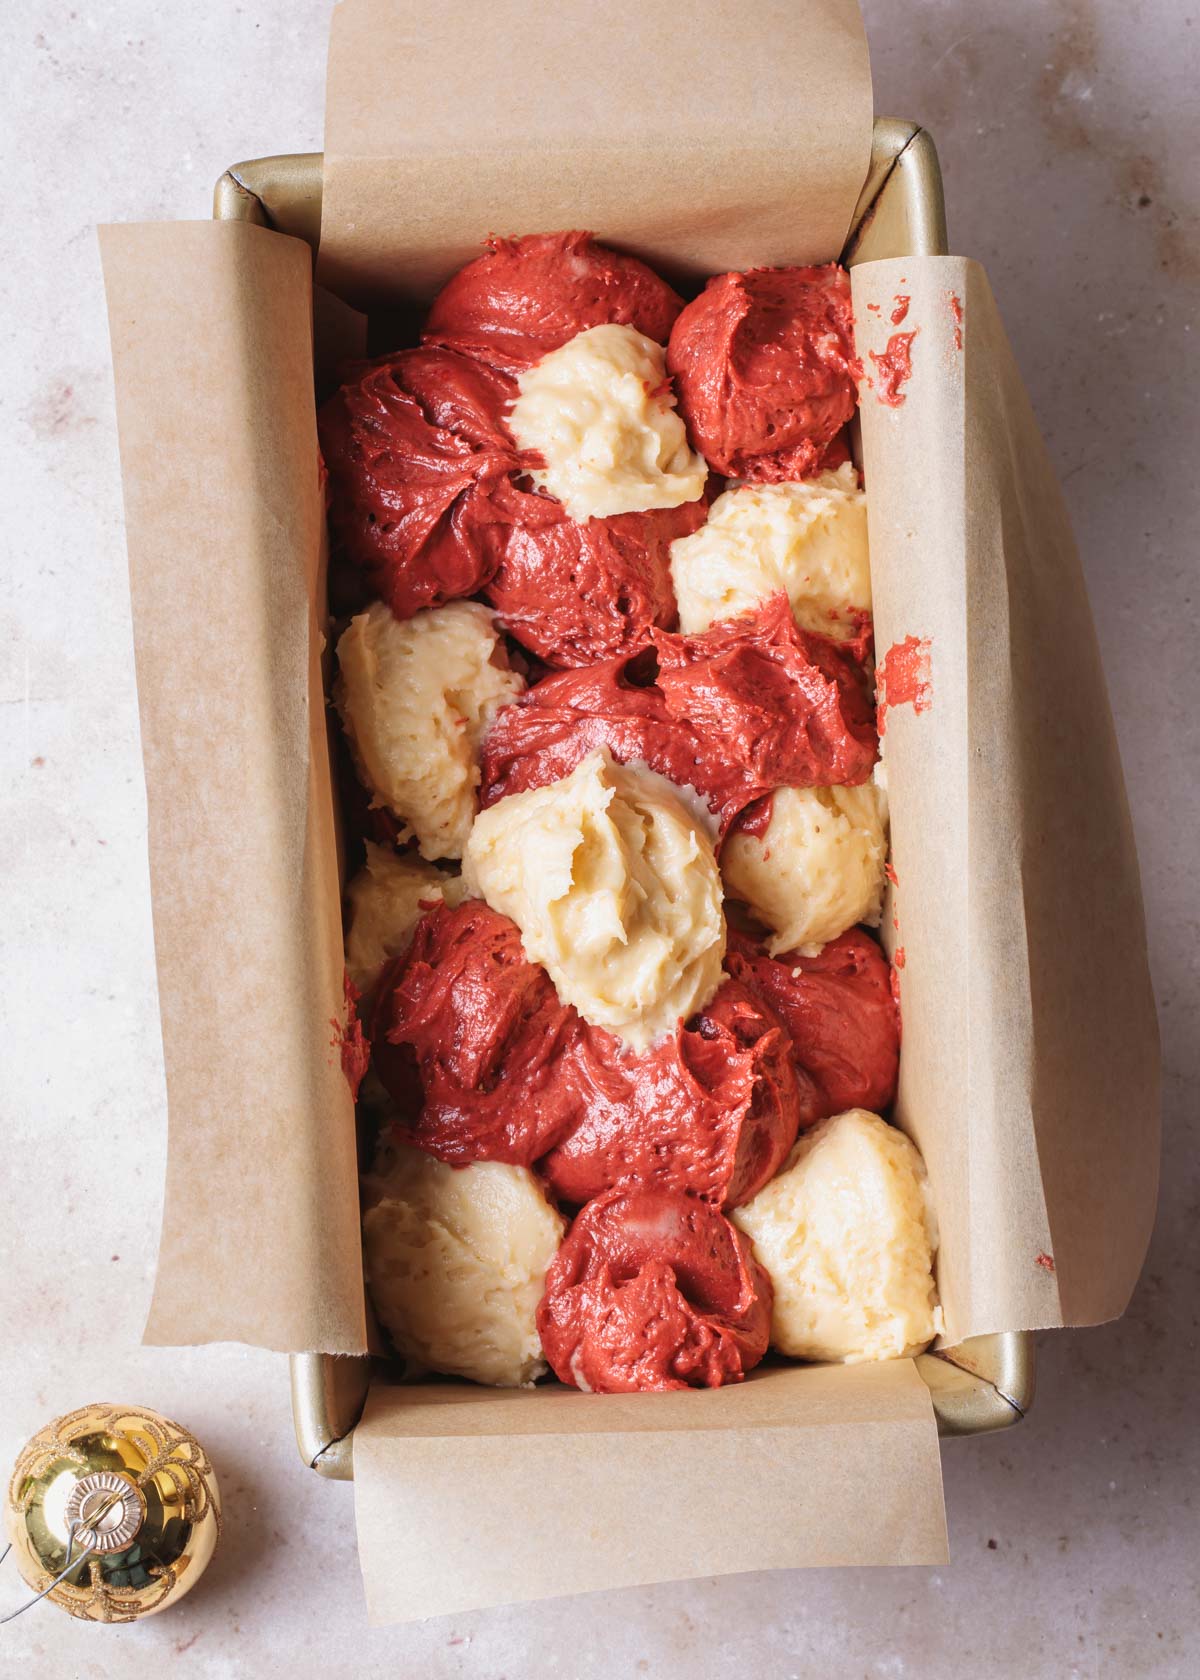
- Scoop the batter. Use cookie scoops to add spoonfuls of each batter to a lined loaf pan. Alternate the two different batters to create a checker-board pattern.
- Swirl it! Once all of the batter has been added, use the tip of a knife to swirl it around a few times.
- Bake!
- Frost it! Make the vanilla frosting and spread it all over the baked and cooled cake.
Tasting Notes of Red Velvet Pound Cake Recipe
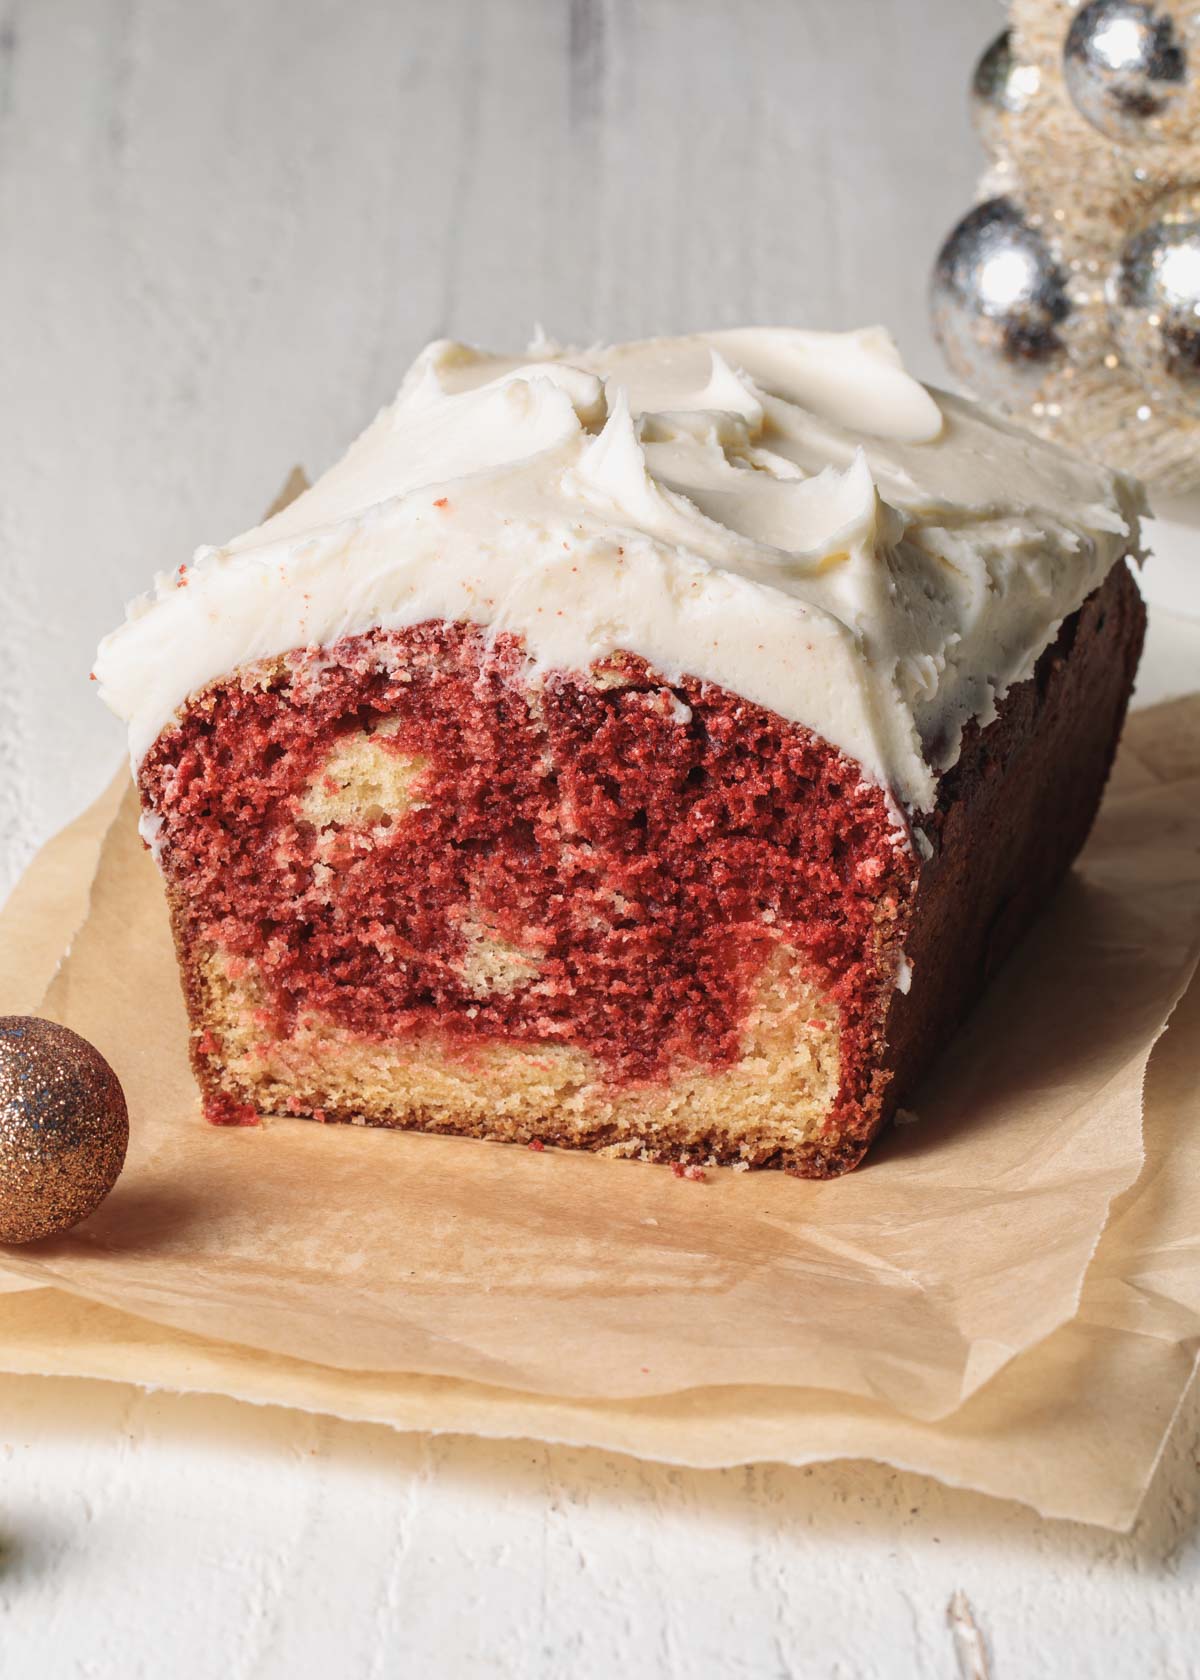
- Moist with a tight crumb. Both butter and oil keep the cake moist. This tight crumb is tender, not dense, and makes it easy to slice and serve.
- Mild cocoa flavor. The red velvet cake batter has a bit of unsweetened cocoa that give it both flavor and color
- Tangy sour cream. Traditionally, red velvet cake uses buttermilk to add a slight tang to the cake. Here, we use sour cream. It is similar in that it's acidic but has a higher milk fat percentage that keeps the pound cake super moist and tender.
- Sweet and creamy frosting. Most red velvet cakes have cream cheese frosting, but this whipped vanilla buttercream is sweet and creamy. It does not need to be refrigerated, which is an extra bonus if you want to give this cake as a gift for Christmas.
- Cute and gift-able. Loaf cakes are much easier to give as a gift than layer cakes. The frosting does not need to be refrigerated.
- The WOW effect inside. Tinting only half the batter with red food coloring creates this beautiful marble effect on each slice.
How it Works
Pound cake gets its name from a pound each of butter, eggs, flour, and sugar. It has evolved to include other ingredients like sour cream and baking powder to create a better texture.
Here, we start with the creaming method. During this step, we whip together softened butter and sugar. The air from the mixing forces the sugar to cut into the butter and creates tiny air pockets that make the cake light and fluffy.
The addition of sour cream adds fat and acidity. These two properties make the cake moist and tender. Traditionally, buttermilk performs this roll in a red velvet cake, but sour cream acts in a very similar way.
What you'll love about this marble cake is that is still used just one batter. After the dry ingredients are added, half the batter gets an addition of cocoa powder and red food coloring for the classic red velvet cake look.
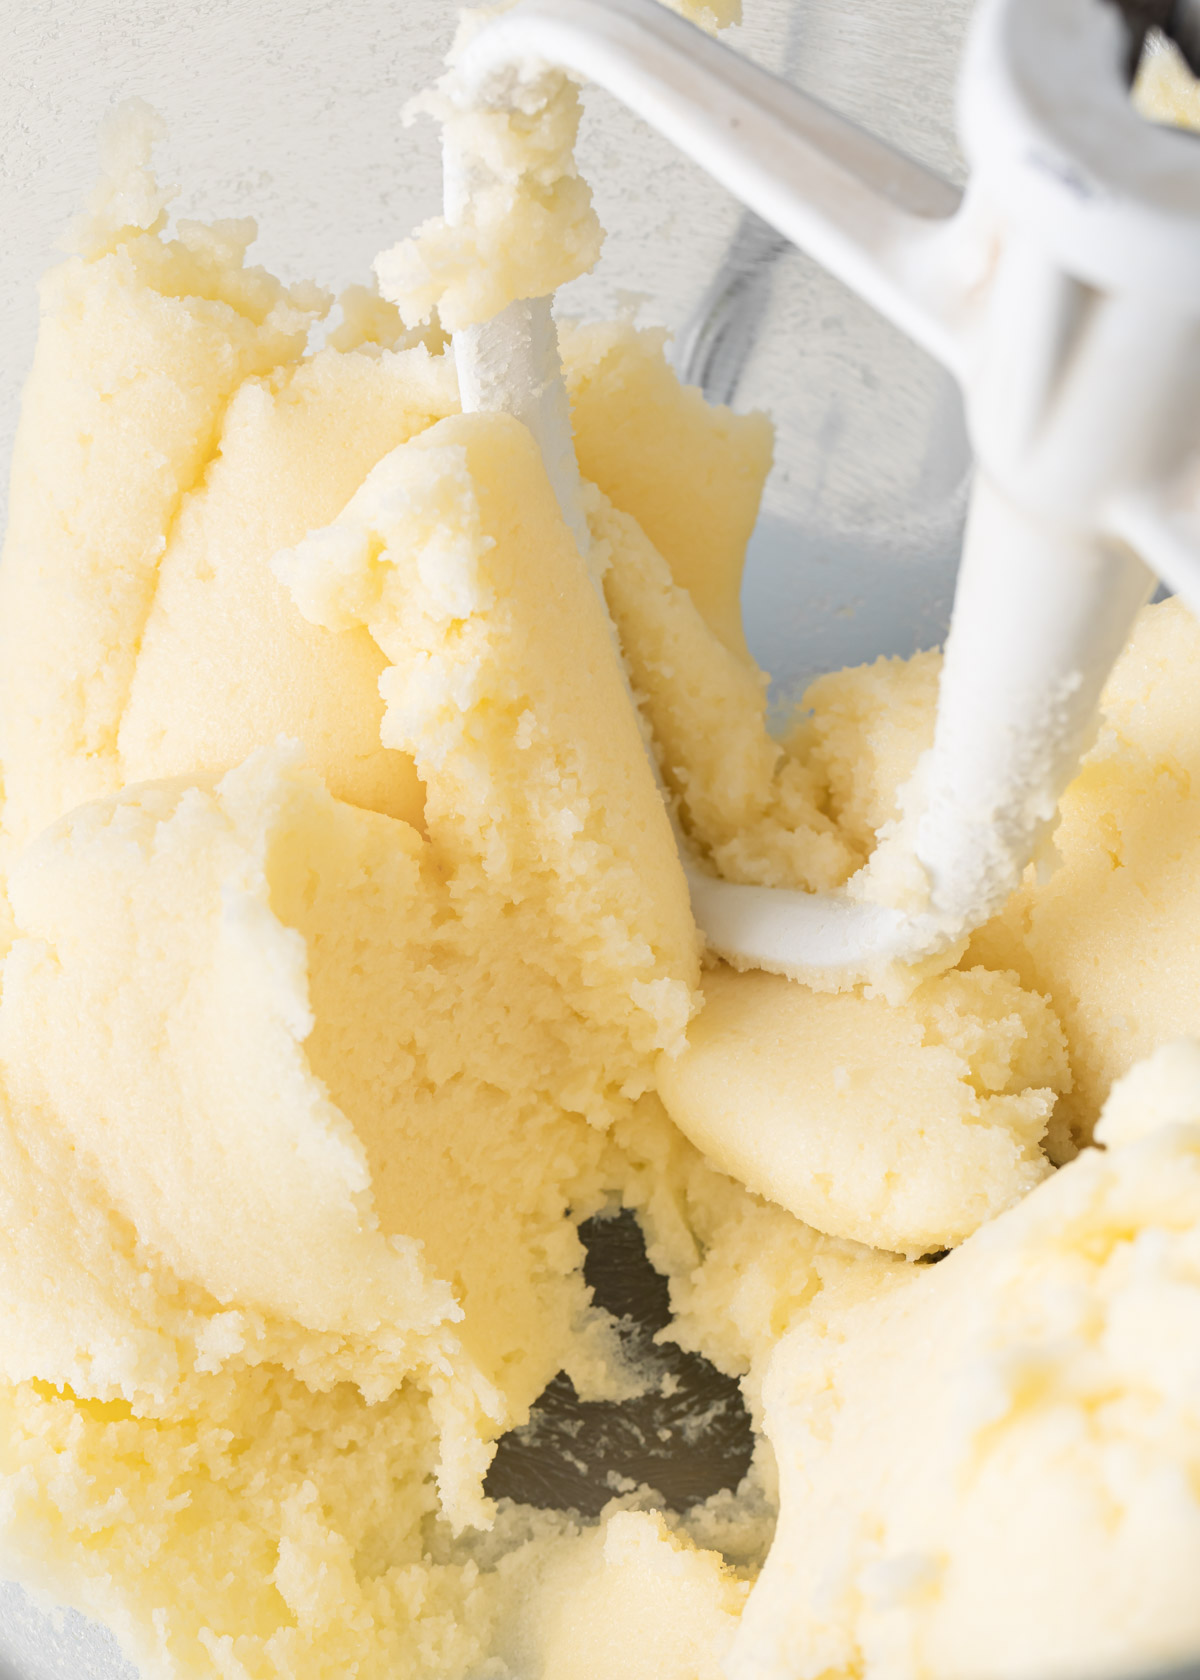
How to Use the Creaming Method
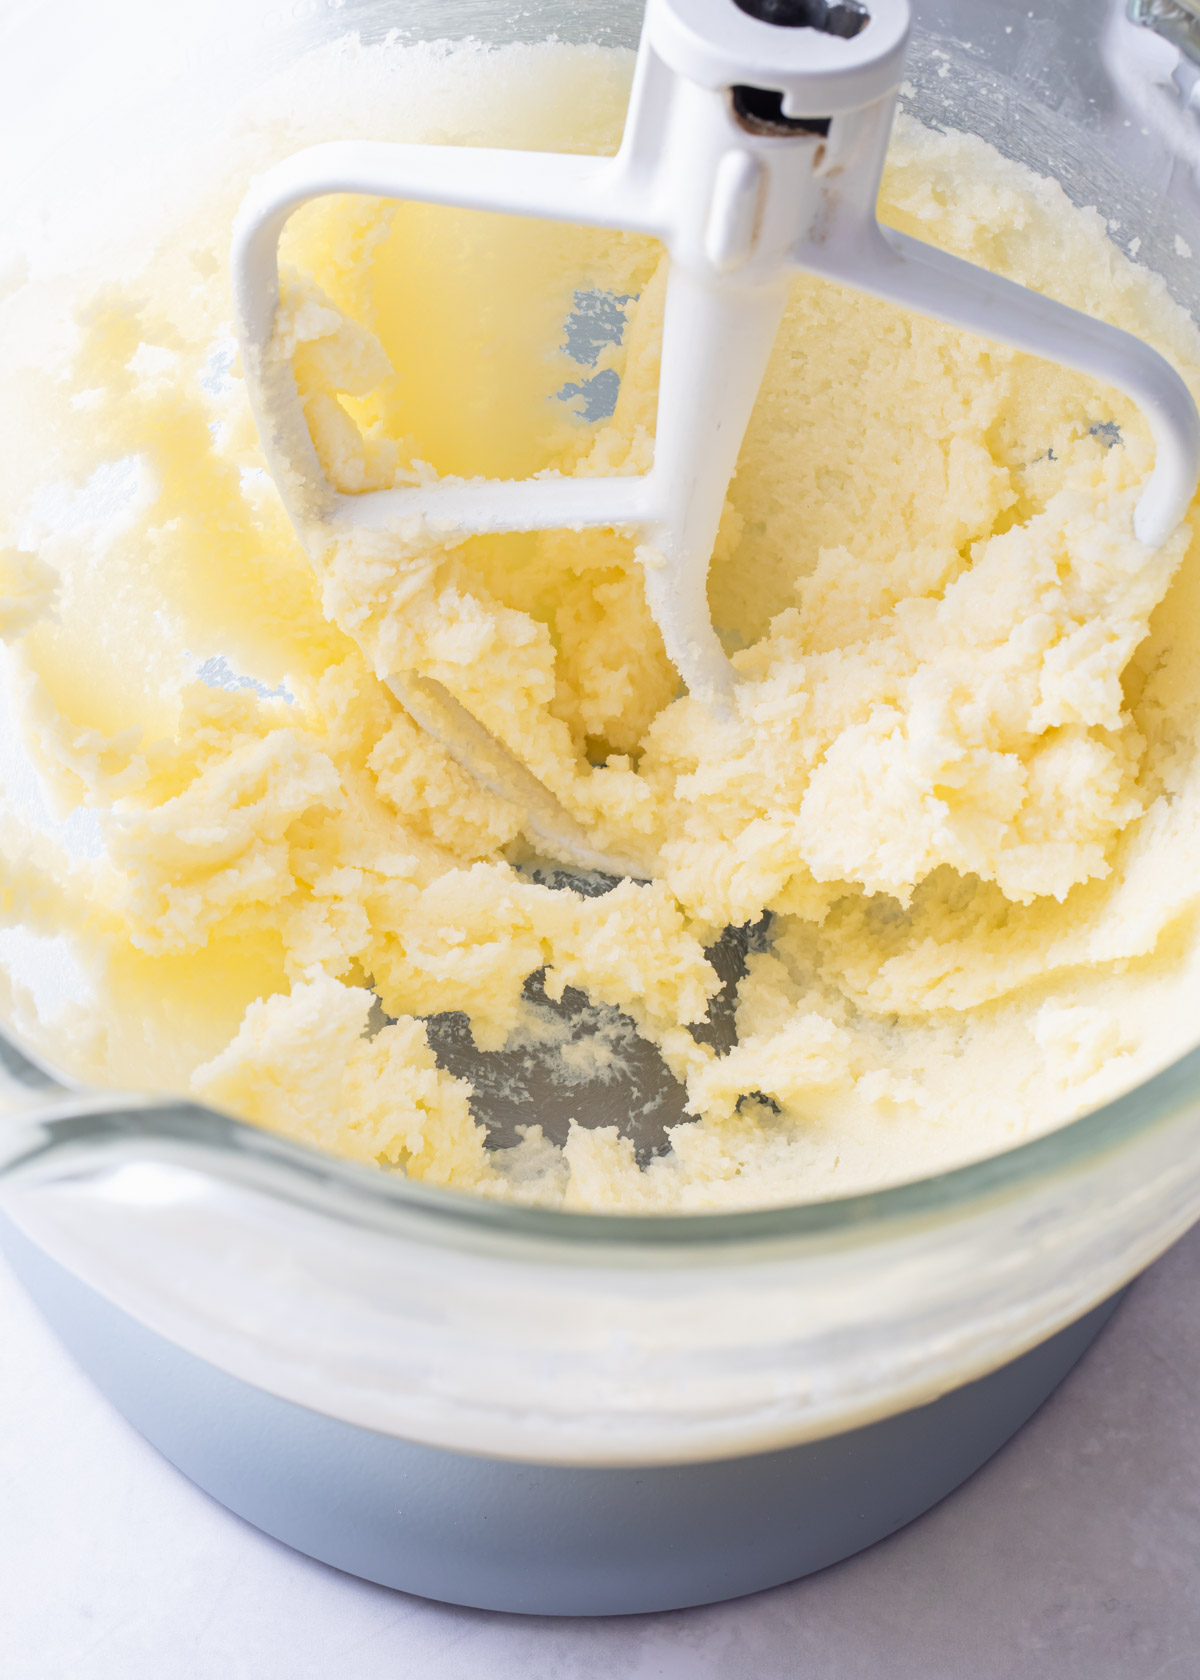
The most crucial step of the creaming method is mixing softened butter with granulated sugar until light and fluffy. Not sure what that means? Take a look:
Softened butter and granulated sugar mixed together on medium speed for about 2 minutes. The mixture is quite heavy and dense.
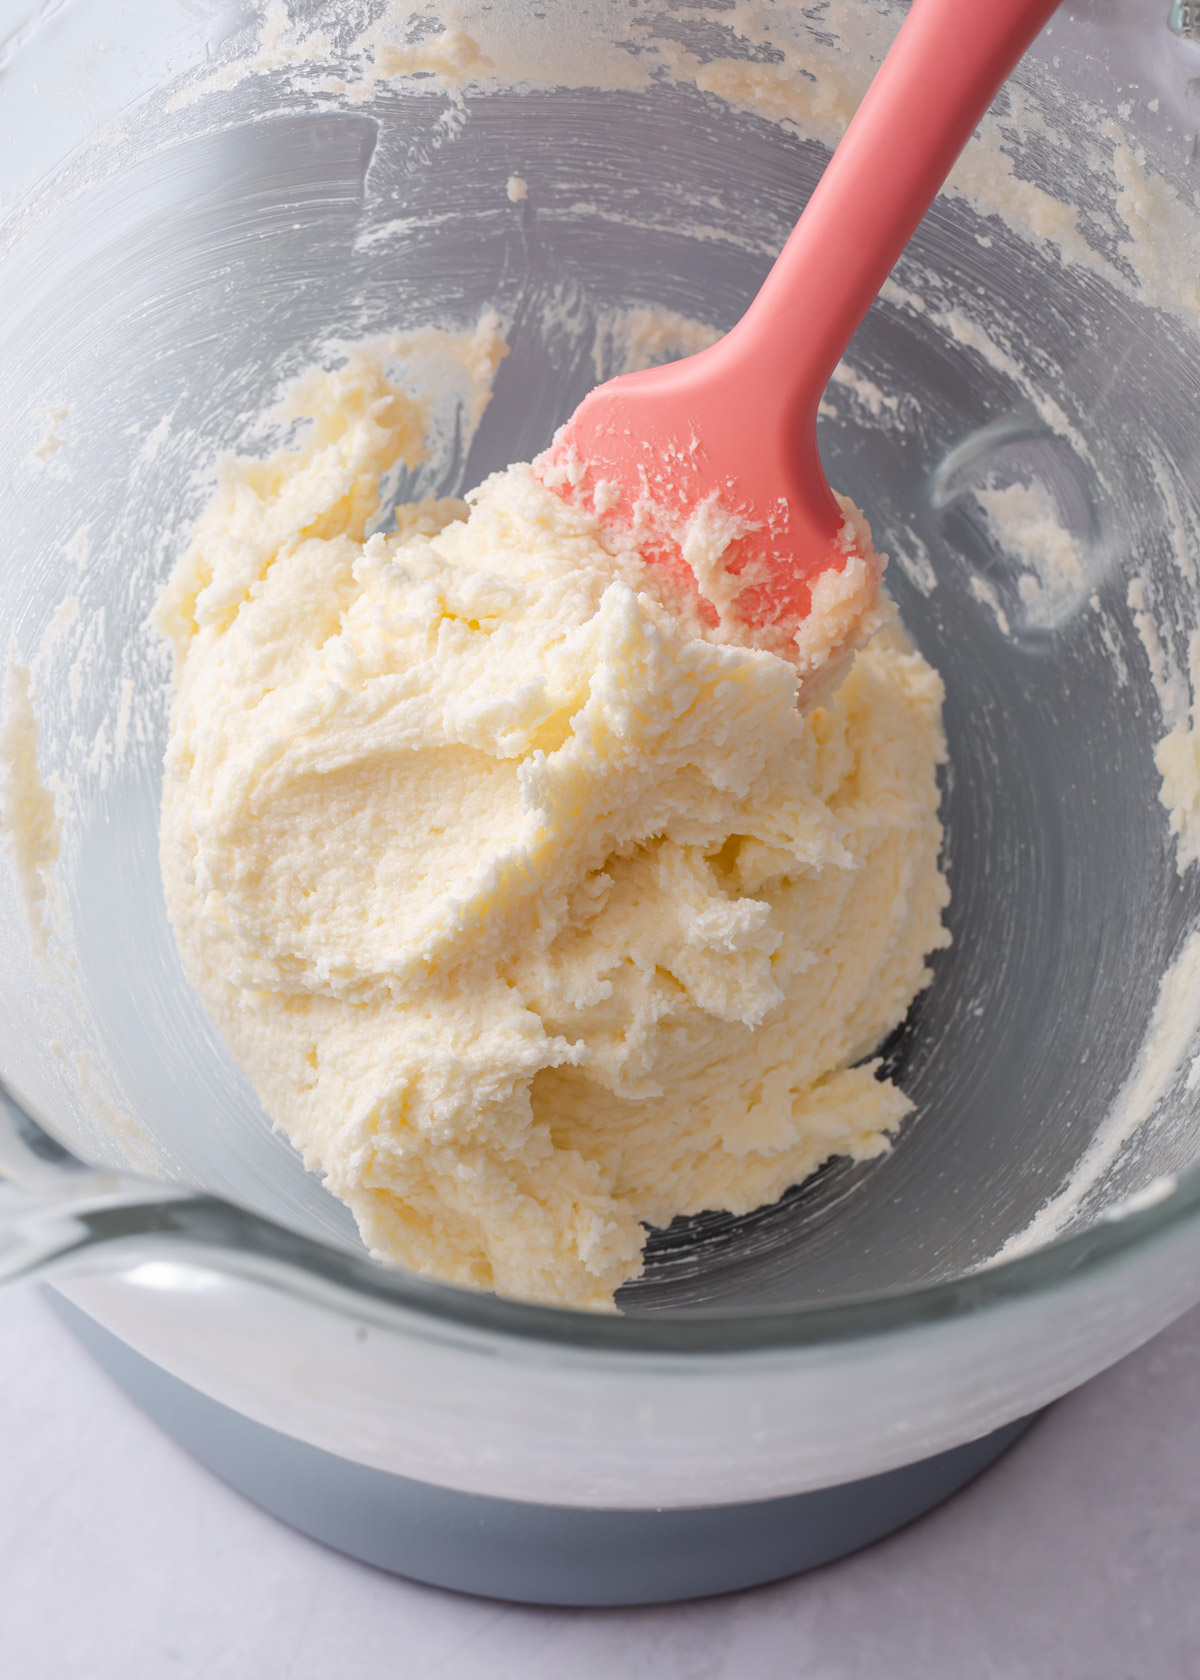
Softened butter and granulated sugar mixed together on medium speed for about 3 minutes. It is starting to lighten up.
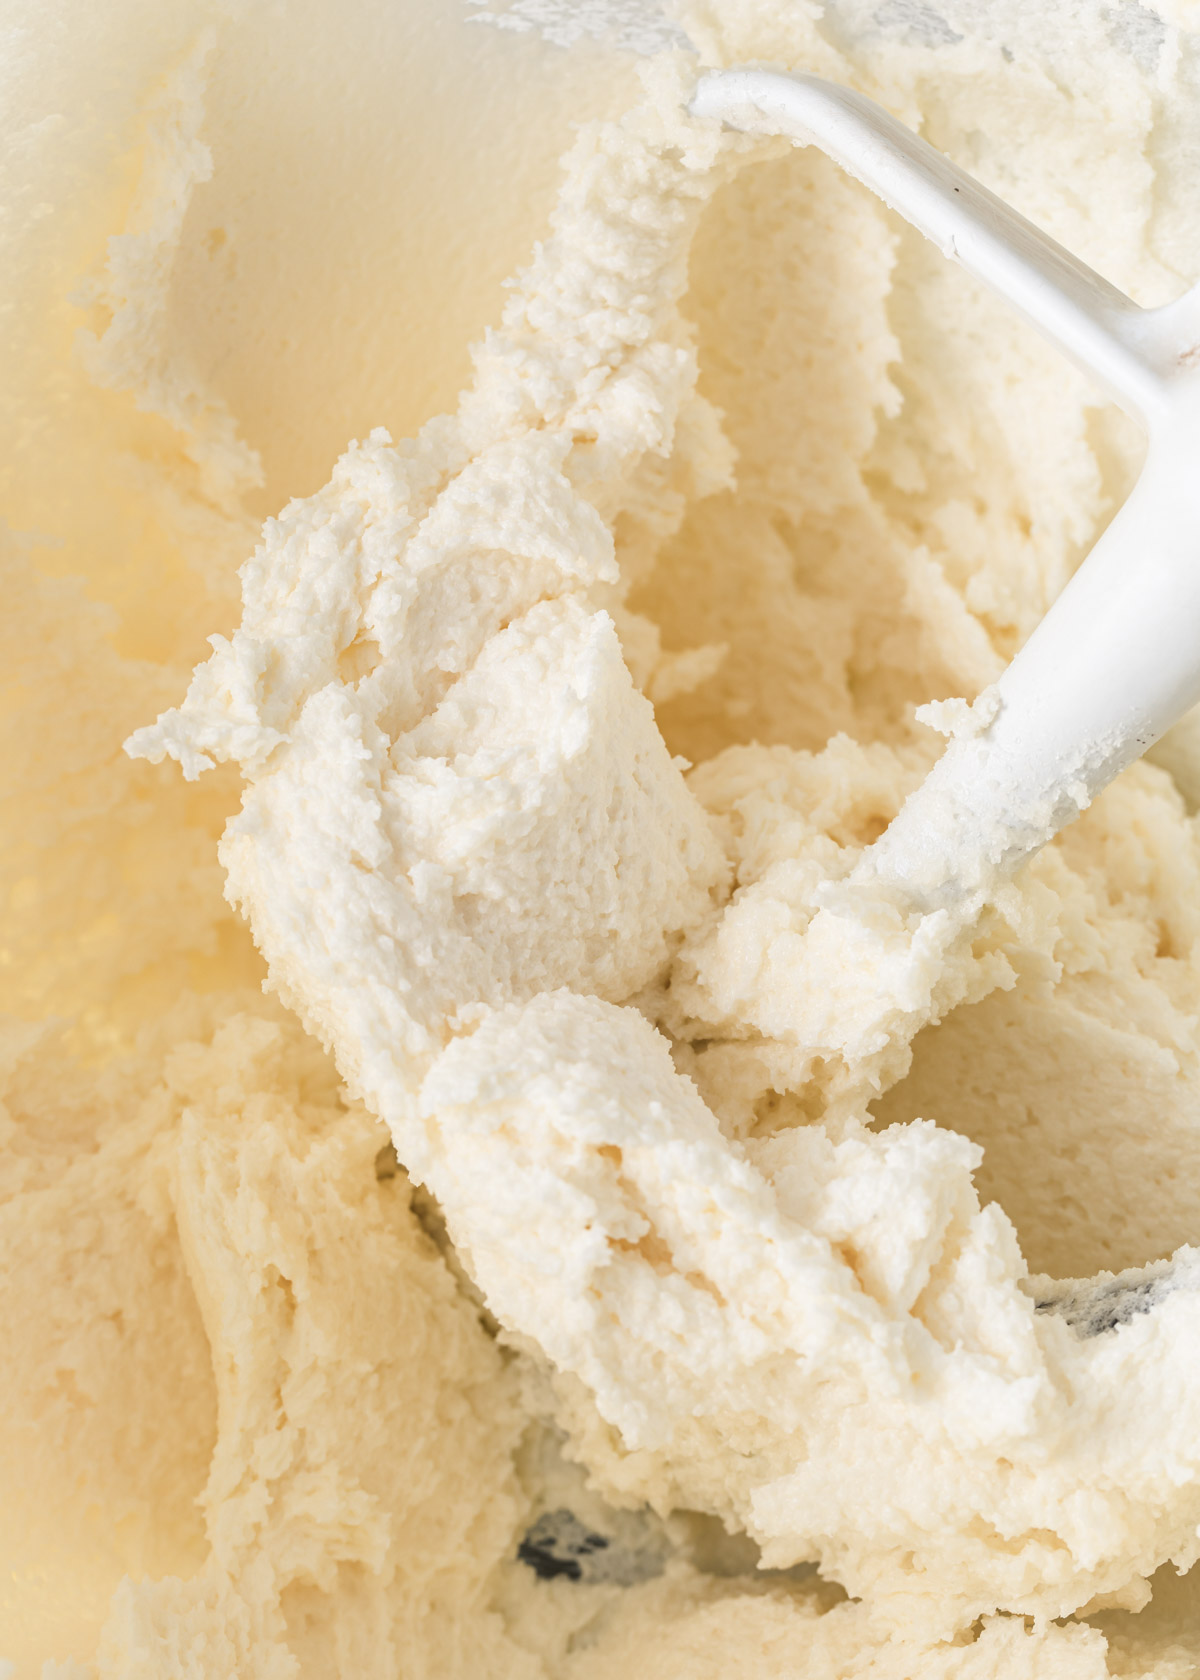
Softened butter and granulated sugar mixed together on medium speed for about 5 minutes. It is light, pale in color, and fluffy.
Properly creamed butter and sugar. It should hold its fluffy texture. If over-mixed, it will start to collapse.
Variations
Classic Marble Cake - Skip the red food coloring for a chocolate marble cake loaf.
Red Velvet Cream Cheese Cake - Ice the cake with classic Cream Cheese Frosting.
Make it Peppermint! Add swirls of peppermint frosting for an ultra festive cake.
Serving and Storage
Store the cake at room temperature for up to 2 days. Cover in a cake box or in an air-tight container.
In order to extend their freshness, transfer leftovers in an air-tight container to the refrigerator for up to 2 days.
The cooled and unfrosted cake may be wrapped in bundles of 4 or 6 and stored in the freezer for up to one month.
Likewise, wrap leftover buttercream in plastic and store in the freezer for up to 3 months. Be sure to thaw and rewhip the frosting before using.
Layer cakes, either from scratch or a box, are typically light and fluffy where pound cake has a more compact crumb. This is not to be confused with dense, as pound cakes should still be moist and tender.
Traditionally, the chemical reaction between the acidity of buttermilk and vinegar combined with cocoa powder gives the cake a red hue. Often red food coloring is added to amplify the color.

Recipe
Red Velvet Pound Cake
Ingredients
For the Red Velvet Cake
- 2 cups (250g) all-purpose flour
- ½ teaspoon baking soda
- ½ teaspoon baking powder
- ½ teaspoon salt
- ½ cup (113g) unsalted butter softened
- 1 cup (200g) granulated sugar
- 2 eggs
- 3 tablespoon neutral oil
- ⅔ cup (160ml) sour cream
- 1 tablespoon cocoa powder
- red food coloring
For the Vanilla Frosting
- ½ cup (113g) unsalted butter softened
- 2 cups (260g) powdered sugar
- 2 tablespoon milk
- 2 tsp vanilla extract
Instructions
To Make the Cake
- Preheat the oven to 350°F. Line a loaf pan with parchment paper and set aside.
- Sift together the all-purpose flour, baking soda, baking powder and salt. Set aside.
- In the bowl of an electric mixer, cream together the butter and sugar until light and fluffy. Add the eggs – one at a time, followed by the oil and mix to combined Stop the mixer and scrape down the bowl.
- With the mixer on low, add in half of the dry ingredients followed by the sour cream. Mix until combined. Stop the mixer and add the second half of the dry ingredients and stir together by hand until smooth.
- Divide the batter in half and place the second portion in a mixing bowl. Set aside. Add the cocoa powder and red food coloring to half of the batter and mix to combine.
- Use cookie scoops to add spoonfuls of each batter to a lined loaf pan. Alternate the two different batters to create a checker-board pattern. Once all of the batter has been added, use the tip of a knife to swirl it around a few times.
- Bake the cake for 55 to 60 minutes or until a toothpick inserted into the center of the cake comes out clean or with a few moist crumbs.
- Cool the cake on a wire rack for at least 30 minute before adding the frosting.
To Make the Frosting
- Using a stand (or hand) mixer fitted with the paddle attachment, beat butter on medium-low speed until smooth and creamy, 1 minute.
- Turn the mixer off and add the powdered sugar, 2 tablespoons of milk, vanilla, and salt. Begin mixing on low speed until the ingredients come together - scraping the bowl occasionally.
- Turn up the speed and mix at medium-high speed for 3 minutes, until the buttercream is light, airy, and nearly white. If needed, add the additional sugar or cream until desired consistency is achieved. The buttercream should spread smoothly without tearing the crumb of the cake but thick enough that it holds shape when piped and spread between the layers.
georgie r.
Went a little wild with the marbling, but the taste was delicious!