Last updated on November 10th, 2024 at 04:44 pm
Gear up for the fall baking season by learning how to make pie dough by hand. Want tender, flaky crusts? I got you. Don’t have a food processor (or despise cleaning it as much as I do)? No problem!
Unless you are making dozens of pies or are working in a commercial kitchen, then making pie dough by hand is a rewarding part of the process. Not only do you have more control over your ingredients, the task is simple and quite therapeutic.
Here is everything you need to know about how to make pie dough by hand:

Quick Steps for Making Pie Dough by Hand
- Stir together the dry ingredients in a large bowl
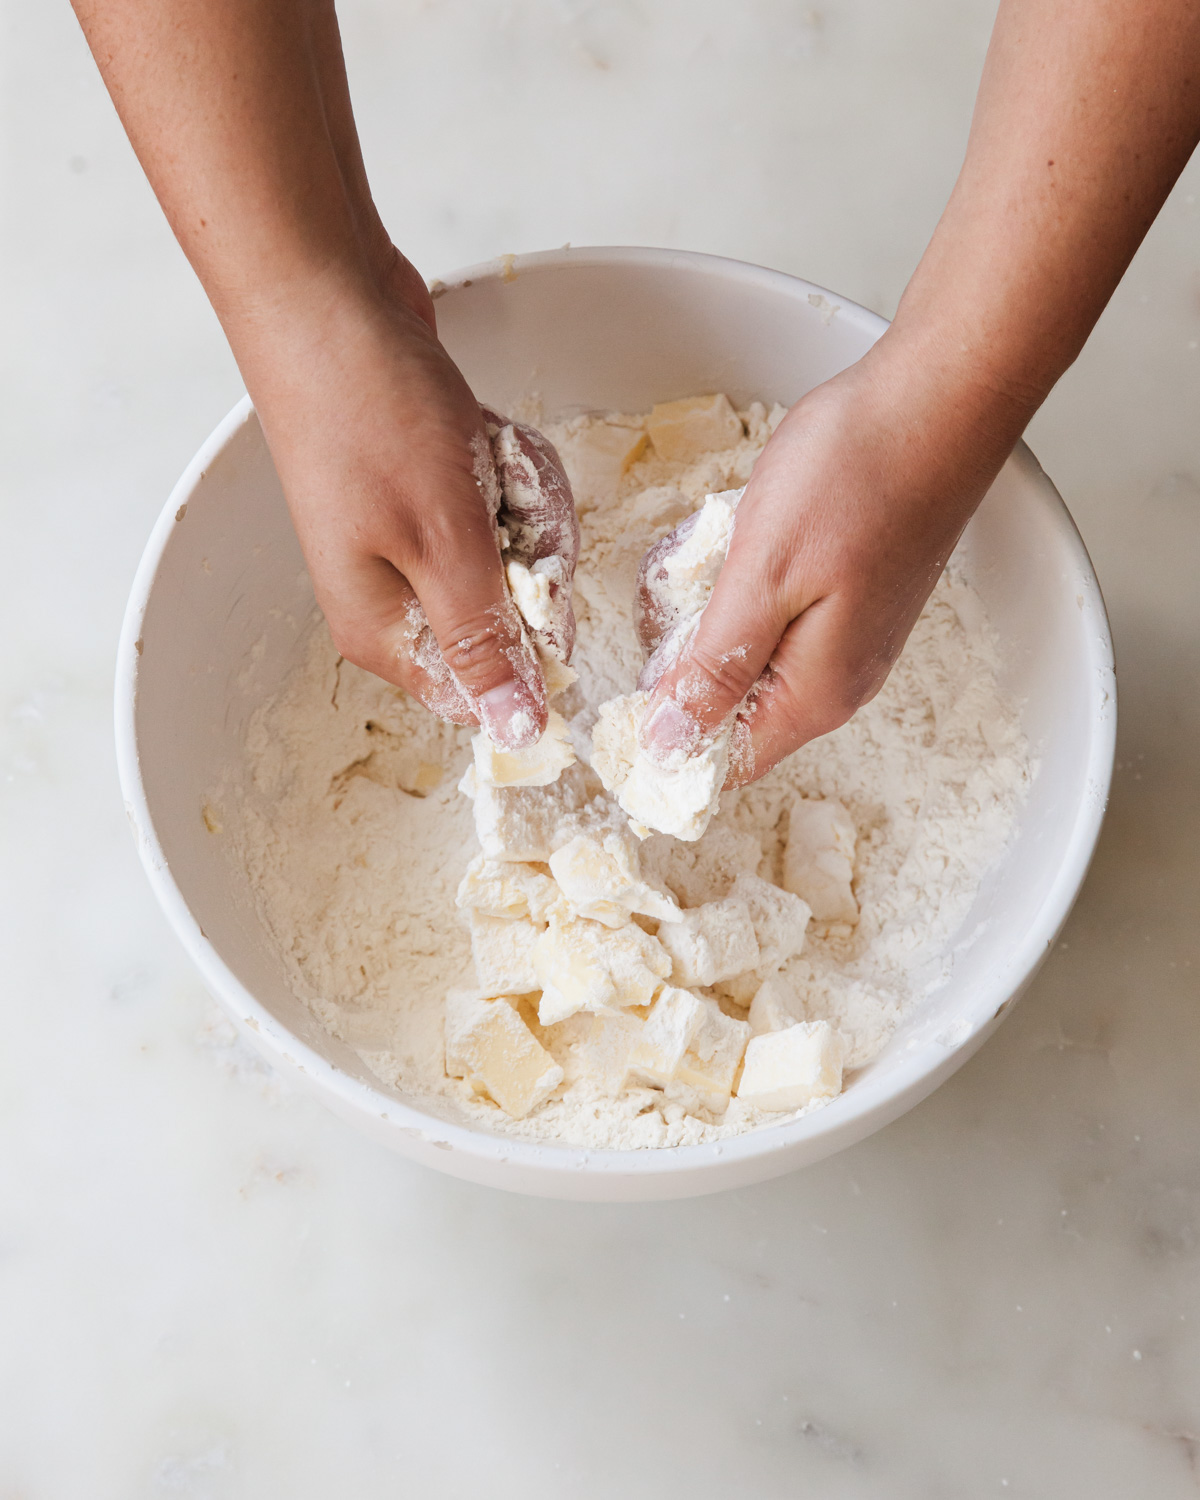
- Add in the butter and begin cutting it in. Use your fingertips to smear the butter into pieces and coat with the flour until the butter pieces range from the size of peas to walnuts
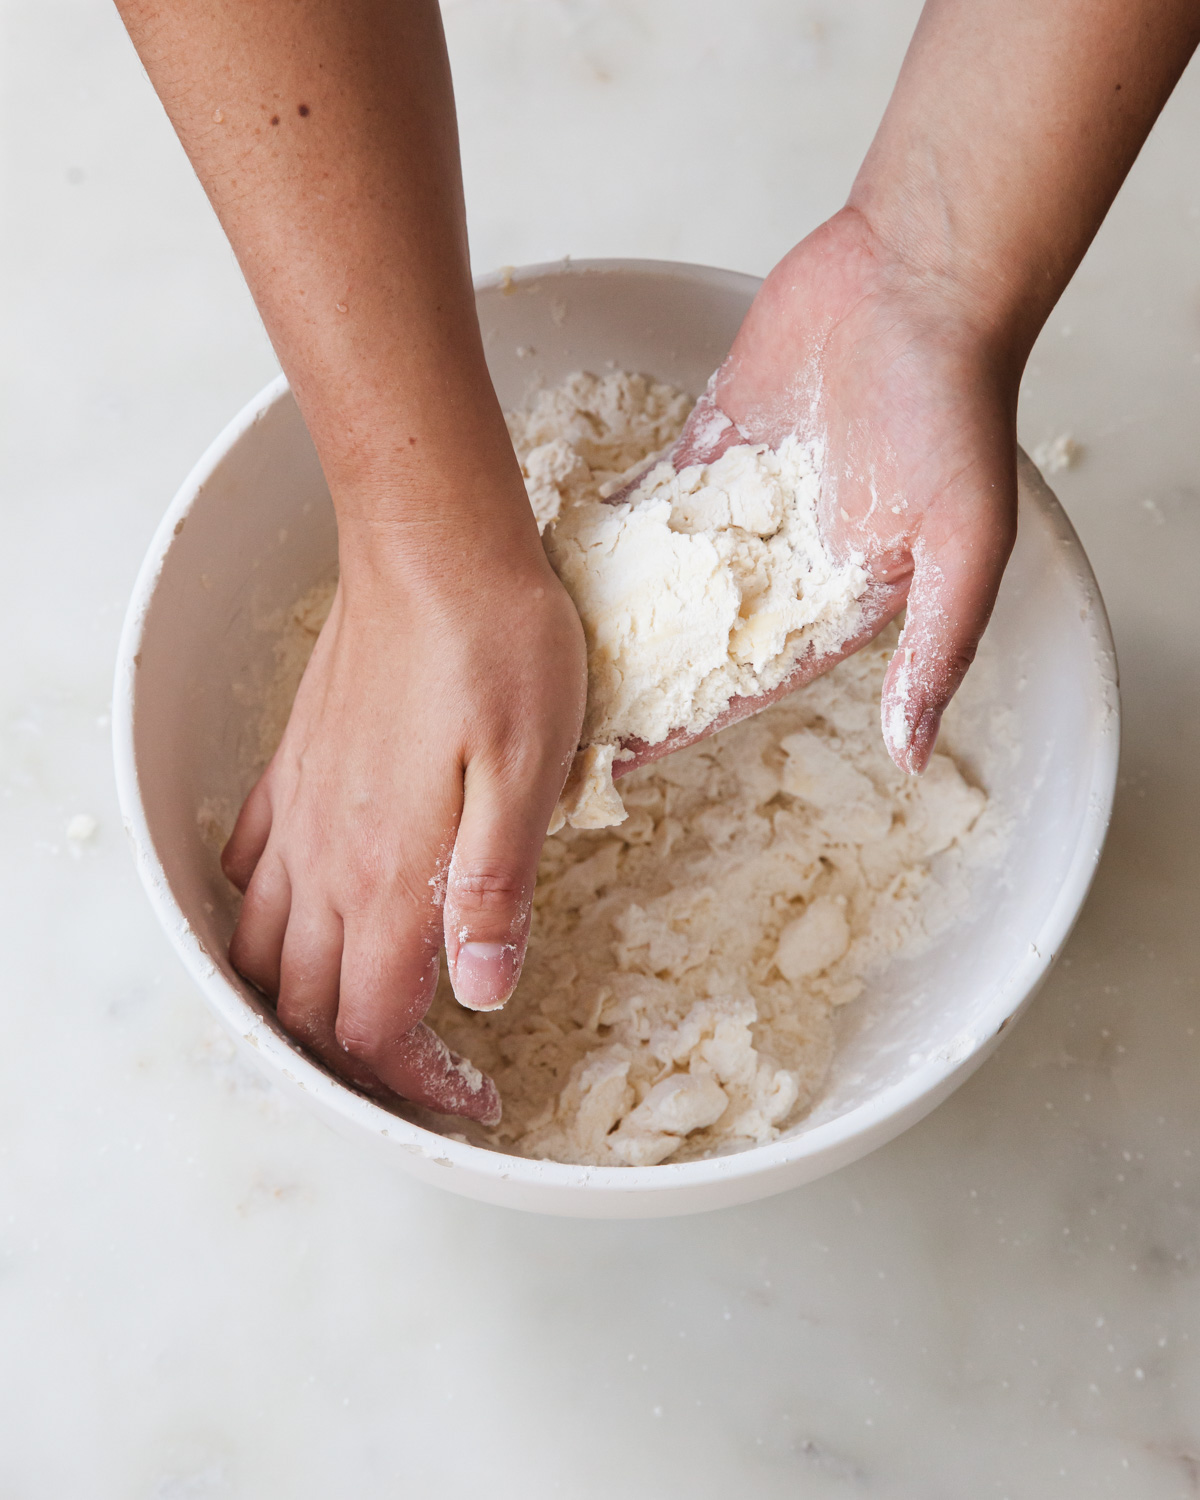
- Smear the flour-coated butter between the palms of your hands. This creates sheets of butter that will help create flakes.
- Add water
- Toss with fingers to evenly hydrate dough
- Gently knead and fold the dough
- Chill
Visual Guide for Making Pie Dough by Hand
First, fill a cup halfway with ice and top with water. Set aside.
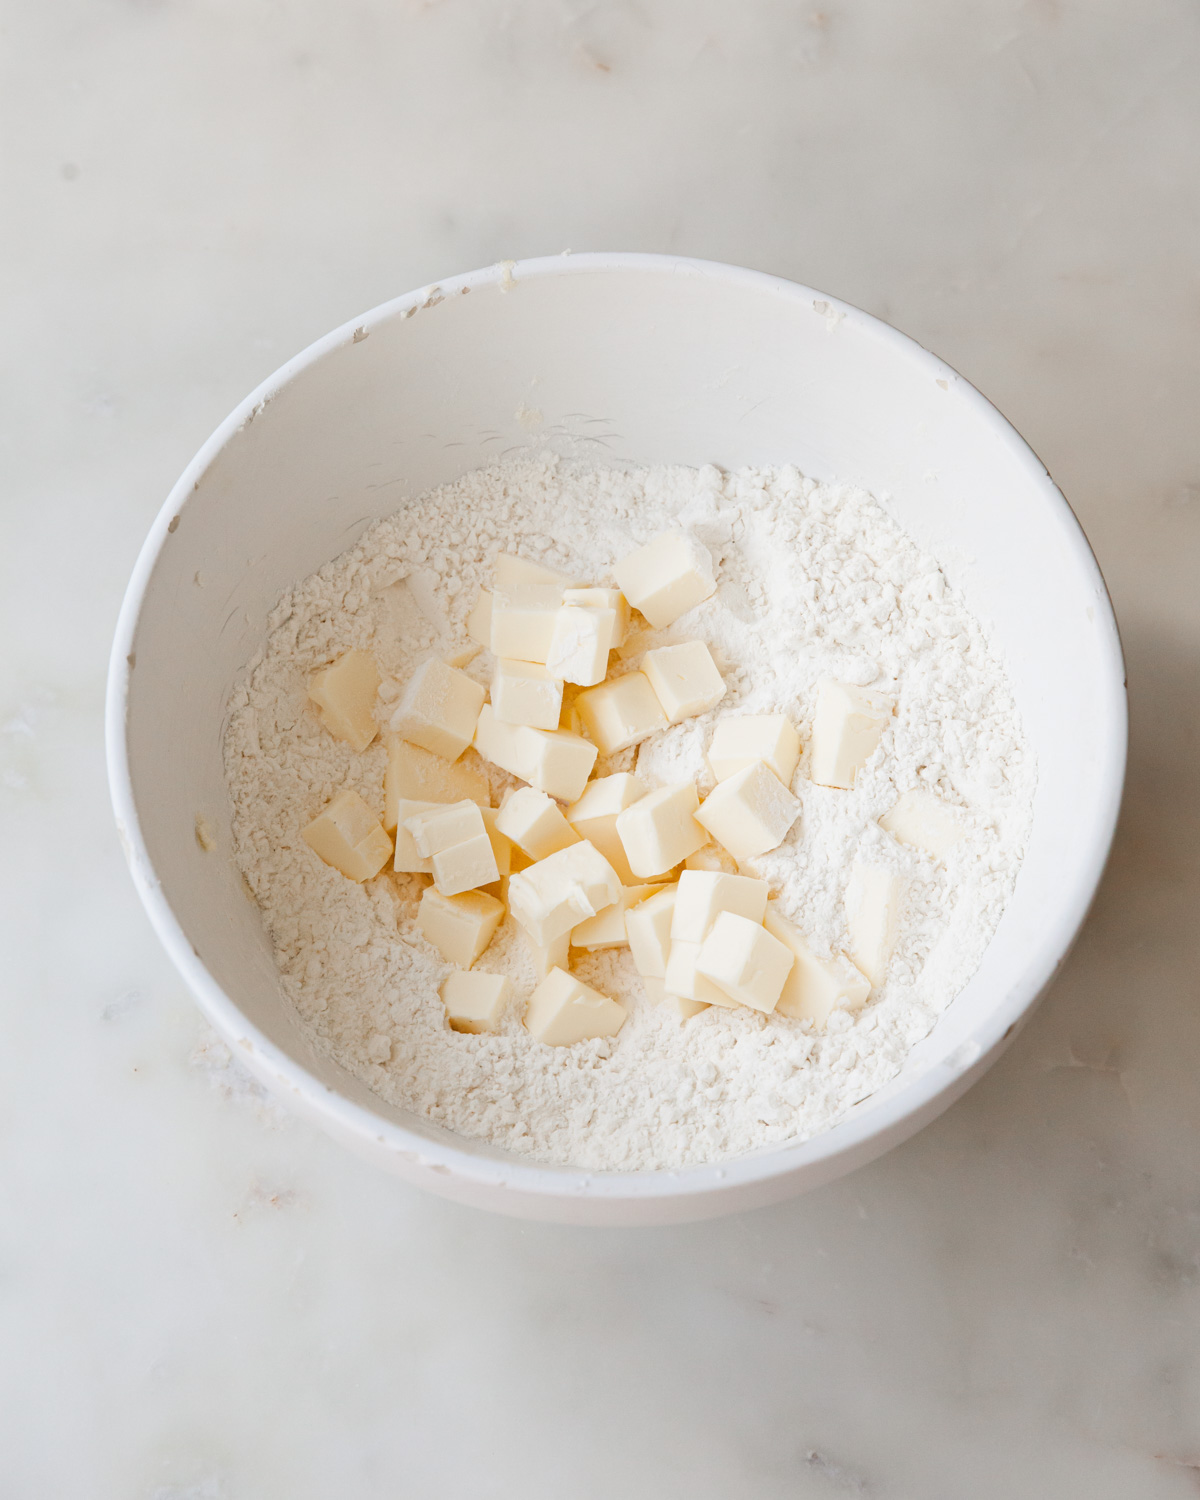
Weigh your dry ingredients in a medium mixing bowl and quickly stir to combine.
Toss cold, cubed butter into the bowl. Begin cutting the butter into the flour by rubbing bits of the cold butter between your thumbs and fingers. Stop once you have irregular shapes of flour-coated butter - ranging in size from that of a walnut to a peanut.
Dip your hands into the bowl and smear some of the flour-coated butter between the palms of your hands to create sheets of butter. Don’t over think this process or overwork the dough. A few times will do.

Adding the Water
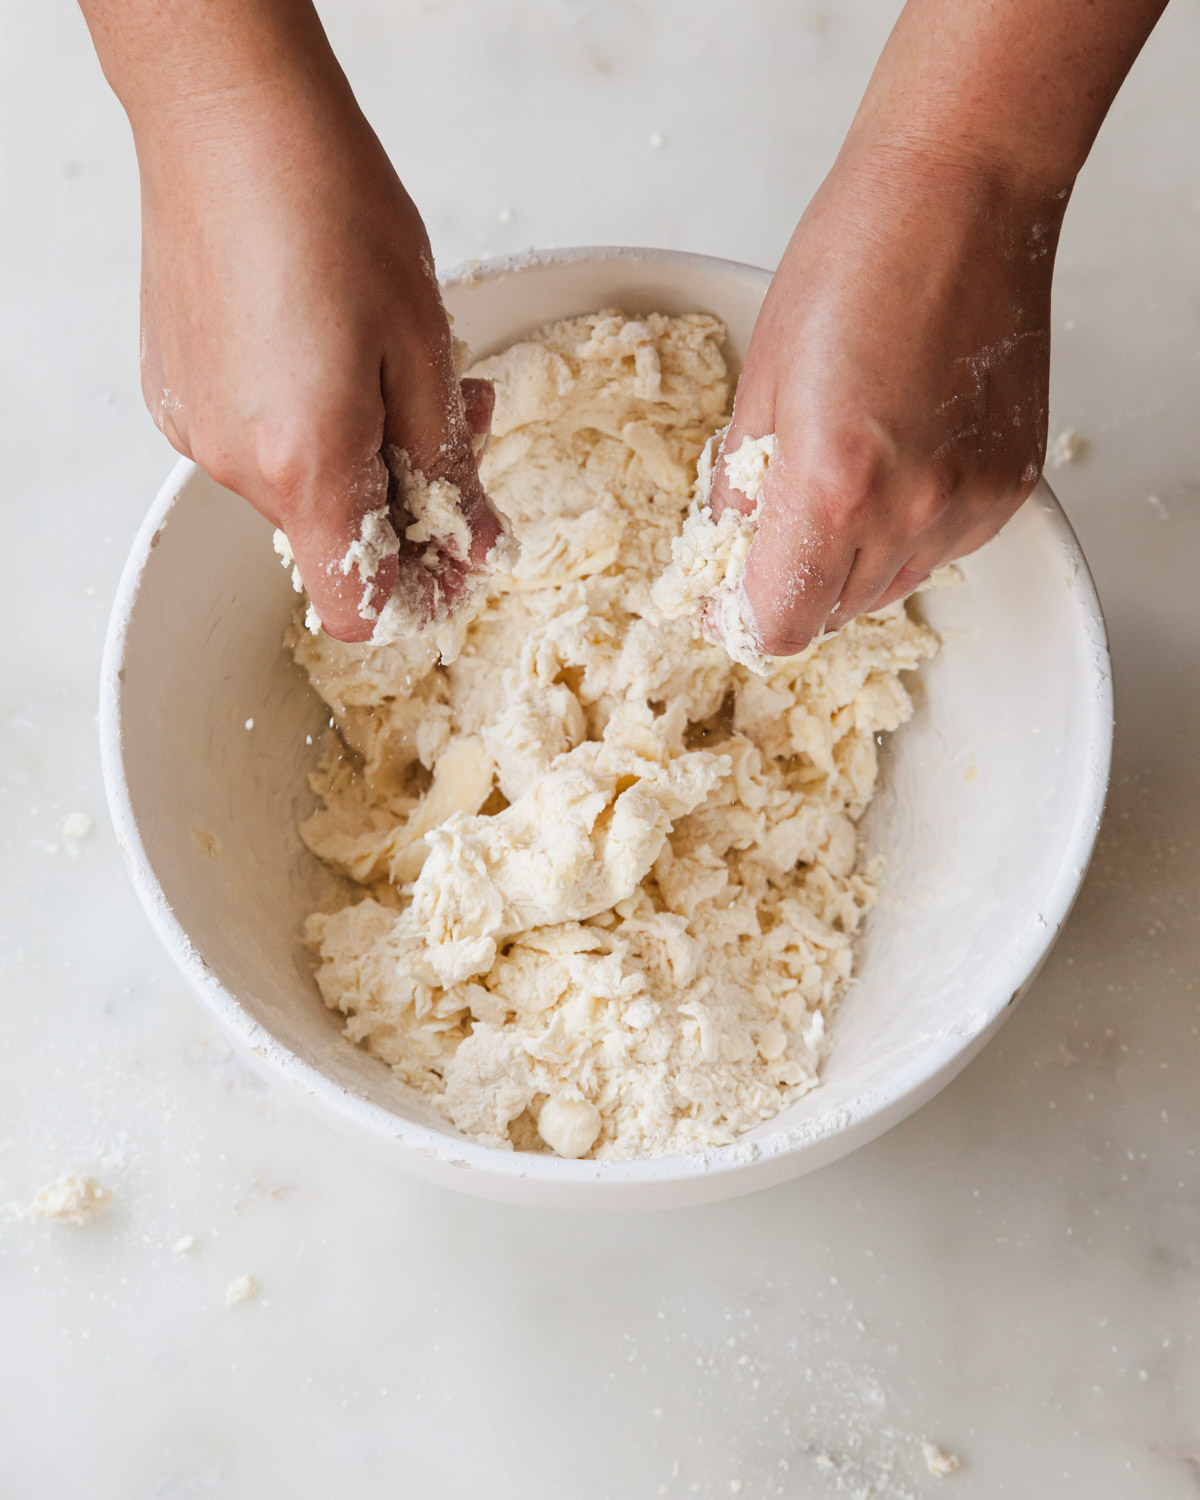
Next, create a well in the center of the bowl. Taking care not to add in pieces of ice, place 4 tablespoons of ice water into the center. Sprinkle 2 more tablespoons around the edges of the mixture.
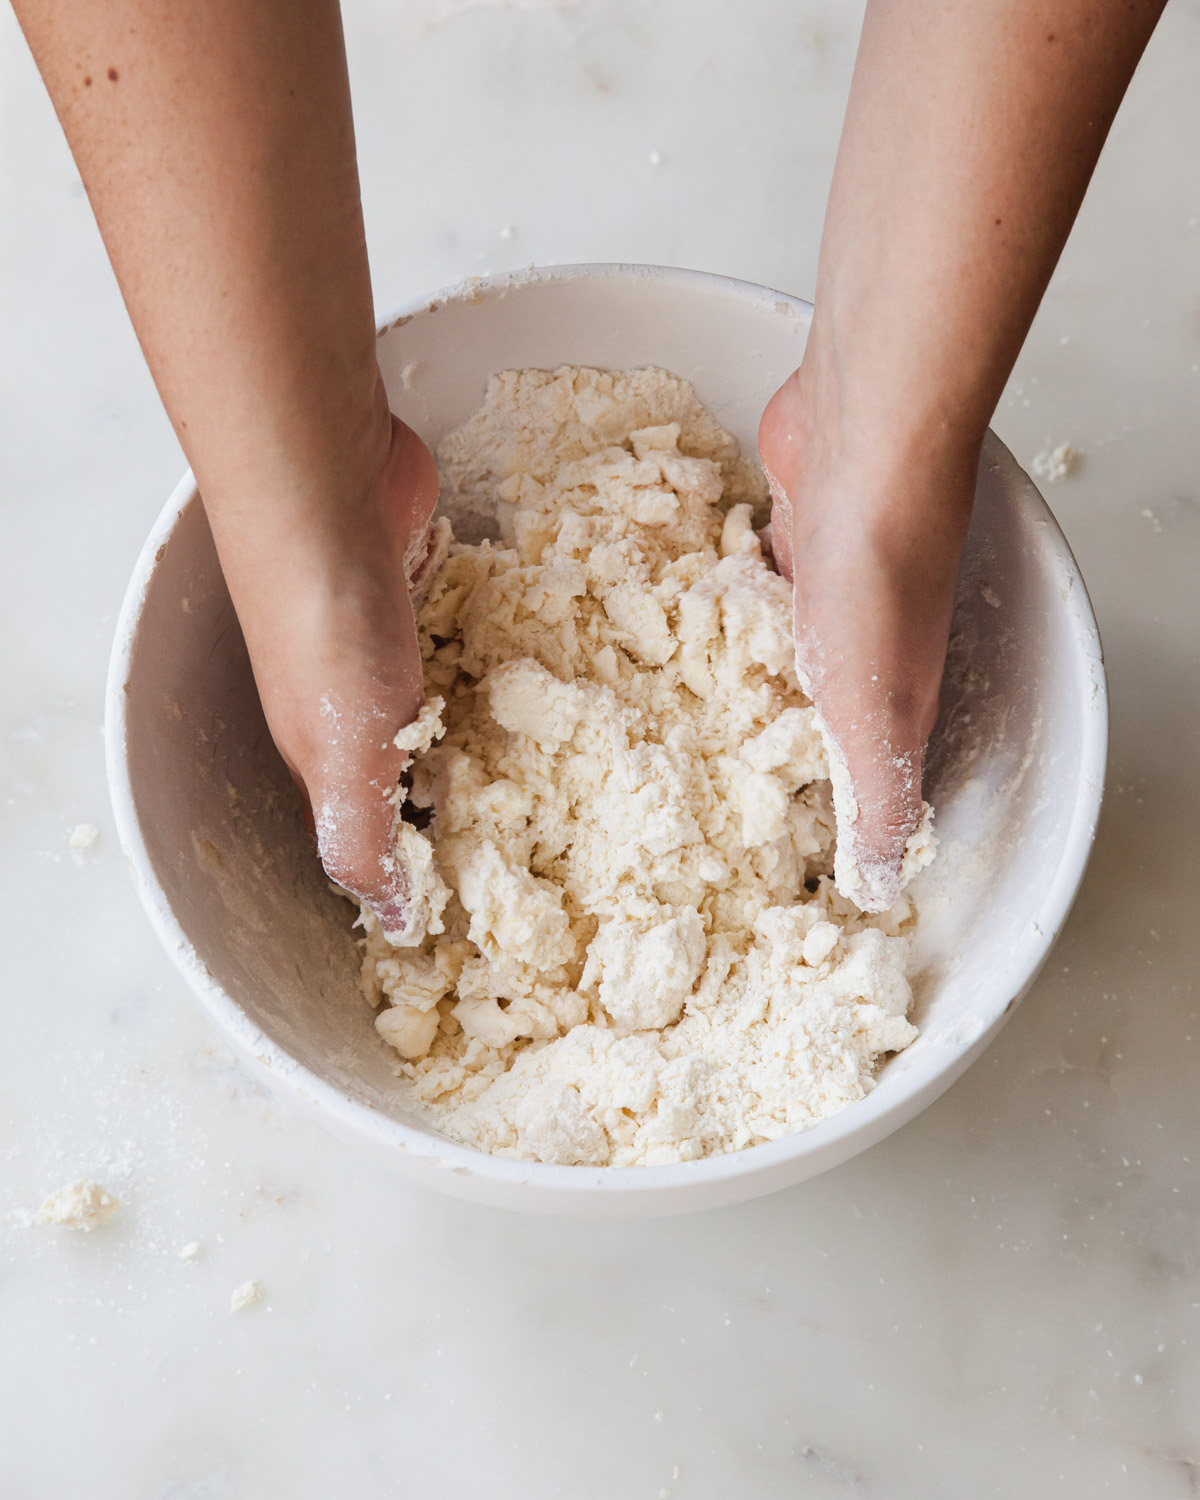
Immediately dip your hands into the bottom of the bowl and begin tossing the flour mixture with the water.
Add an additional 1 to 2 tablespoons of water and make sure any dry bits at the bottom of the bowl begin to incorporate. Give the dough a good squeeze; if most of it sticks together, then stop. Do not over-mix or over-hydrate (er on the side of under-mixing, as the dough will continue to be worked in the next step).
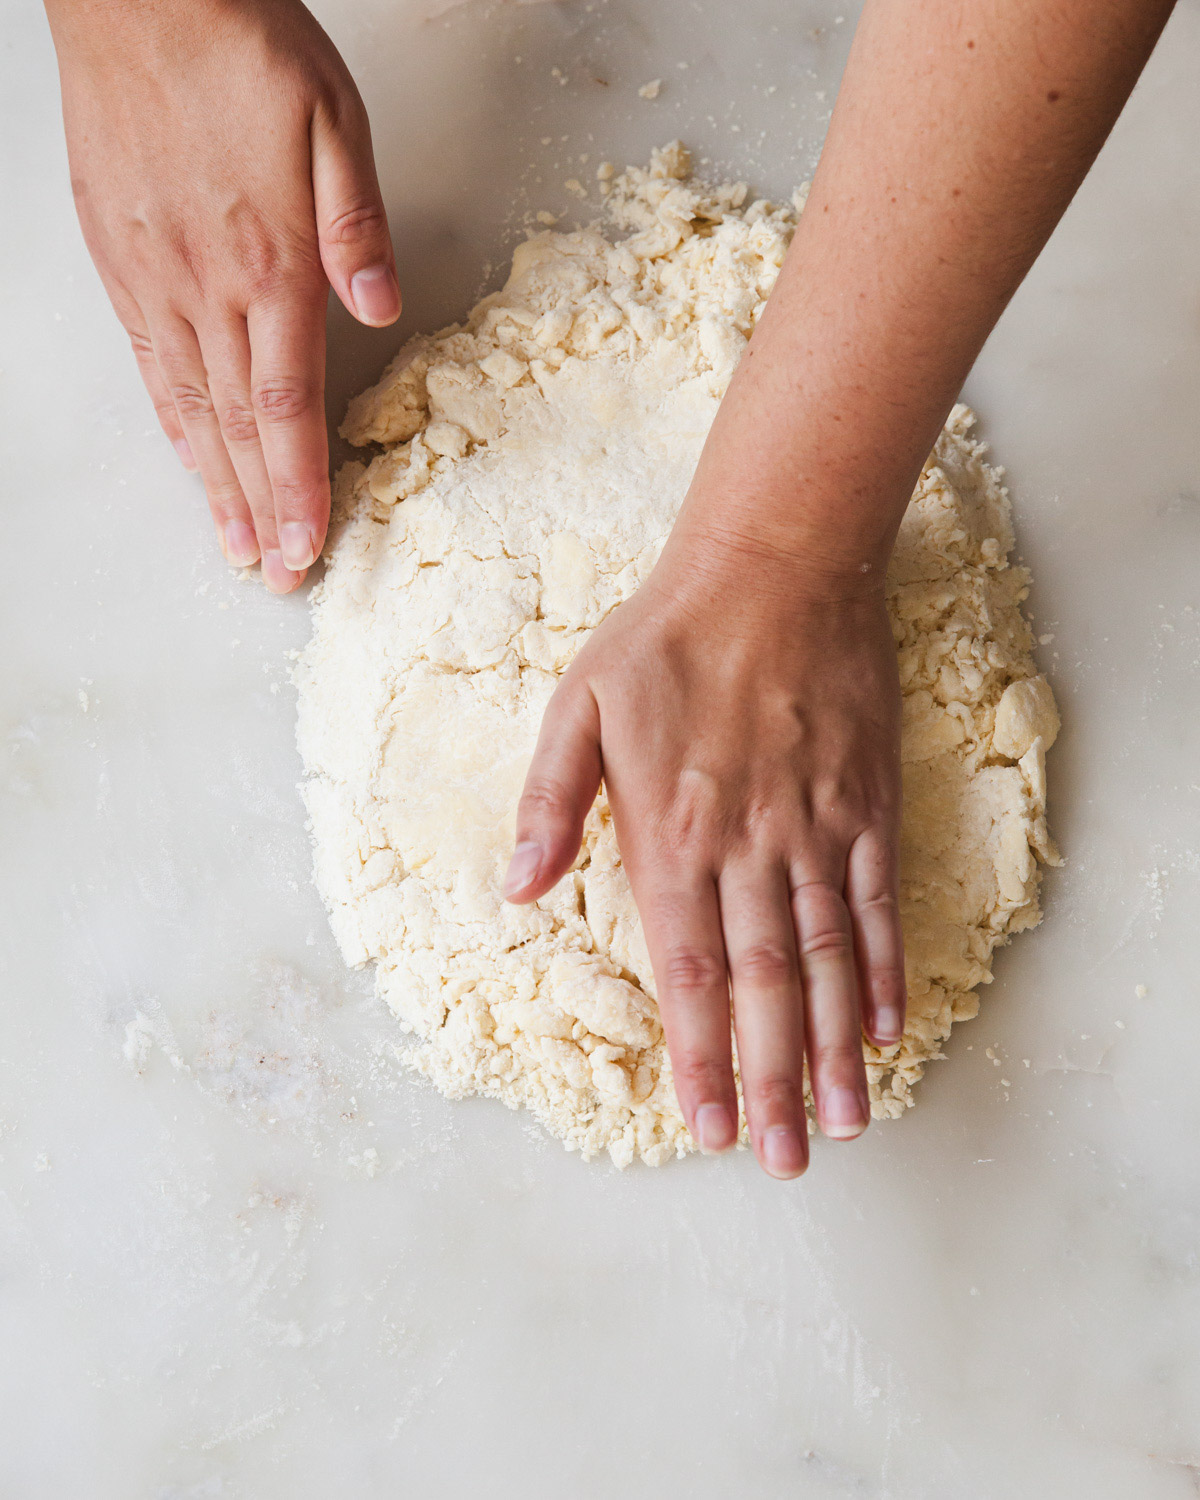
Tip the mixture onto a clean work surface. Pat down the dough into a rectangle with the palms of your hands. It is okay if there are some dry or unincorporated pieces at this time.
Slide a bench scraper under the top edge of the dough and fold the top third up and over to the center. Repeat with the bottom third, like folding a letter.
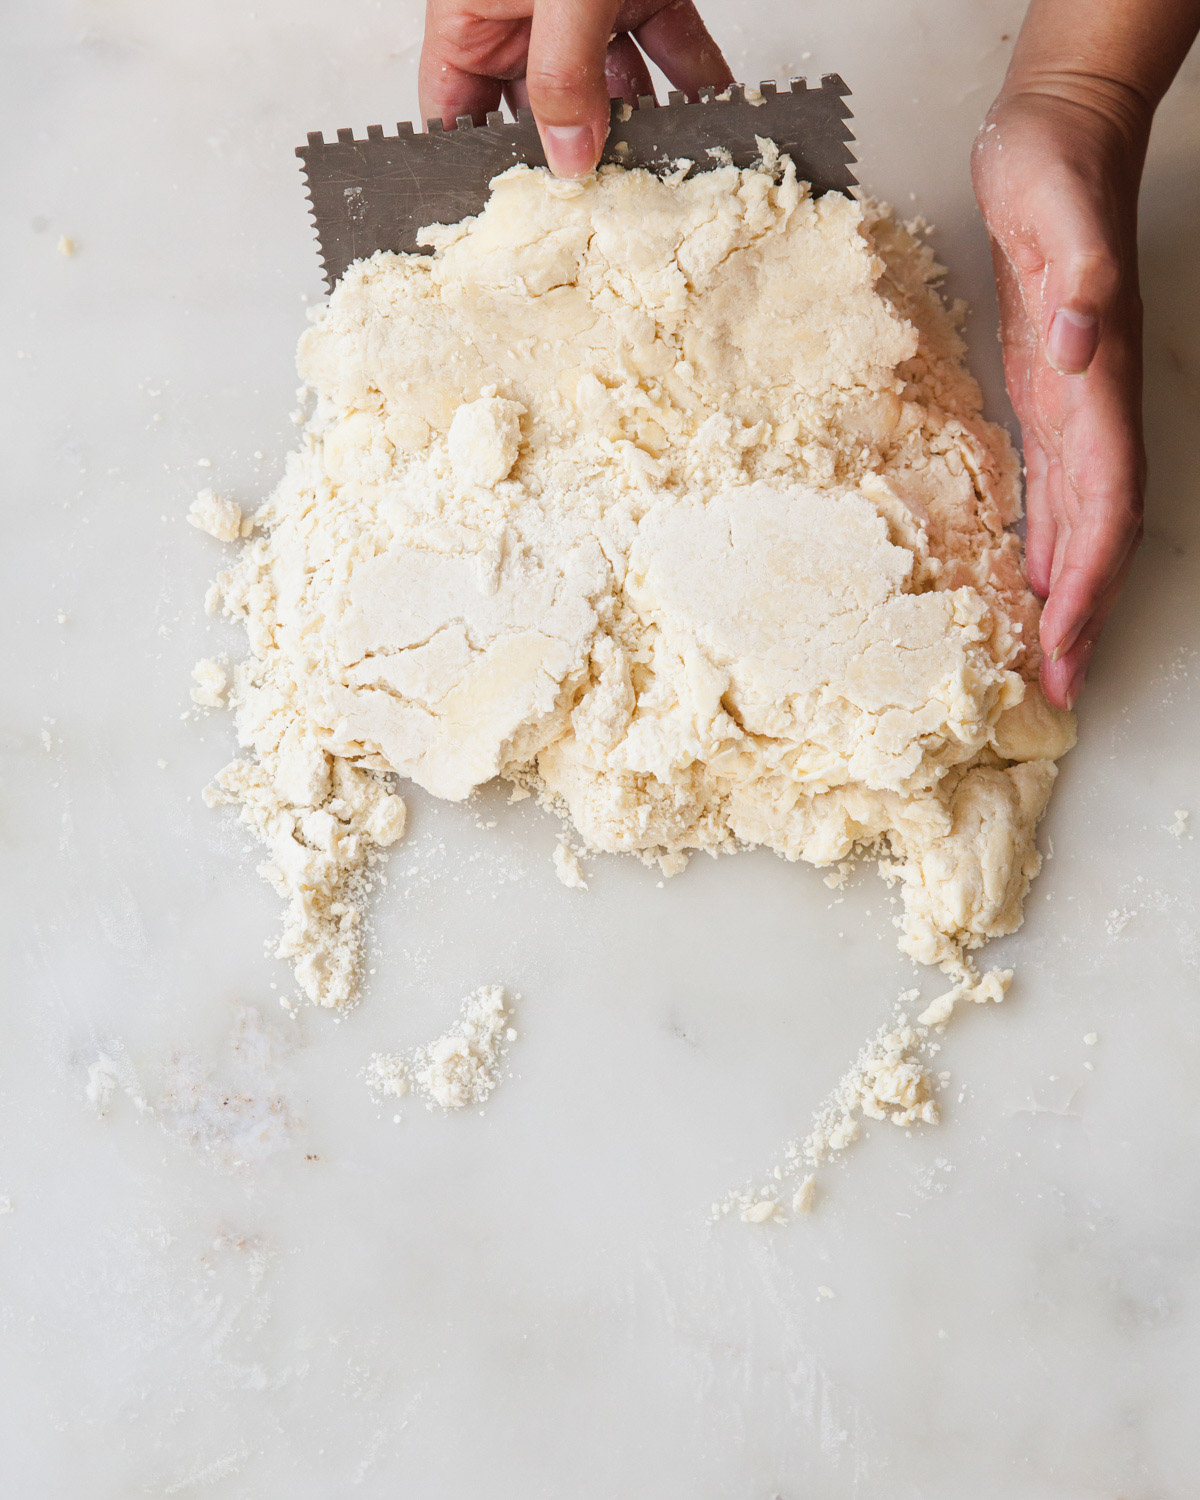
After the first fold, rotate the dough and repeat 1 to 2 more times. There will be some dry bits that don’t “fold” in the first round. By the third, most (if not all) of the dough should be incorporated.
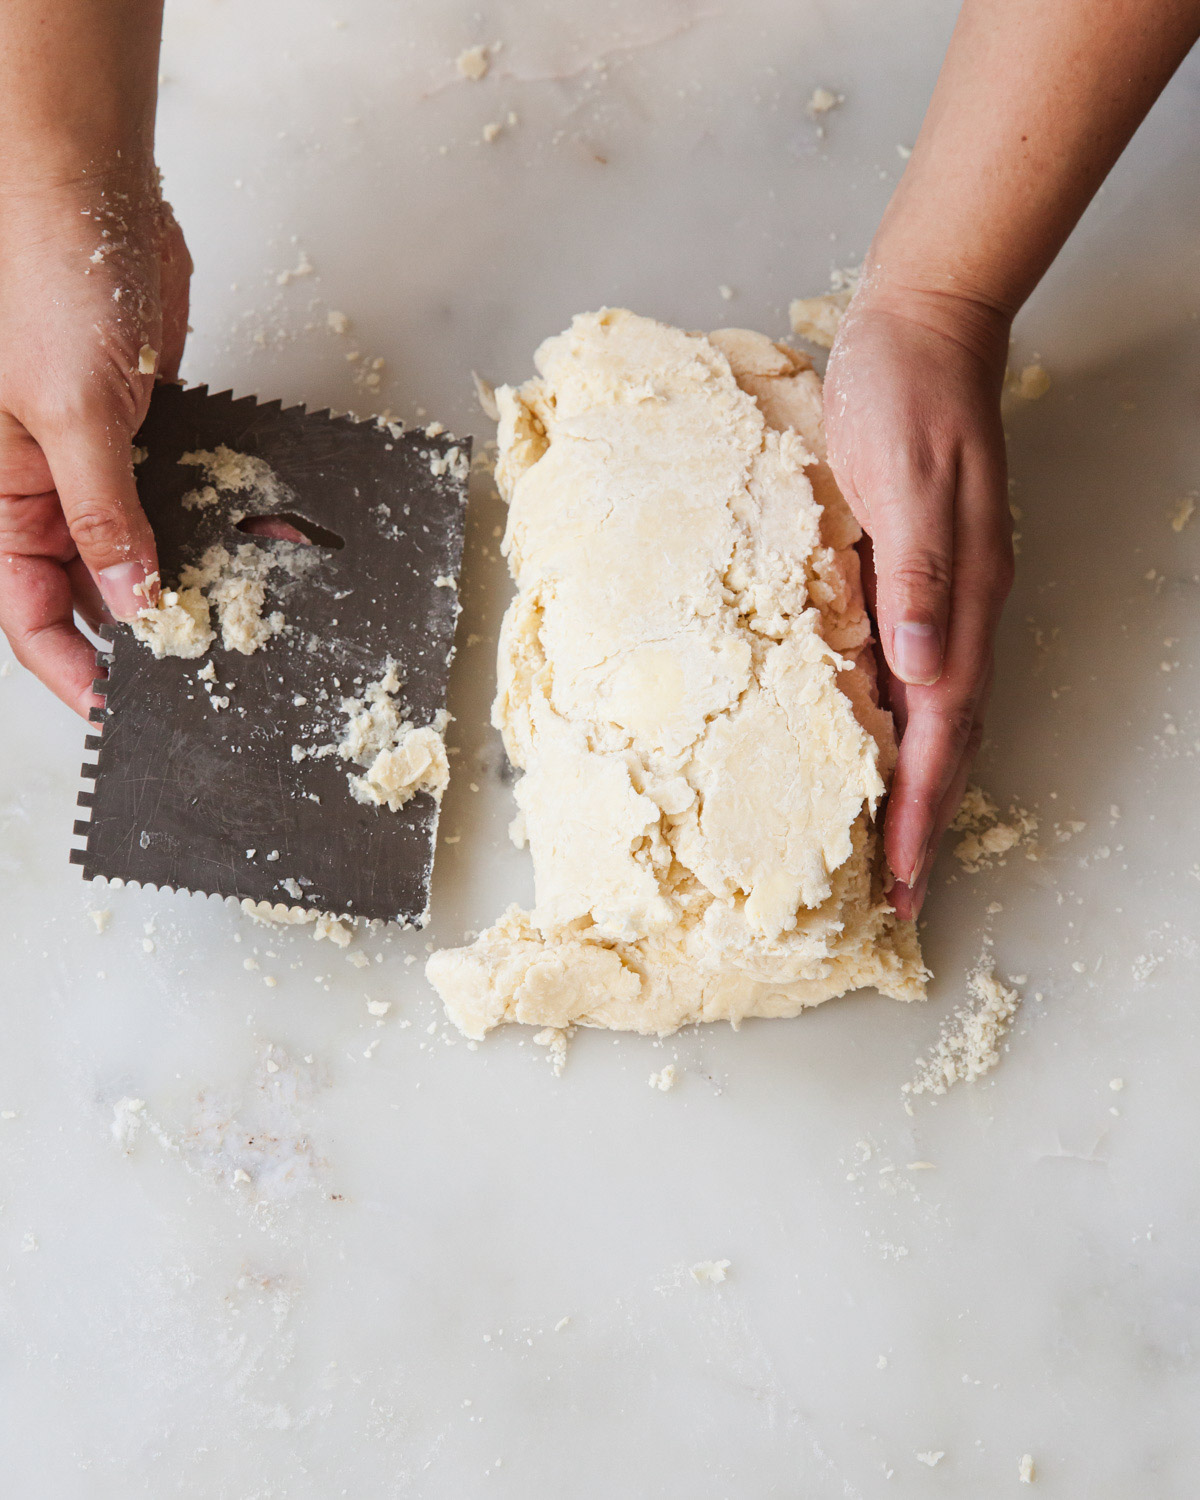
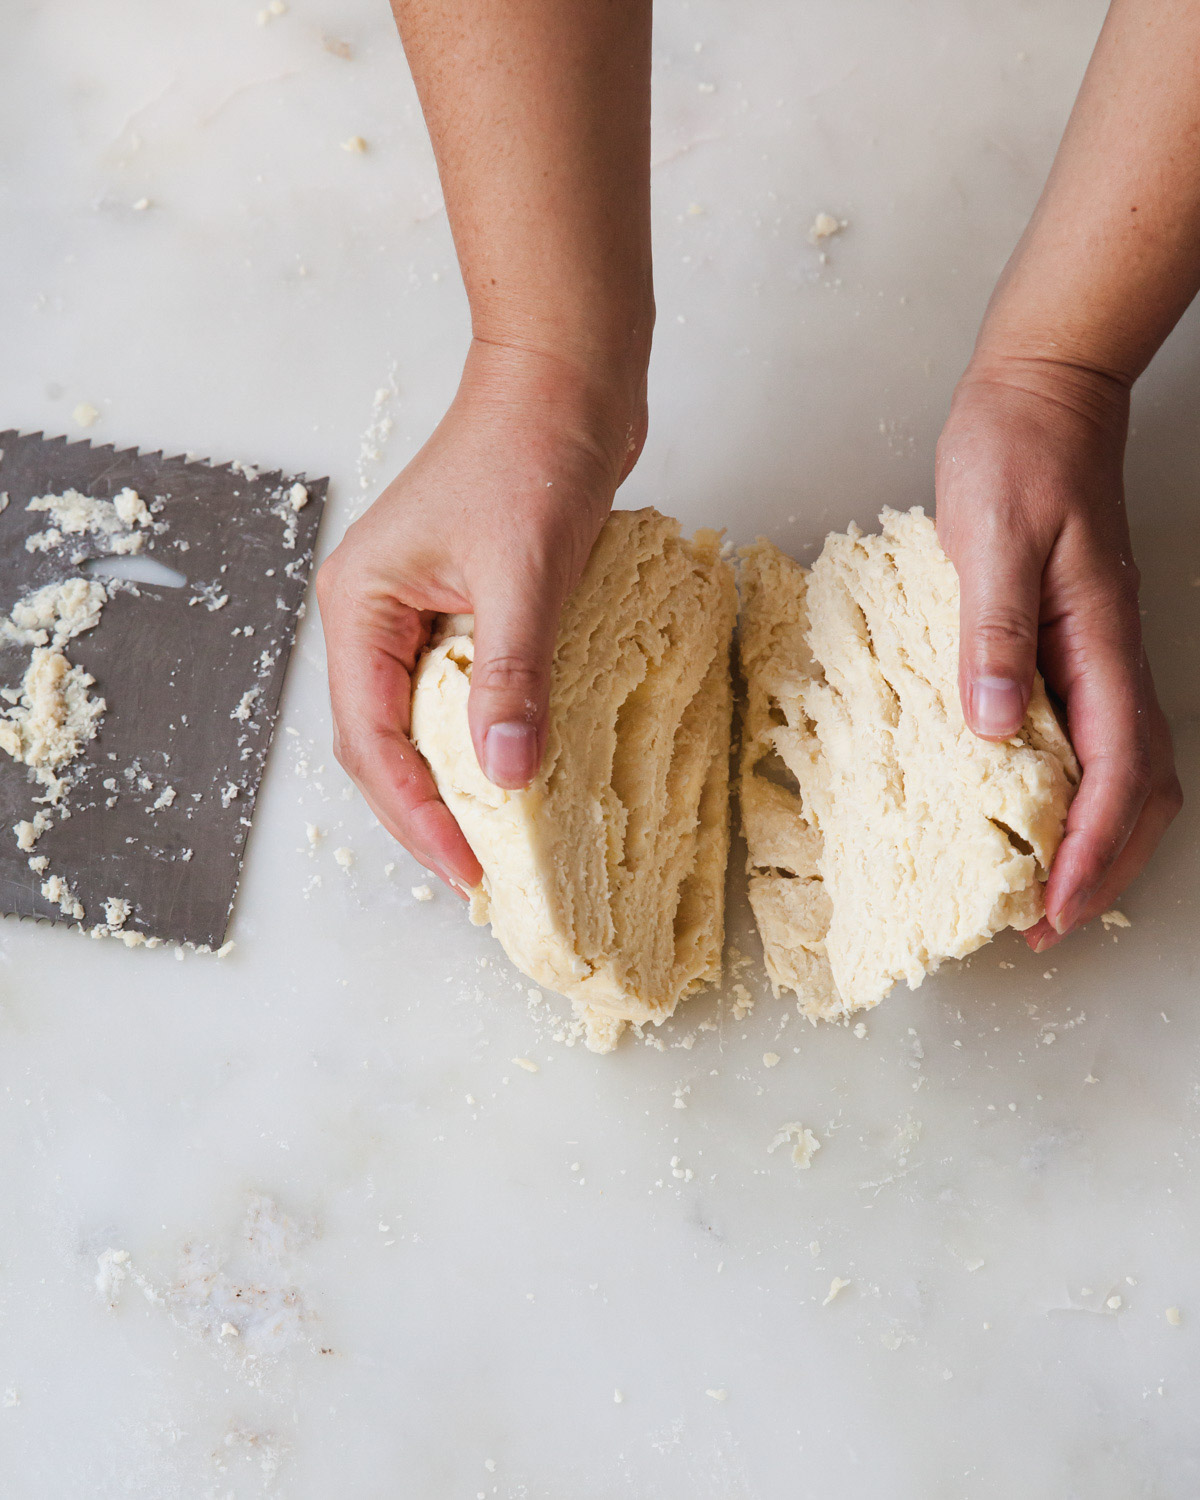
Gently gather the dough into a ball. Split the dough into two even portions with the edge of the bench scraper.
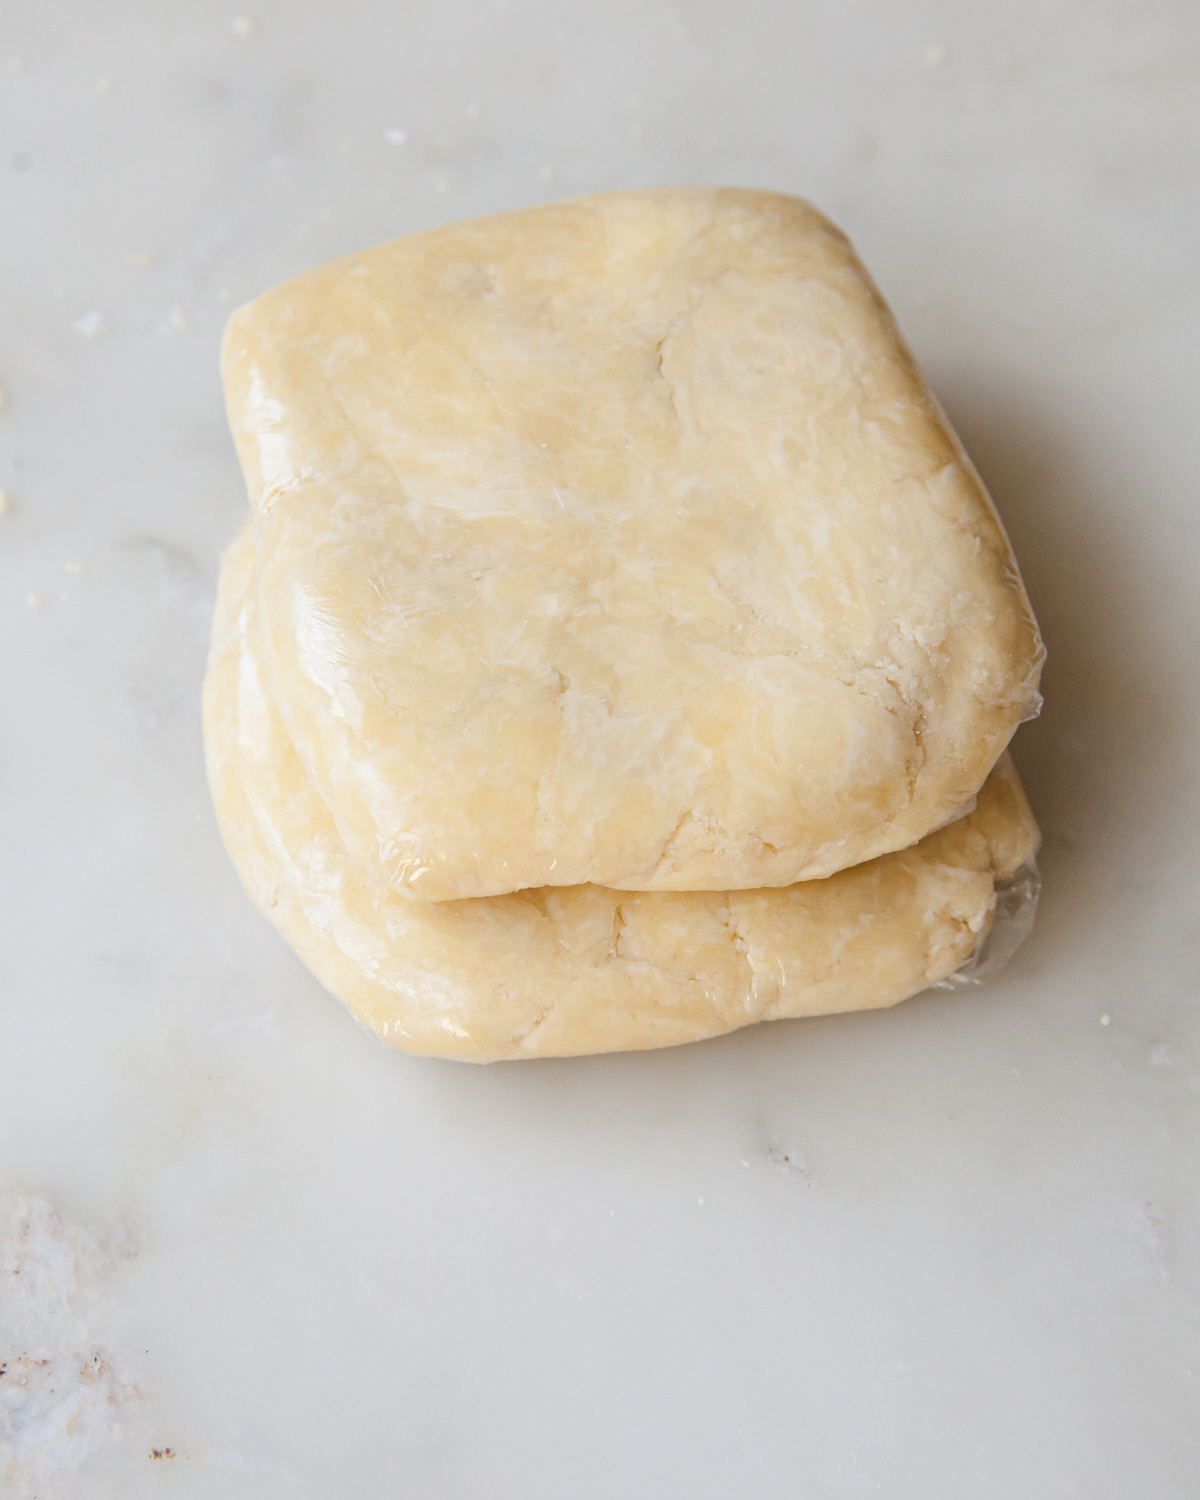
Lastly, pat each half into a disk and wrap well in plastic. Chill in the refrigerator for at least 30 minutes before use.
Tips for Making Flaky, Tender Pies
- Keep cool - from your tools to your ingredients to your hands. If the butter starts to melt at all during the mixing process, throw everything in the fridge to chill out while you take a moment to sip some coffee or tea (making sure your hands don’t get too warm, of course).
- Work the dough as little as possible. Once the water is added, toss gently and work efficiently. Overworking the dough with lead to a tougher crust and possible shrinking.
- Have extra warm hands? Use a pair of forks or a pastry cutter (if you have warm hands). Use the flat side of the fork tines to smear the butter into the flour mixture.
Benefits of making pie dough by hand
From-scratch pie dough comes together easily and quickly in this no-fuss, no-tools method. Sure you can whiz it all together in a food processor for half the time, but unless you are making large quantities in a commercial bakery, making pie dough by hand for even up to a few pies is still quick and doable.
Not everyone owns a food processor, making this method more inclusive. Plus, it beats pulling down the food processor, cleaning all the parts, and putting it away.
Making pie dough by hand gives you ultimate control over your dough. Since you are not using a machine, the bits of flour-covered butter remain irregular and organic. This means more marbling and ultimately more flakes in your baked crusts.
I love how a bowl of simple ingredients transforms into pastry between my very own fingertips. Making pie dough by hand can be relaxing as well.
Ingredients in All-Butter Pie Dough
This bare-bones recipes calls only for the essentials:
- All-purpose flour
- Salt
- Granulated sugar
- Unsalted butter
- Ice water
While other recipes call for things like cider vinegar, cream cheese, and even vodka, we find that it comes down to the mixing method rather than the short list of ingredients that makes for a tender, flaky crust.
Equipment Needed
No need for a food processor or stand mixer here. This pie dough recipe is made by hand with very few tools. All you need is:
- Large mixing bowl
- Bench scraper
- Measuring cup
- Kitchen scale (recommended)

How to Hydrate Your Pie Dough
The range of water accounts for a few different factors from the brand of flour and humidity in your kitchen to the temperature of your butter. The recipe will call for more water than you actually need.
Gradually add in the water and use as little as possible. The dough should still be shaggy once the water has been added and tossed around.
To test it, give the dough a good squeeze. If most of it sticks together, then stop adding water.
Serving and Storage
For best results and ultra flaky pies, allow the pie dough to chill in the refrigerator for at least 30 minutes after making.
This time will allow the pie dough to hydrate and gluten to relax. Pull the pie dough out of the refrigerator 10 minutes before rolling out and assembling a pie.
Keep the pie dough in the refrigerator from 30 minutes to 2 days. Alternatively, store pie dough in the freezer for up to 3 months.
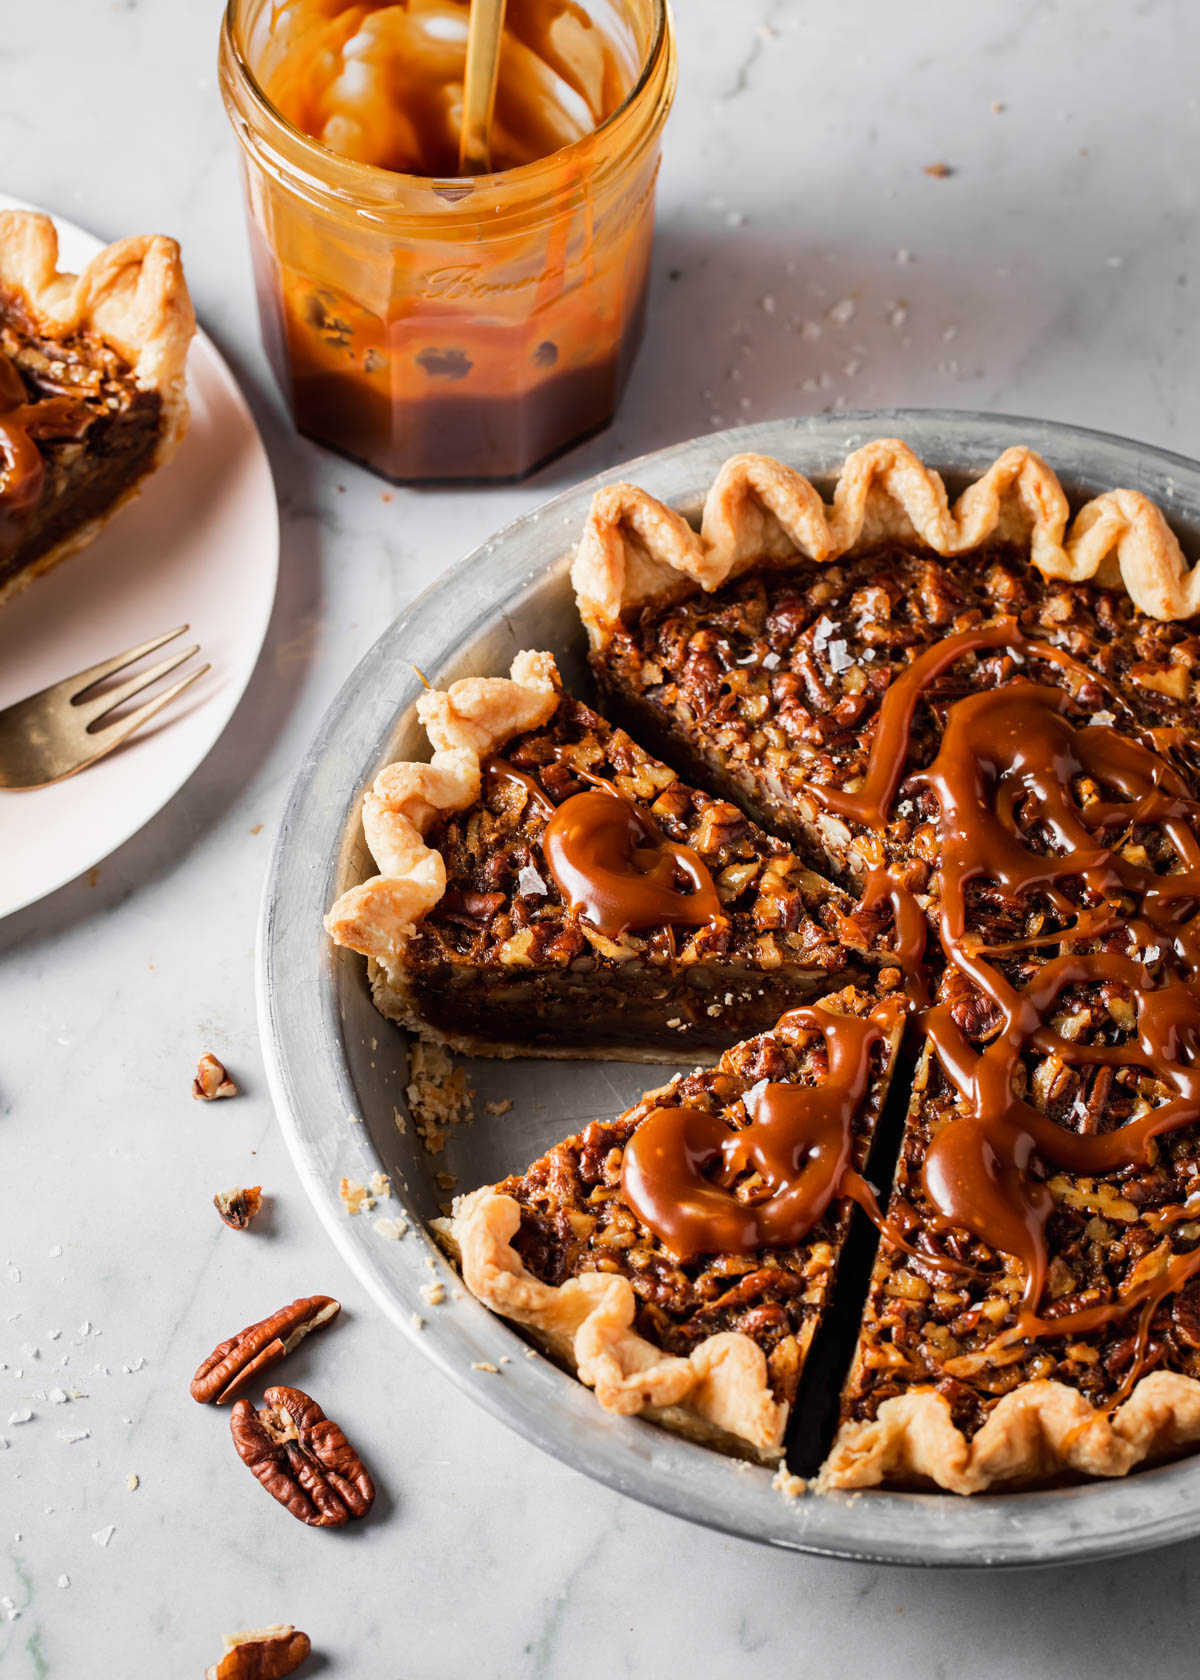
More Pie Recipes to Bake
Join the Style Sweet Bake Club!
Get exclusive recipes and articles sent straight to your inbox. Become a subscriber today! Click to join.
Recipe

Pie Dough By Hand
Ingredients
- ¾ cup (180ml) cold water
- ¼ cup (60 ml) ice
- 2 ⅔ cup plus 2 tablespoon (360g) all-purpose flour
- 1 tablespoon granulated sugar
- ½ tea kosher salt
- 1 cup cup plus 2 tablespoon (250g) unsalted butter, diced very cold
Instructions
- Place the water and ice in a cup and set aside.
- Add the dry ingredients to a medium mixing bowl and quickly stir to combine.
- Toss cold, cubed butter into the bowl. Being cutting the butter into the flour by rubbing bits of the cold butter between your thumbs and fingers. Stop once you have irregular shapes of flour-coated butter - ranging in size from that of a walnut to a peanut.
- Smear some of the flour-coated butter between the palms of your hands to create sheets of butter.
- Create a well in the center of bowl and add 4 tablespoons of ice water into the center. Sprinkle 2 more tablespoons around the edges. Immediately dip your hands into the bottom of the bowl and begin tossing the flour mixture with the water.
- Add an additional 1 to 2 tablespoons of water and make sure any dry bits at the bottom of the bowl begin to incorporate. Give the dough a good squeeze; if most of it sticks together, then stop
- Tip the mixture onto a clean work surface. Pat down the dough into a rectangle with the palms of your hands. Slide a bench scraper under the top edge of the dough and fold the top third up and over to the center. Repeat with the bottom third, like folding a letter.
- Rotate the dough and repeat 1 to 2 more times. There will be some dry bits that don’t “fold” in the first round. By the third, most (if not all) of the dough should be incorporated.
- Gather the dough into a ball and split it into two even portions. Wrap each portion in plastic.
- Chill in the refrigerator for at least 30 minutes before use.
Dizzee
This pastry crust is the best
Sarah
This is my go-to pie crust recipe - flaky and delicious every time!
stylesweet
Hi! Thank you so much! I love this one too - it's simple and straightforward. Glad you enjoy it!
Crystal
Hands-down the best flaky pie dough! I use this recipe every Thanksgiving.