Last updated on February 10th, 2023 at 04:27 am
Welcome spring with this orange and cardamom-scented Citrus Strawberry Rhubarb Pie! A classic combination with a twist to brighten up the season.
Jump to:
Fall in love with the classic combination of strawberry and rhubarb all over again in this bright and vibrant pie.
Tart, tangy rhubarb and sweet, succulent strawberries bake down to the jammy, ruby-colored filling in this all-butter crust.
The fresh citrus notes from the orange juice and zest awaken the filling and give it an extra punch of flavor.
Tasting Notes
Rhubarb on its own is very tart and unpleasant to eat. Stewed with sugar or baked in a pie with sweet strawberries, it turns into a bright and tangy jam that is perfect for spring and summer.
New to using cardamom? It adds vibrance and freshness to the citrus and strawberries the same way cinnamon adds warmth and comfort to apple pie.
If you have any orange liqueur or Grand Marnier around, a glug or two added to the filling would add even more amazing flavor.
Ingredients
- Rhubarb
- Strawberries
- Orange - use the zest and juice in the pie filling
- Granulated sugar
- Ground Cardamom (optional) - an alternative to cinnamon for adding flavor to pie filling
- Salt
- All-purpose flour
- Cornstarch - use in combination with the flour to thicken the filling
- Unsalted butter
- Large egg - mixed with a splash of milk or cream to create a wash for the pie crust
- Splash milk
Tools and Equipment
Homemade pies come together with not much more than your own two hands. Here is a list of a few other kitchen tools needed to make this pie:
- Large mixing bowl
- Rolling pin
- 8 or 9-inch pie tin
- Pastry wheel or paring knife
- General kitchen tools (measuring spoons, spatula, etc)
Supporting Articles

How to Know When the Pie is Done Baking
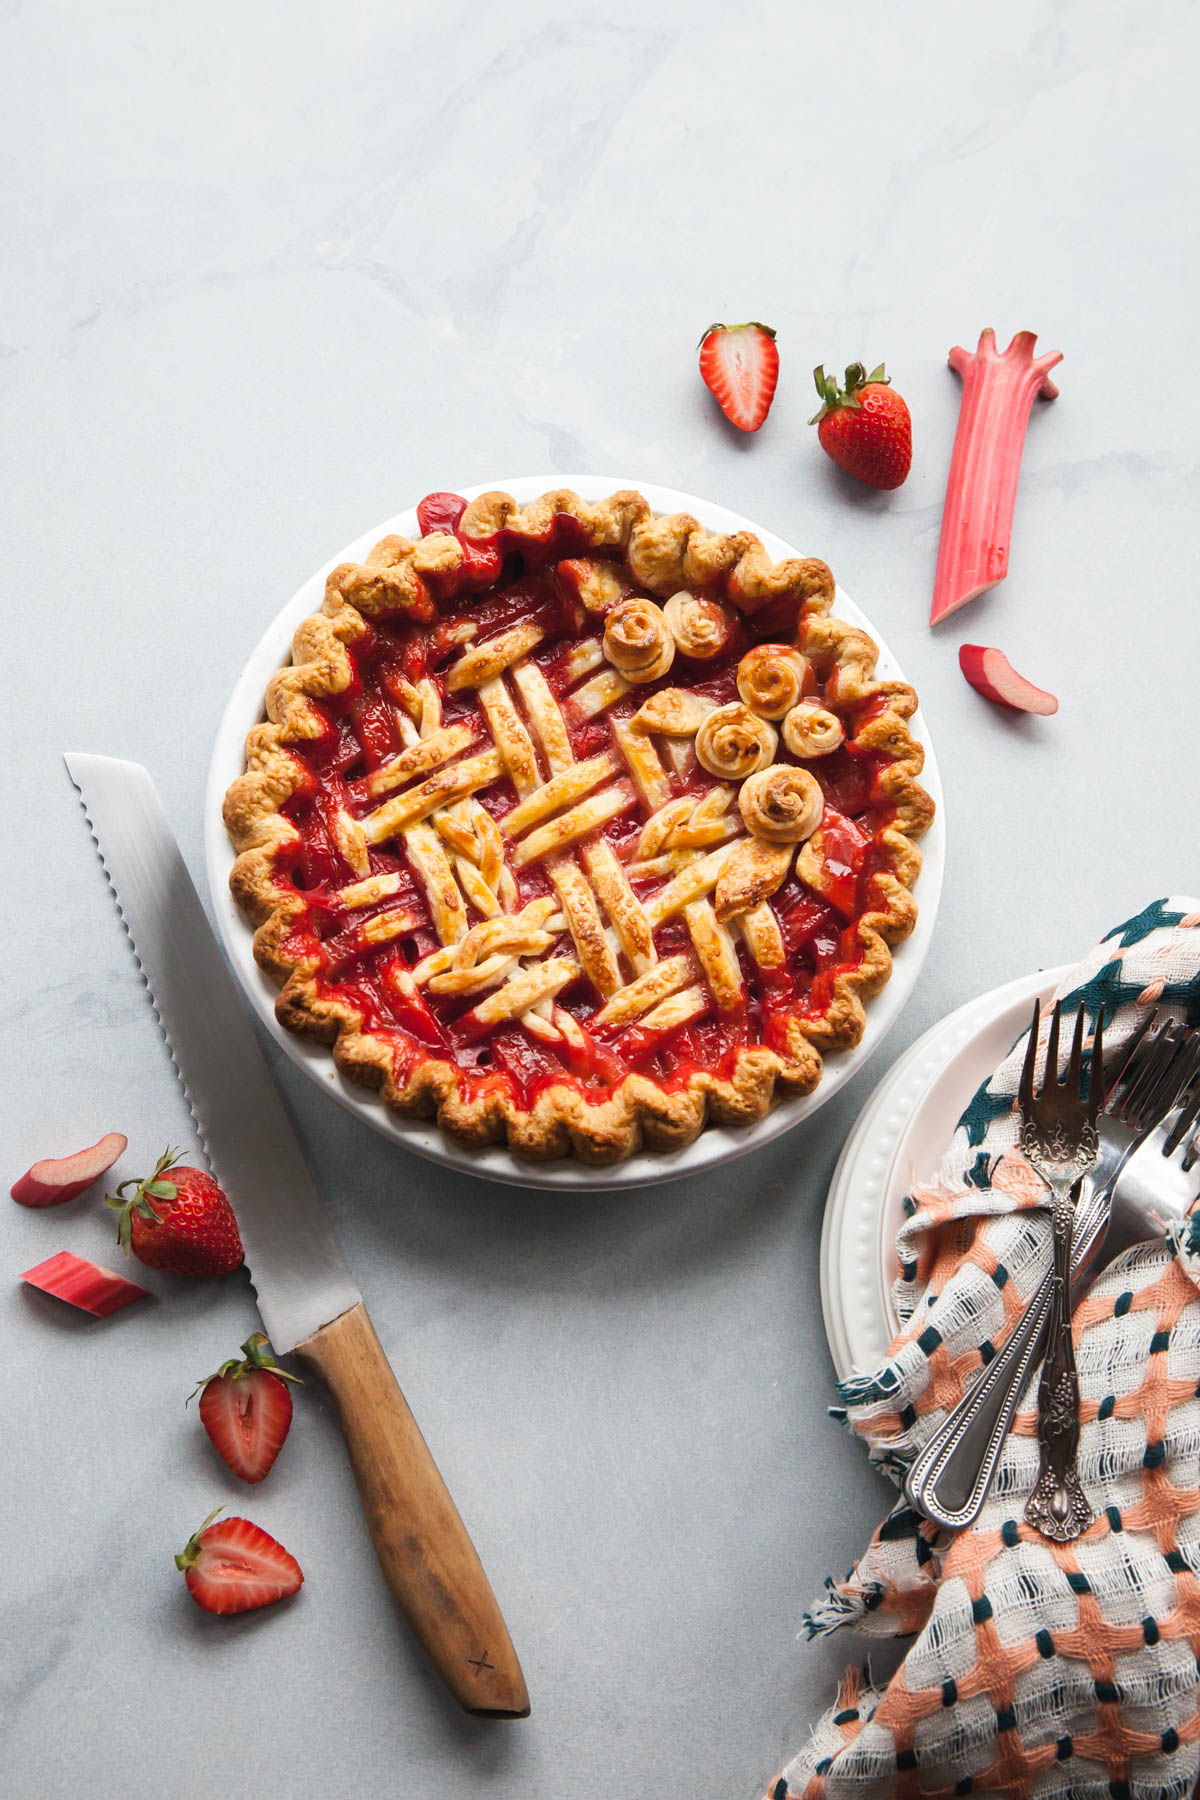
There are a few things to look out for when the pie is nearly baked. First, look for a top crust that is nice and golden brown.
Next, the filling should be bubbling. Look between the lattice to see the juices bubbling and popping. This needs to happen to ensure that the thickening agents (cornstarch) are activated so the pie sets up and slices easily.
Lastly, pay attention to the time. Bake times help us catch things before they are over-baked, but this is the least important indicator that the pie is done.
If the crust is browning too quickly, cover it with a pie shield or piece of foil.
Substitutions
Orange - feel free to substitute any other citrus zest and juice like lemon or grapefruit.
Cardamom - try equal amounts of ground ginger.
Serving and Storage
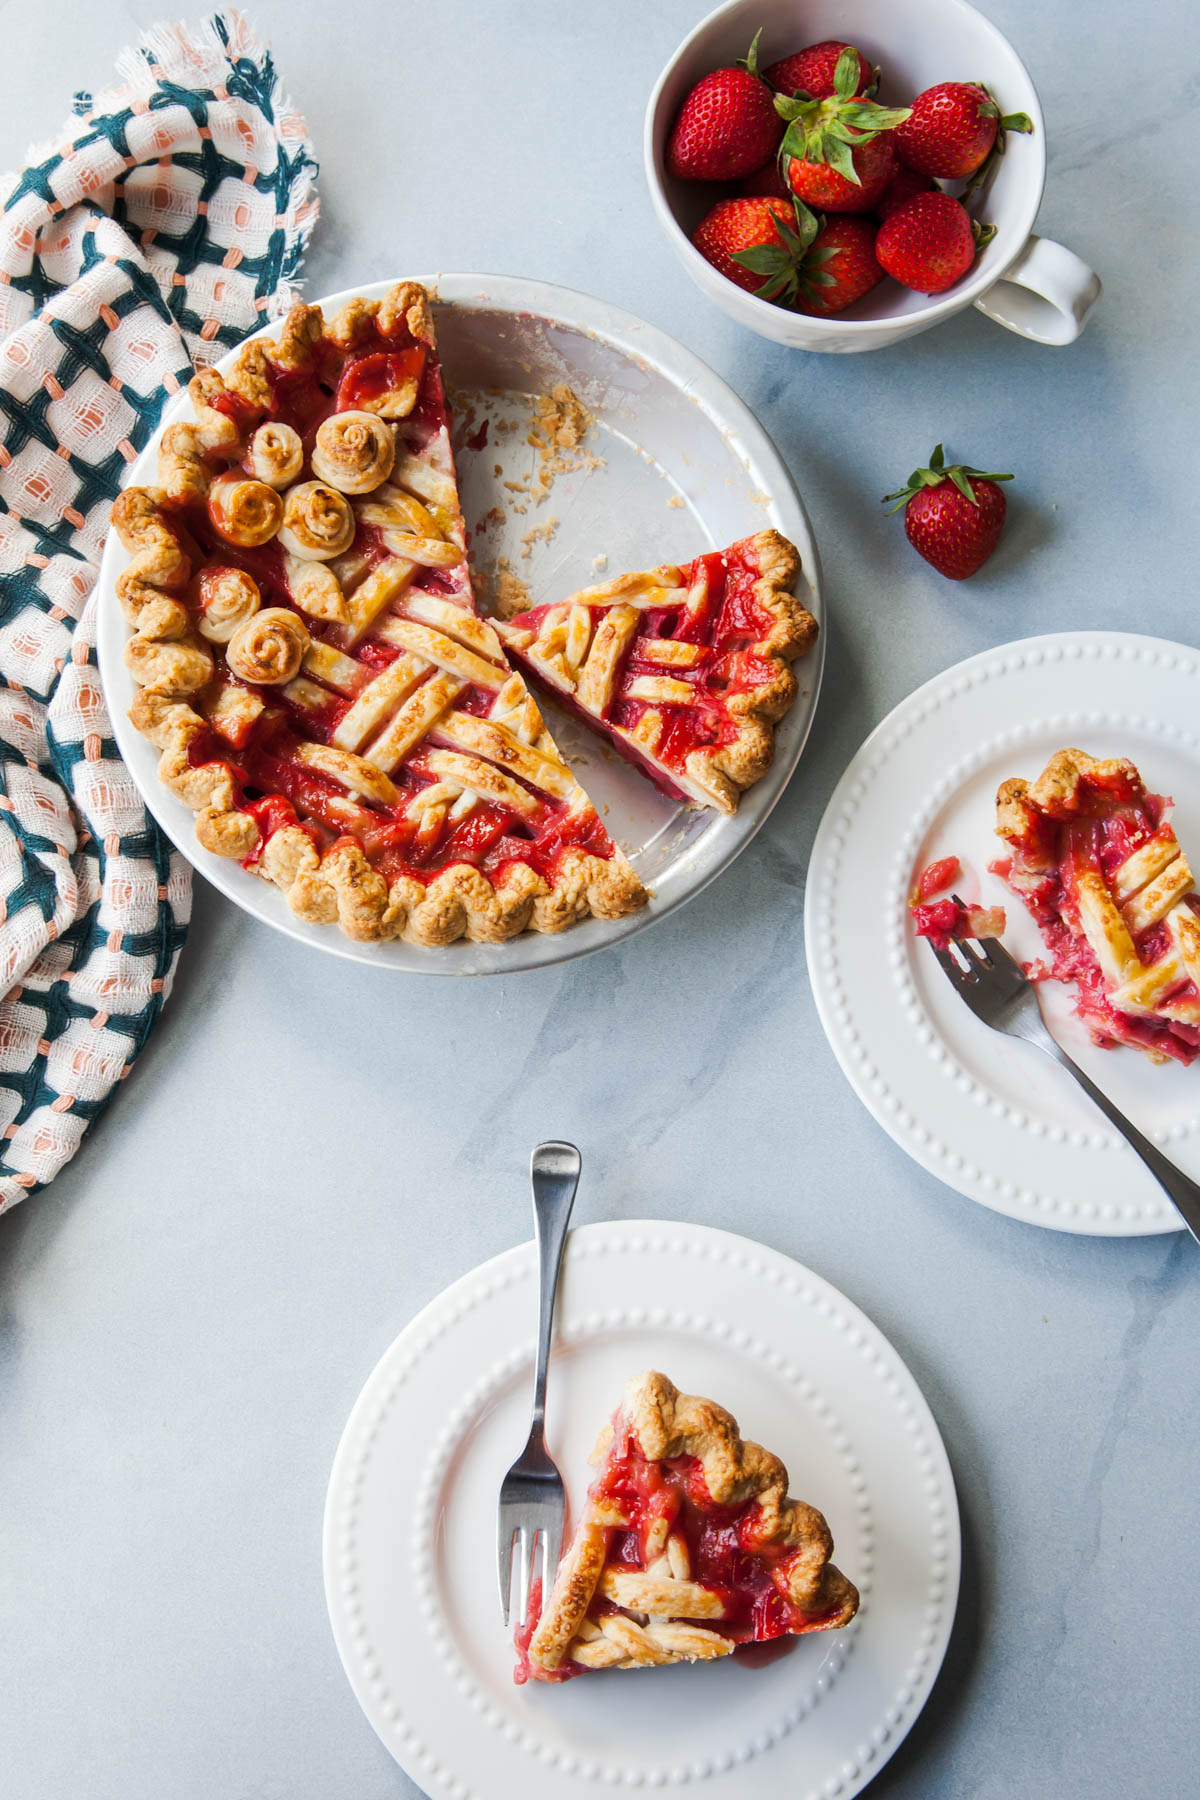
The pie should cool completely before serving, at least 4 hours. If sliced when warm, the filling may spill out into a soupy mess.
Allowing the pie to cool completely makes sure that the filling has a chance to set. If you prefer to eat your pie warm, you may reheat each serving individually after it has been sliced.
The pie may be stored at room temperate overnight (covered). Beyond the first day, store leftovers in the refrigerator for up to 3 days.
Baker's Notes
- Do not overfill the pie with filling. Always bake on a rimmed baking sheet to catch drips.
- I do not recommend using frozen strawberries as they tend to have a lot more water content than fresh berries.
More Pie Recipes to Try
Recipe
Citrus Strawberry Rhubarb Pie
Ingredients
All Butter Pie Dough
- ⅔ cup ice cold water
- 2 ⅔ cup all-purpose flour
- 1 tablespoon granulated sugar
- ½ teaspoon salt
- 1 cup very cold butter diced
- 1 egg
- 1 splash milk
- turbinado sugar for sprinkling
Citrus Strawberry Rhubarb Filling
- ¾ lb fresh rhubarb cut into ½-inch pieces
- 2 cups ripe strawberries sliced
- ⅔ to ¾ cup granulated sugar depending on sweetness of berries
- zest and juice of ½ and orange
- ⅛ to ¼ teaspoon ground cardamom
- 1 pinch salt
- 2 tablespoon cornstarch
- 1 tablespoon all-purpose flour
Instructions
All Butter Pie Dough
- In a large bowl, stir together the flour, salt, and sugar.
- Cut in the cold butter with a pastry cutter or by hand, rubbing the pieces of butter between your thumb, index, and middle fingers. Once the pieces are no longer lager than about a peanut, begin to flatten the pieces of butter in sheets between your palms. Be careful not to over-work the butter or let it get too warm.
- Working with only a couple tablespoons at a time, add in about 6 to 8 tablespoons of the water. Stir together using a wooden spoon or even just a clean hand in the bowl. The dough should appear fairly shaggy and not sticky. Once you can squeeze a few pieces together and they hold, the dough is done being mixed and hydrated. Do not over-mix or add too much water*.
- Divide the dough into half and shape each piece into a disk. Wrap in plastic and refrigerate for at least a couple of hours, or overnight (preferably).
- When ready, bring one disc out of the refrigerator and allow to rest for about 10 minutes. Lightly flour the work surface and begin to roll out the dough, working from the center out – rotating the dough after each roll. Roll the dough until about ¼ inch thick and about 12 to 13 inches in diameter.
- Gently roll the dough around the rolling pin and transfer to a 8 or 9 inch pie tin. Fit the dough into the bottom of the tin and up the sides, allowing for about an inch of overhang. Trim with kitchen sheers and place back in the refrigerator.
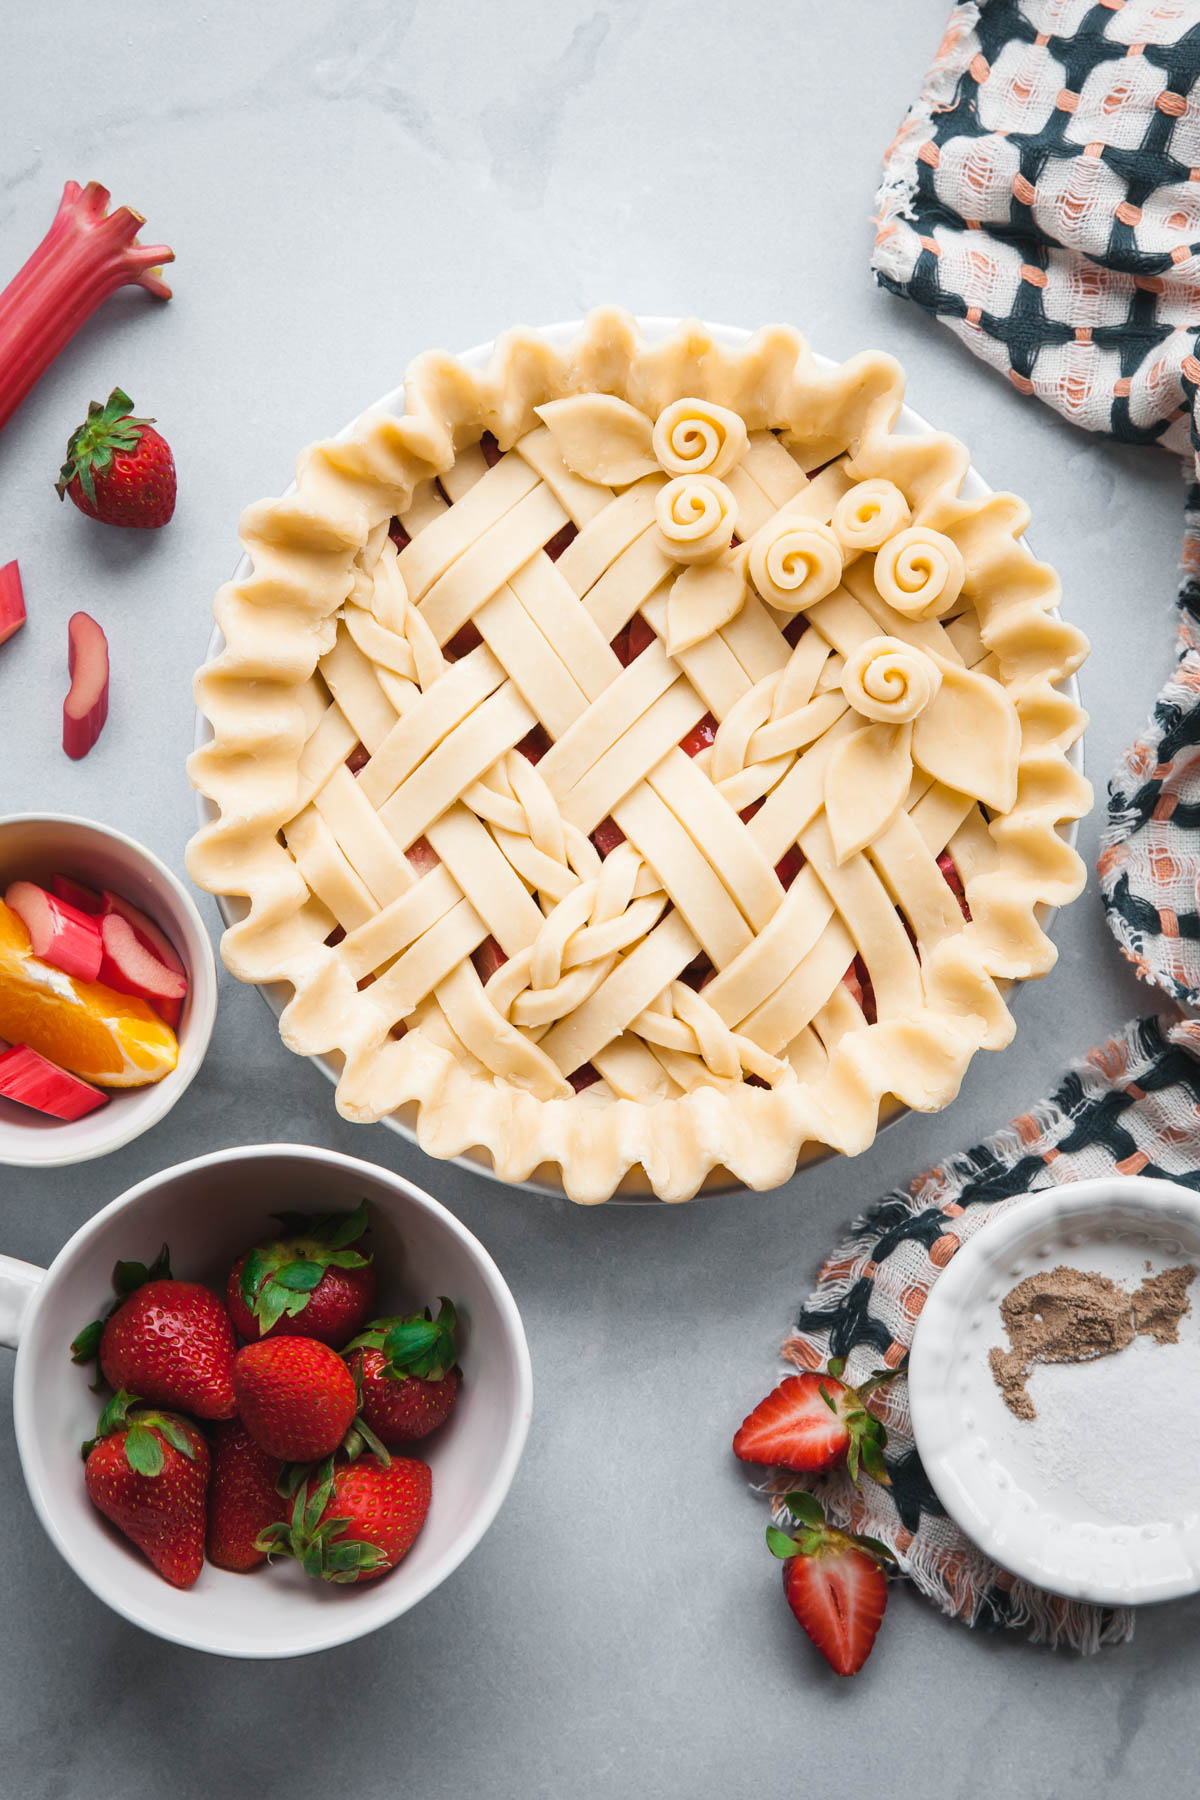
- For the lattice top, repeat step 5. Using a ruler and a paring knife, cut about 24 strips, about ½-inch wide. Braid two sets of three (strips) to create the briads, if desired. Place all the cut dough on a baking sheet or cutting board and place in the refrigerator.
- Create the filling (see recipe to follow). Remove the pie tin from the fridge and tip in the filling. Leave a gap of about ½-inch from the top to keep the filling from spilling over too much (like mine did) while baking.
- Remove the cut strips from the refrigerator and begin creating a the lattice pattern, carefully weaving over and under each strip of the opposite direction. For this design, I weaved pairs of strips, slipping in the braids for two regular strips. Allow for some excess dough on the end of each strip, then trim.
- Fold the edges of the bottom crust up and over the lattice. Press to seal. Use your fingers to crimp the edges (see image here). Roll out any other the dough scraps and cut into strips. Coil the strip around itself and pinch one end to create the roses. Cut out leaves with a paring knife and arrange on top of the lattice.
- Return the pie back to refrigerator for at least 30 minutes. Meanwhile, pre-heat oven to 425F.
- Just before heading into the over, create an egg wash by whisking together a whole egg and a splash of milk. Brush the egg wash over the entire top of the crust and sprinkle with turbinado sugar
- Place pie on a baking sheet and bake for about 25 minutes. Turn down the heat to 375F and continue to bake for an additional 35 to 50 minutes or until the top is golden brown, the juices are bubbling, and the apples are cooked through. If the top begins to brown too quickly, cover with foil.
- Allow the baked pie to completely cool before slicing and serving.
Citrus Strawberry Rhubarb Filling
- In a large bowl, toss all of the ingredients together. Adjust the sweetest as needed, but avoid eating any of the raw rhubarb.
Harrietta
I grew up on rhubarb desserts and had yet to bake a rhubarb recipe for the family. This was the perfect recipe! Everyone loved it