It's a Happy Blog Birthday! I might be off by a few days, but Style Sweet CA is now 2 years old. It seems like just last week, yet also so long ago at the same time, that I started this space for sharing my food thoughts, photography, and recipes. I always had a blog to accompany my old bakery, The Frosted Cake Shop, but it was more for posting custom cake photos, seasonal menus, and a recipe here and there. Not until two years ago did I finally have a space that was easy to use, showed off my photography, and kept me motivated and encouraged to share more and more. Once what was just my portfolio-turned-Style Sweet CA got a huge face lift in June 2013 by the lovely ladies over at Wooden Spoons Kitchen, things really started to take off.
I am very proud of this little space and how it measures up in the vast world of food blogs. It has connected me with many different bloggers around the world, has helped me book more and more freelance projects, and was a big asset in securing my book deal. No, the blog is not always perfect. And yes, I do fall behind from time to time. But in my defense, half of the time I have either been pregnant, working on my book, and/or caring for a newborn. If I can reach and (hopefully) inspire so many people already, just think what the future holds! Or at least that is the plan =) So thank you, Style Sweet CA, and an even bigger THANK YOU for all of you that support it!
Is it weird that I just thanked my own blog? Oh well! Hehe.
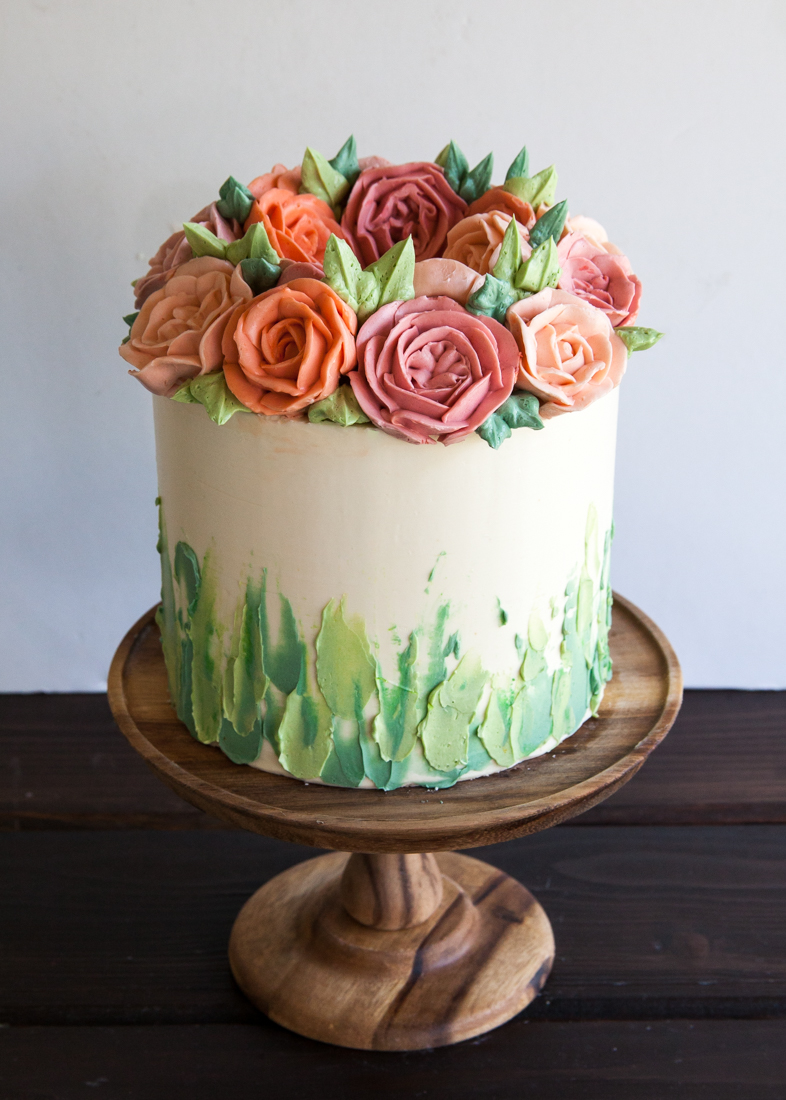
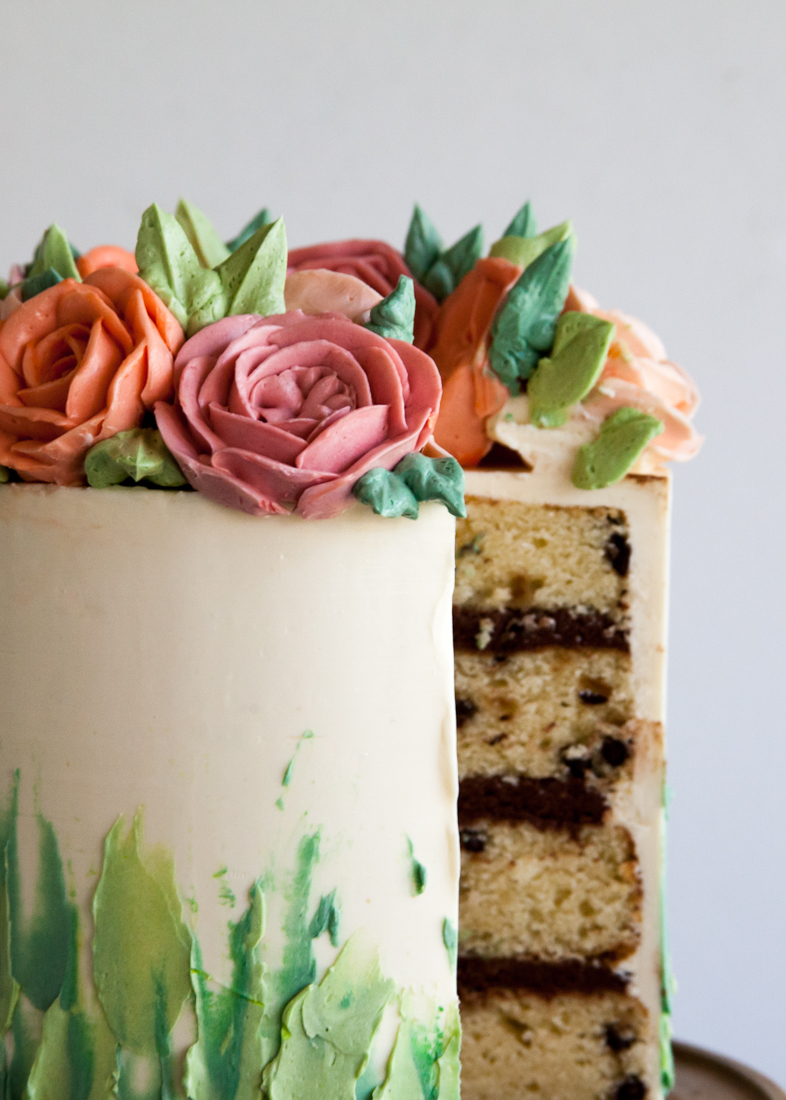
Anyways, to celebrate, I created this buttercream beauty. I missed the blog-birthday last year, so I am making up for it with an original cake design and new cake recipe! If you have stuck with me on this journey, or have just jumped on board, then this cake if for you. Seriously though, I really appreciate you all stopping by, sharing your comments, and hopefully recreating some of my recipes and making them your own. Let's party!!
When I first started decorating cakes back around 2007, fondant was all the rage. I took a Wilton buttercream course with mom at a local Michaels (raise your hand if you did too!), but other than that - I didn't really bother learning how to use buttercream beyond frosting a smooth cake or piping a couple different borders (I missed one class and I actually didn't get my Wilton certificate - haha. I also got in trouble for working ahead, lol). Even over the four years that I ran The Frosted Cake Shop I did not once make a single buttercream rose.
Some odd years later, and it definitely looks like buttercream is coming back in all the right ways. With more and more home bakers and DIY-ers making their own cakes these days, cakes made without special equipment and ingredients are becoming very popular. When I proposed the idea for my book about layer cakes, that was pretty much my mission statement: to make inspiring cakes for home-bakers to professionals to bake and decorate without fondant and extra tools. With just an offset spatula and some piping tips, you'd be amazed at the designs you can create. Just look around the Web and you'll see what I am talking about.
Buttercream flowers might be cheesy and/or old-fashioned, but they too are making a comeback. While they once only appeared on grocery-store sheet cakes, buttercream flowers really can be quite beautiful. Using the right color palette and incorporating more contemporary flowers, buttercream flowers can make a cake shabby chic to even modern these days.
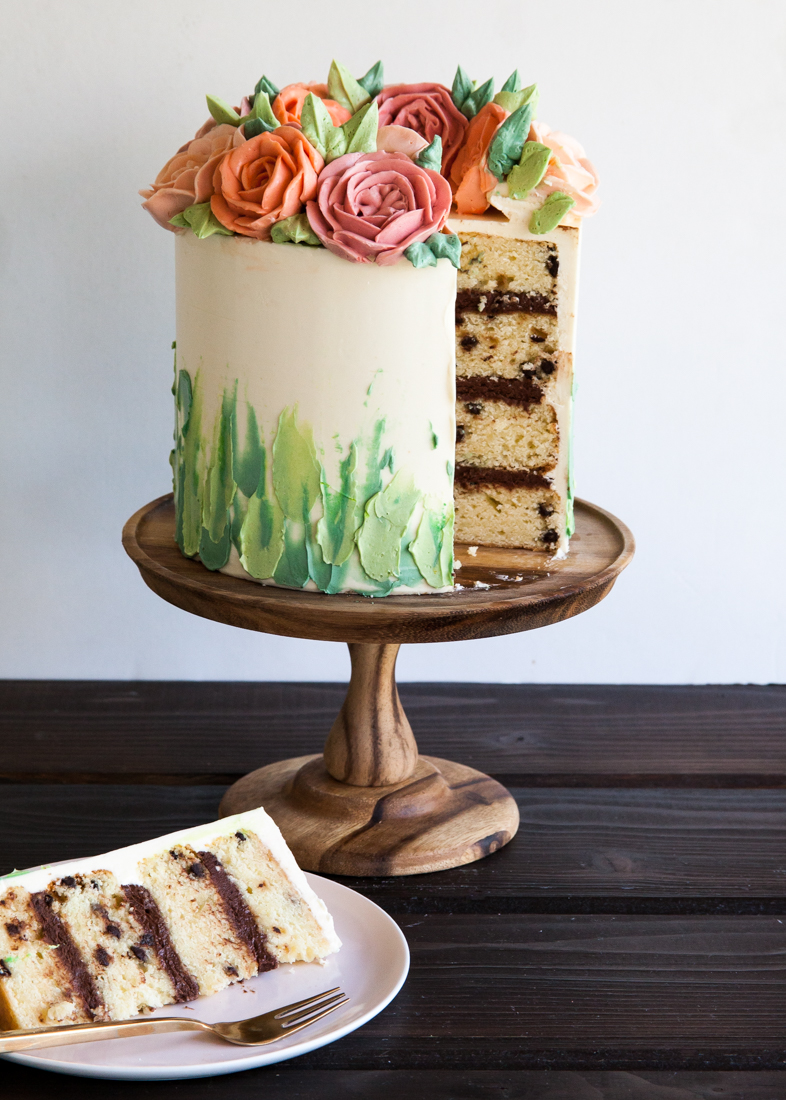
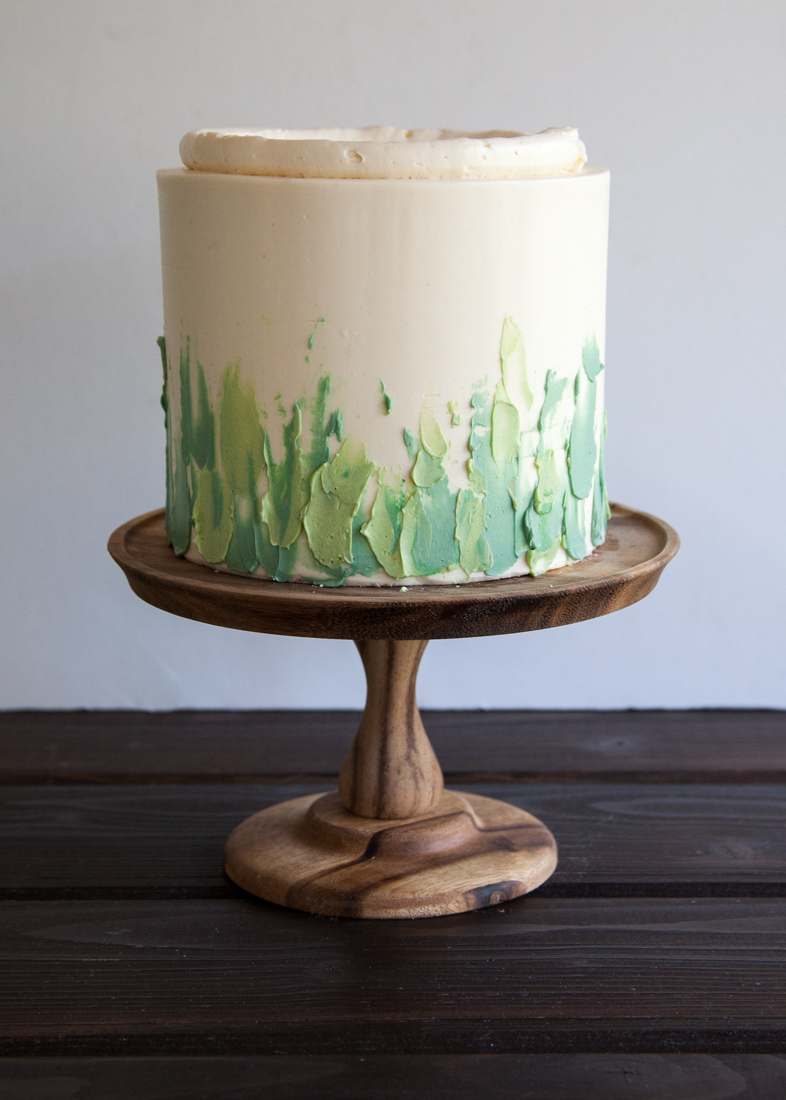
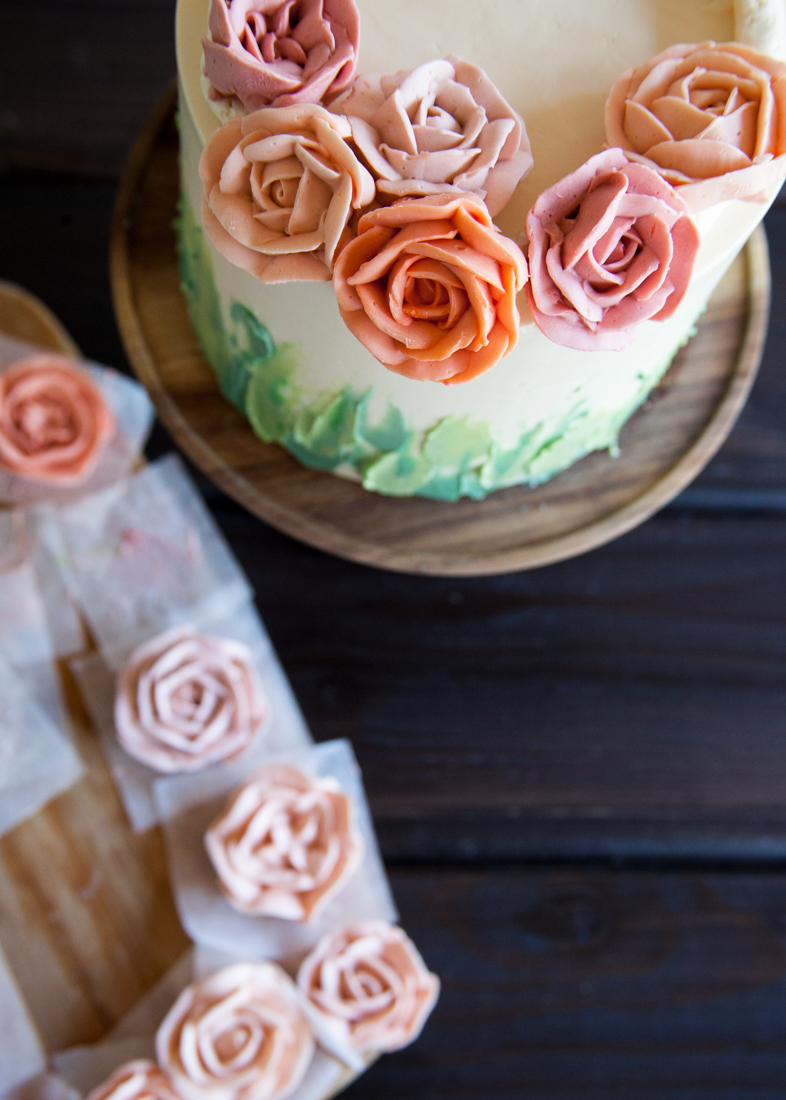
I would not consider myself an expert on piping flowers (yet), but after a few hours of practice I was able to create enough for the design I had in mind. I love watercolor and ombre buttercream cakes, but I wanted to create a cake that looked more like an acrylic painting. Cake as edible art - that's my philosophy! With the cake and smooth buttercream finish as my canvas, I wanted to add on buttercream to create my design. With other cakes, I've blended the buttercream to create the effect that I wanted, but for this cake, I wanted texture. Keeping the final coat of buttercream smooth and cold, I was able to "paint" on my buttercream. As shown, I painted on shades of green to emulate grass to accompany the flower crown on the top of the cake. For the flower crown, I piped out various sizes and shades of traditional roses, frilly carnations, and (what I think look like) English roses. Instead of using a traditional grass green and other classic colors, I kept the cake looking fresh and contemporary with sage-like and lime greens, corals, blush pink, and even a mauve color. Extra "grass" buttercream was used to create leaves to fill in the gaps between the flowers.
Unfortuntly, this post will not contain a step-by-step tutorial on how to make the flowers. However, I did snap some pics of the assembly and would love to share some tips and tricks on how I put it all together.
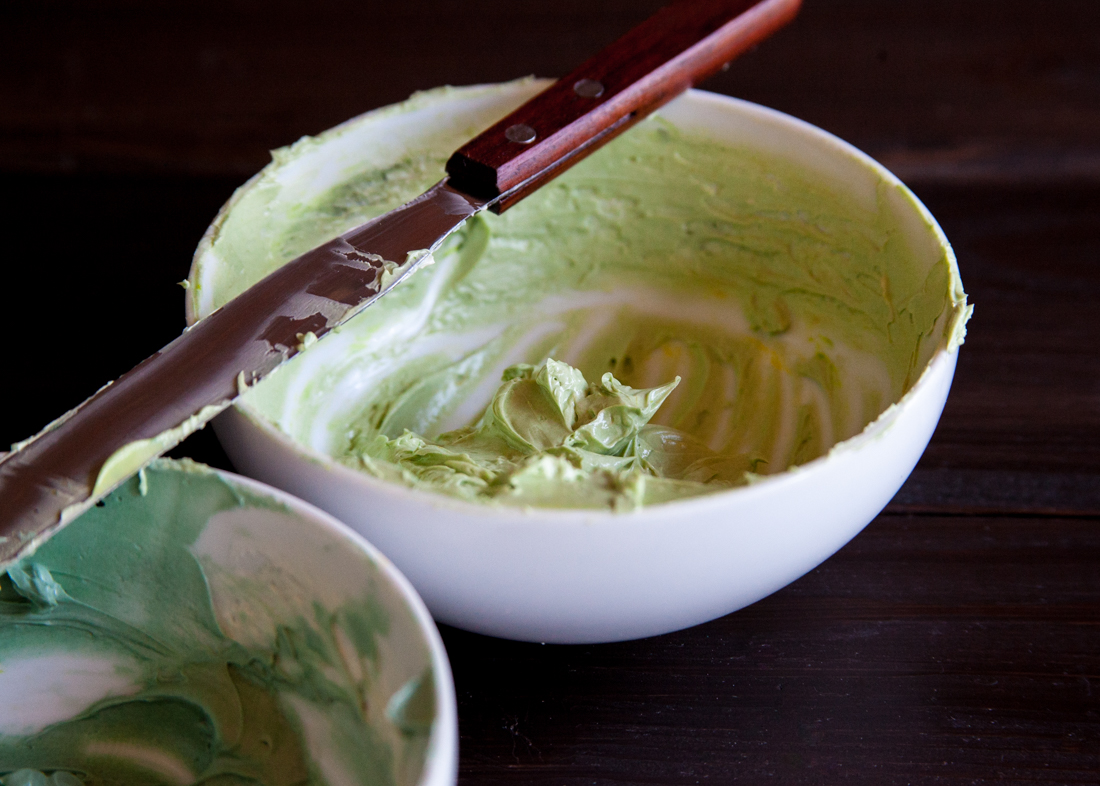
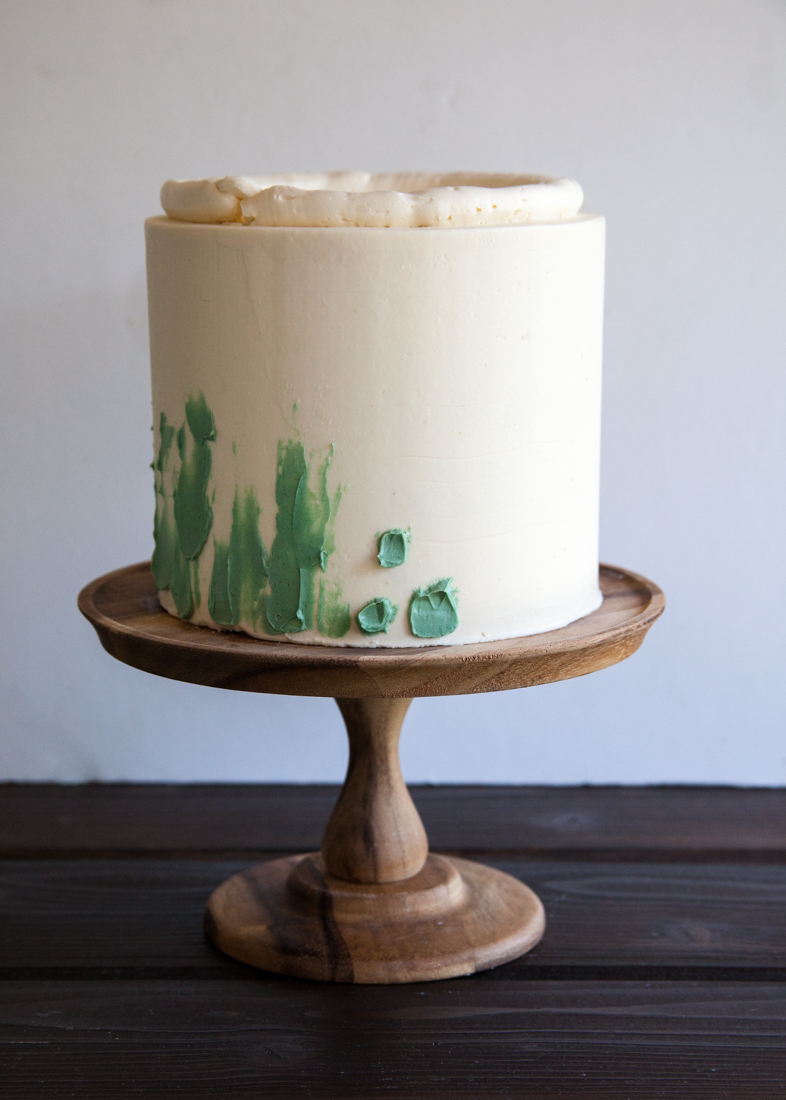
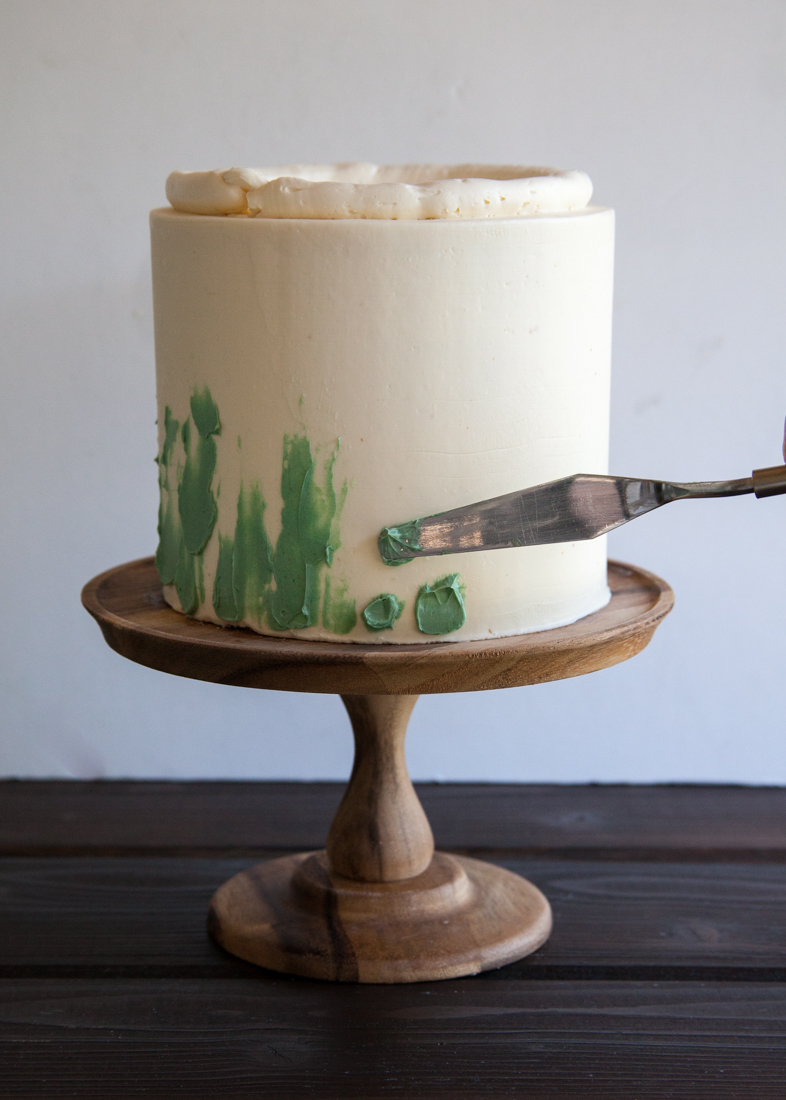
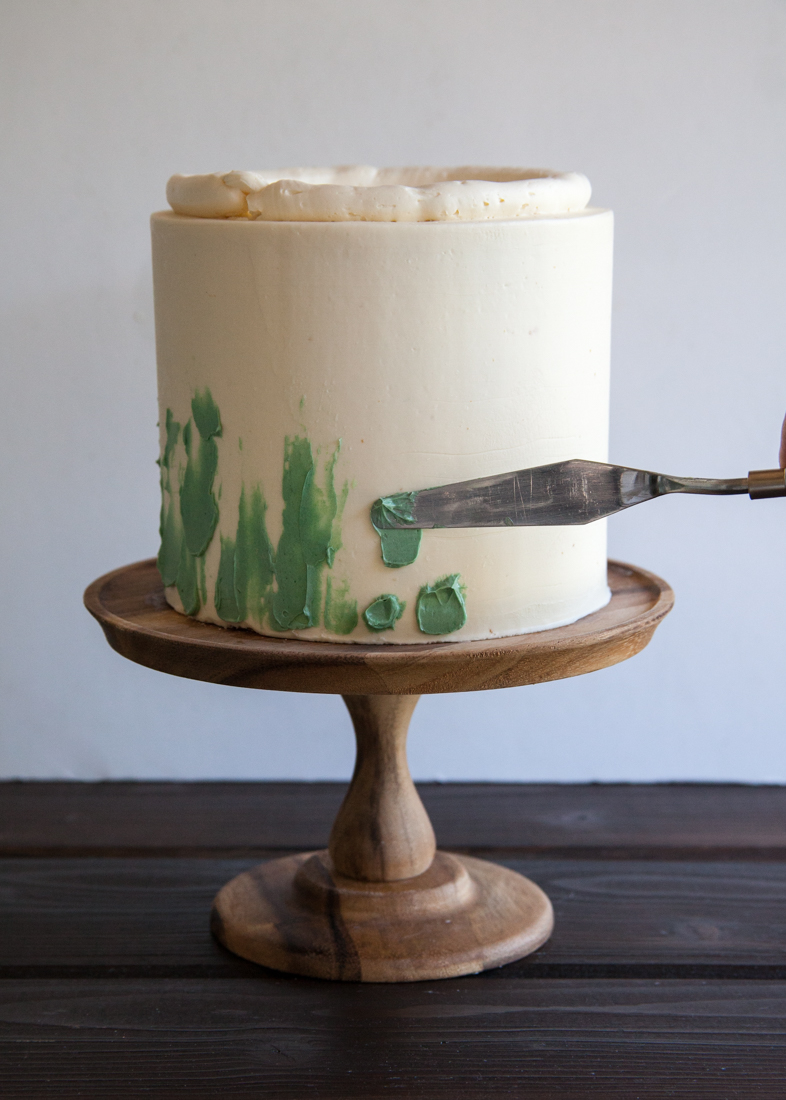
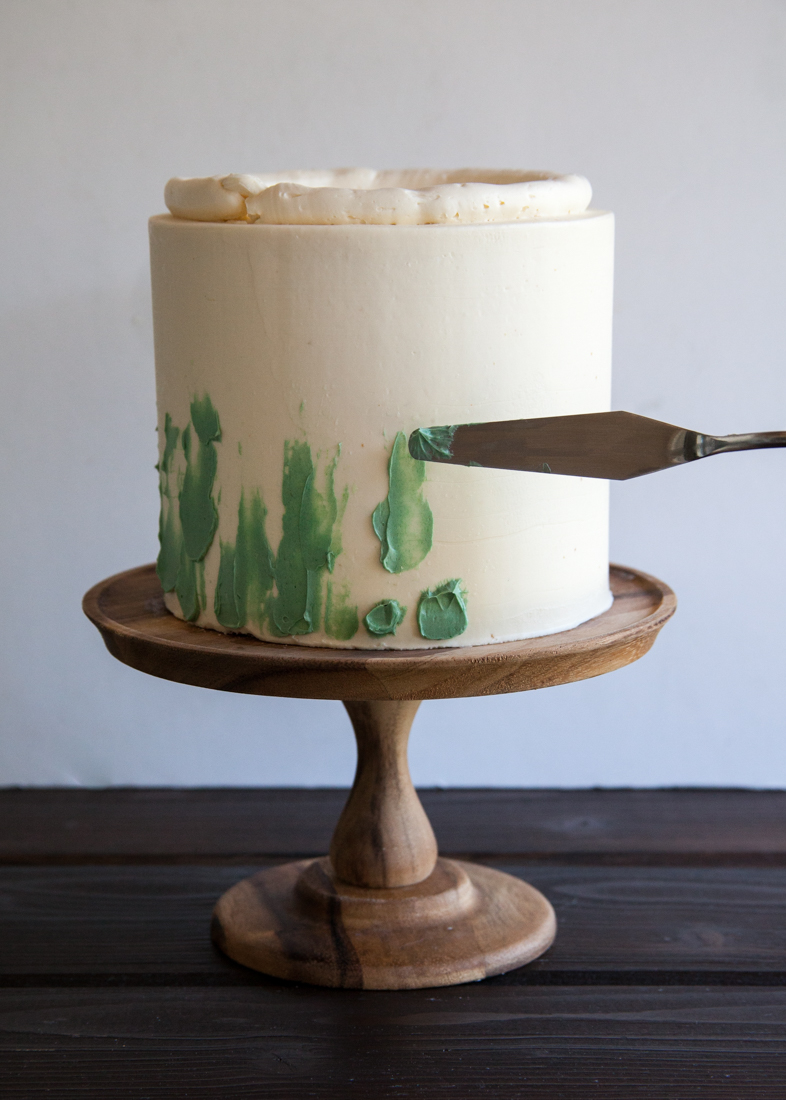
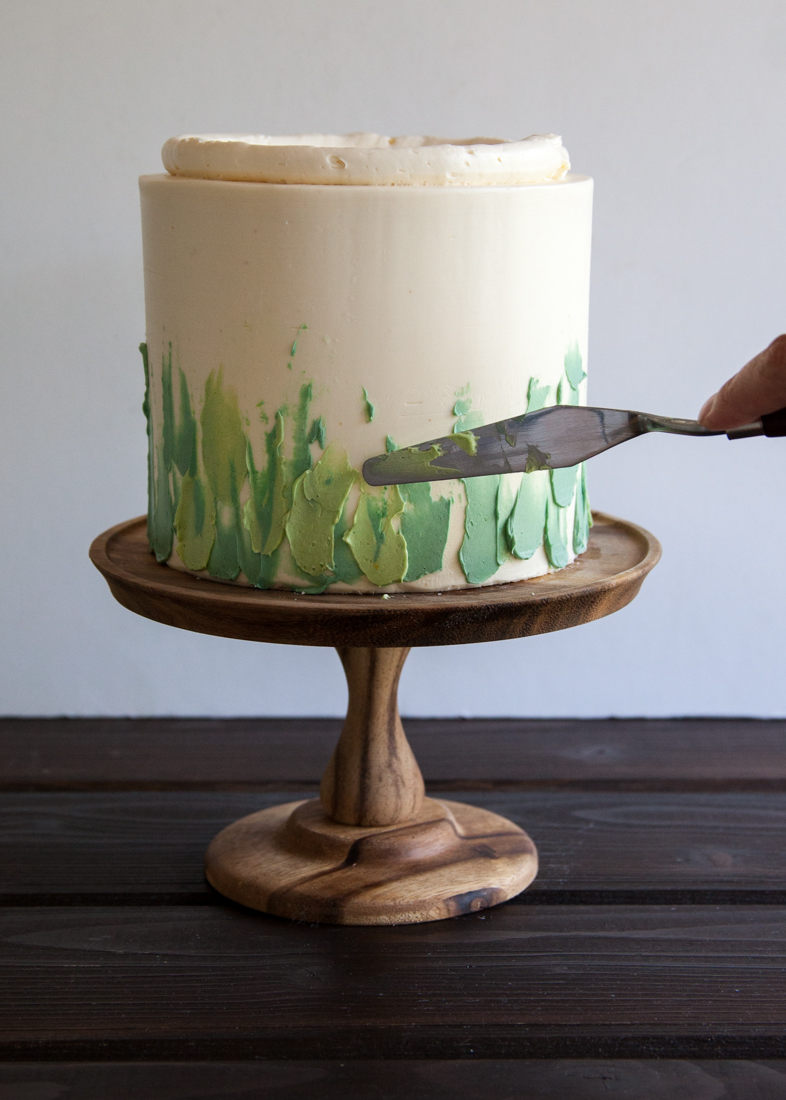
For the "grass," first start with a perfectly smooth buttercream "canvas." Keep the cake chilled until ready to go. Using a small palette knife or off-set spatula, dab on a few, small globs of buttercream near the bottom of the cake. Using a clean palette knife, gently pull the frosting up the side of the cake. Each stroke should be different - creating variety with texture and height.
Continue around the cake, using one color at a time. Using a second color of buttercream, go back over and repeat - trying not to blend too much.
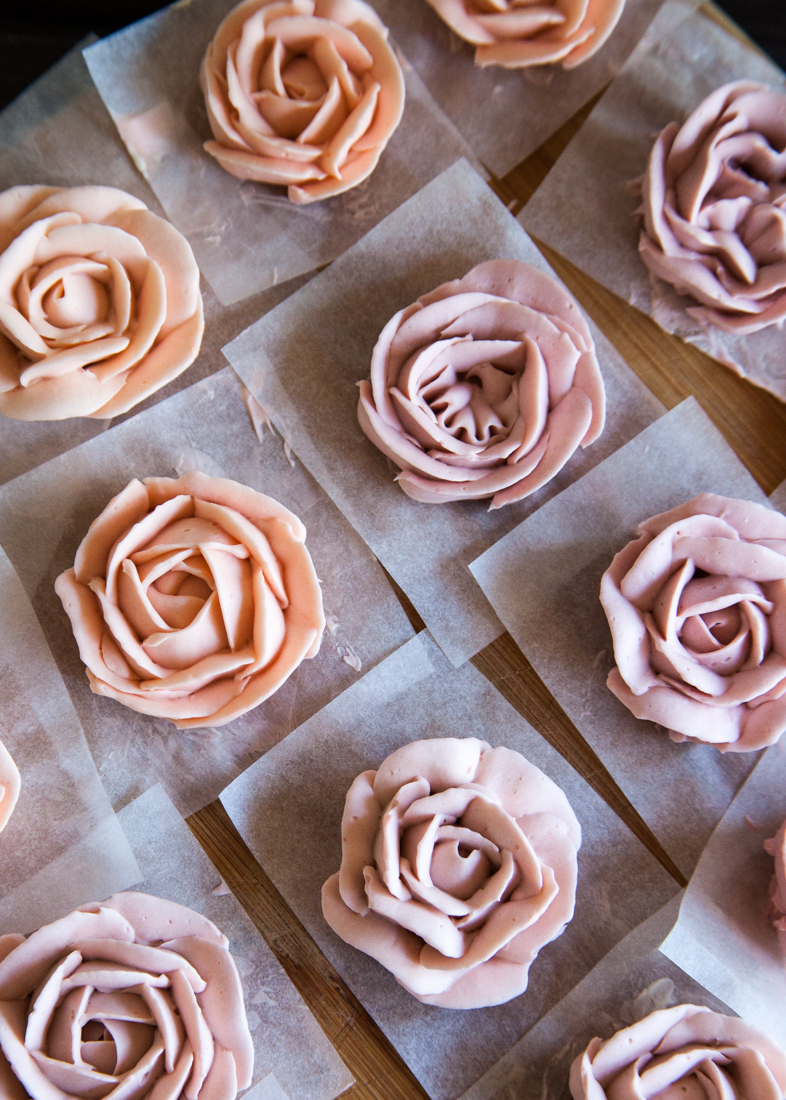
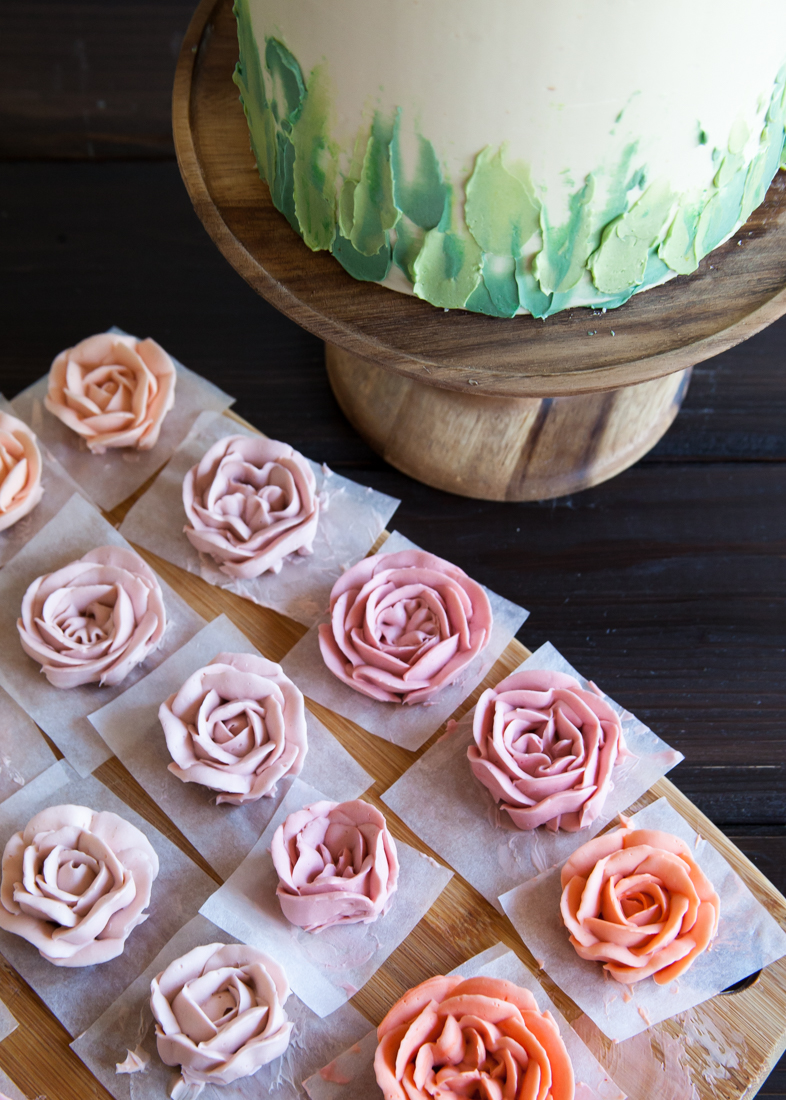
One key step that I did not initially realize when creating elaborate buttercream flower cakes is you can make and chill all of the flowers before assembly. So much easier than trying to transfer them straight to the cake, right? Pipe out all of the your flowers on individual parchment squares and chill in the refrigerator. This way, the buttercream will harden slightly - making them SO much easier to handle and arrange on the cake.
Before placing the flowers straight on top of the cake, pipe a thick ring of plain buttercream around the top of the cake - about ½" from the edge and about 1" tall. This ring of buttercream will give you something to stick the flowers on, so they are not flat on top of the cake. Working quickly but deliberately (the more you handle the flowers, the more they may smudge or be ruined) begin placing them on the cake. Simply use your palette knife or spatula to life the flower off of the parchment and place on the cake. The flowers should be placed on an angle around the cake. Fill in any gaps by piping leaves in between. Ta-da, right?!?
All of the flowers were made with just a petal tip (Wilton 104, I believe). I actually started with just one peachy color of buttercream, and kept adding more orange, white, and then fuchsia to create the different colors of flowers. For the greens, I used avocado, electric green, a bit of leaf green, and some yellow.
I will admit - the flowers are HARD! Or they can be. I made dozens before I was satisfied with the ones I deemed worthy enough to go on the cake. There are tons of how-to videos around the web that show to make buttercream flowers if you want to check them out. I used my Swiss Meringue Buttercream. I believe a buttercream made with shortening might be easier to work with, but it was not worth the sacrifice in flavor for me. To be honest, the SMBC left some of the edges of the petals slightly frayed, but I was able to smooth them out with the tip of my finger once they had chilled in the refrigerator. It really came down to the temperature of the buttercream - not too cold but definitely not too warm, or the petals lost their shape.
What do you think? Is buttercream here to stay? If so, I'm gonna need some more practice, hehe.
Once again, THANK YOU for continuing to support Style Sweet CA! I can't wait to see what this next year has to offer. For starters, the recipe for this cake: Cocoa Cannoli Chip! Coming next week. Sooo good - you won't want to miss it!


Heather (Delicious Not Gorgeous)
happy blogiversary! i'm so glad that you share so many great cakes and treats; they never fail to sound delicious and look amazing (this one especially!). i've never been into fondant (i can't stand the flavor; my happy place will forever be in a vat of smbc), so i think it's great that you stayed away for this cake (:
Michelle @ Hummingbird High
Gorgeous, Tessa!!! Happy Blog Birthday!!!(PS — as I was looking at this on my laptop, my mom walked by and said "What are you looking at??? It's so pretty! Is that one of your cakes???" I replied: "No, I wish though!")
June @ How to Philosophize with Cake
Happy blogoversary! This cake looks perfect to celebrate 🙂 The chilling of the buttercream flowers just blew my mind--I will have to try that technique ASAP. I have always wondered how people got flowers like that so perfect. Personally, I think using buttercream is much better than fondant, since it tastes sooo much better--and it's just as gorgeous, too!
Lyndsay // Coco Cake Land
Aw! Tessa, congratulations on an amazing 2 years of Style Sweet CA! You can thank your blog all you like - it's such an amazing resource, with gorgeous photos and really creative and incredible ideas - ! More exciting things to come - very happy we have become friends! XO
JC
Yes! I love this. I'm a huge fan of buttercream flower cakes and I do hope you put out more tutorials/cake ideas with this. It's all the rage in Asia right now.
In my experience, I prefer piping buttercream roses using SMBC. For some reason ABC doesn't work for me at all. I think it might have something to do with my homemade icing sugar (I use my Vitamix for this.) But I agree, SMBC tastes a million times better with ABC so I'm sticking with it.
Debbie
That is one of the most beautiful cakes I have EVER seen. Congratulations on your success. And yes, I do believe that buttercream is here to stay!! Hip, Hip, Hurray!
Marlene
That's a stunning cake! And happy blog birthday!
janet
Happy Birthday!
This cake is just incredible - insert "standing ovation"!
Kelsey
A very pretty cake that is! I love your blog and I appreciate you saying what tips you use- I'd like to start actually decorating my cakes and making them look decent so it's very helpful!!
Chocolate Banana Cake | MishMash Globe
[…] for some reason I wanted to start decorating again. I wanted to attempt to re-creating this cake design that I saw on pinterest. And as is typical when I am determined to do something, I did […]