Truth be told, I have not always been a cake gal. As a child, I would have surely picked ice cream over sheet cake. My tastes have certainly changed over the years, but I will always have a huge sweet tooth. I love and work in pastry and I most definitely have my chocolate-craving days, but sometimes I just want some good old fashion candy.
Now that I think about it, I do tend to favor classic candies. I picked salt water taffy as favors for our wedding, and I distinctly remember my husband teasing me for picking out a box of peanut brittle when selecting candy for a movie one time. One piece of candy that I always found so amusing is Ribbon Candy. I didn't even know such candy existed until I danced the role in The Nutcracker about 20 years ago. The pearly sheen of this colorful candy is eye-catching and the shape so whimsical and festive. If you've seen my previous work, then you could probably guess how much l love those ruffles. I'm intrigued by the colored stripes within the candy and was inspired to create a frosting technique to mimic this characteristic of ribbon candy.
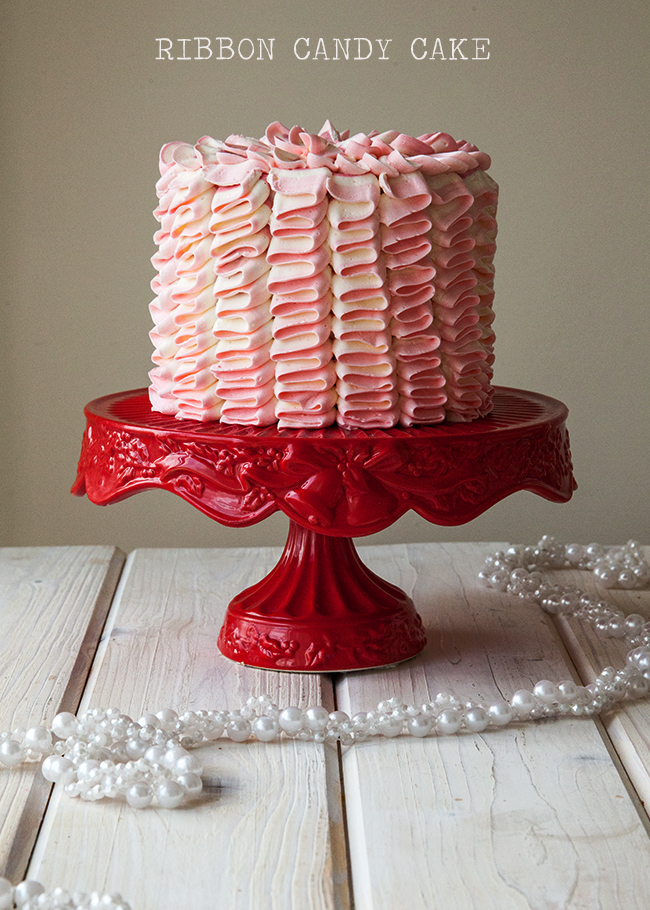
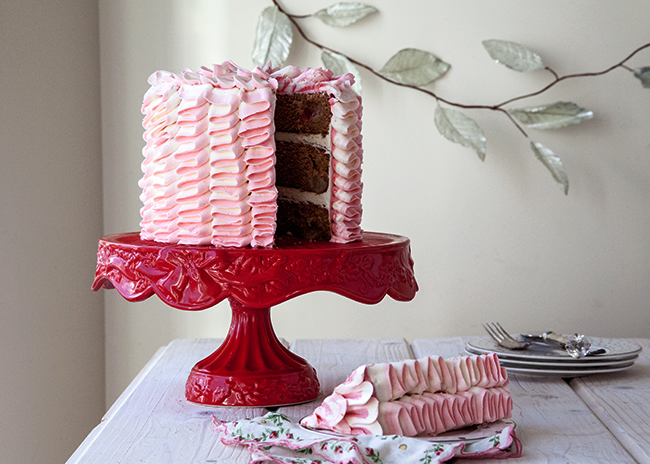
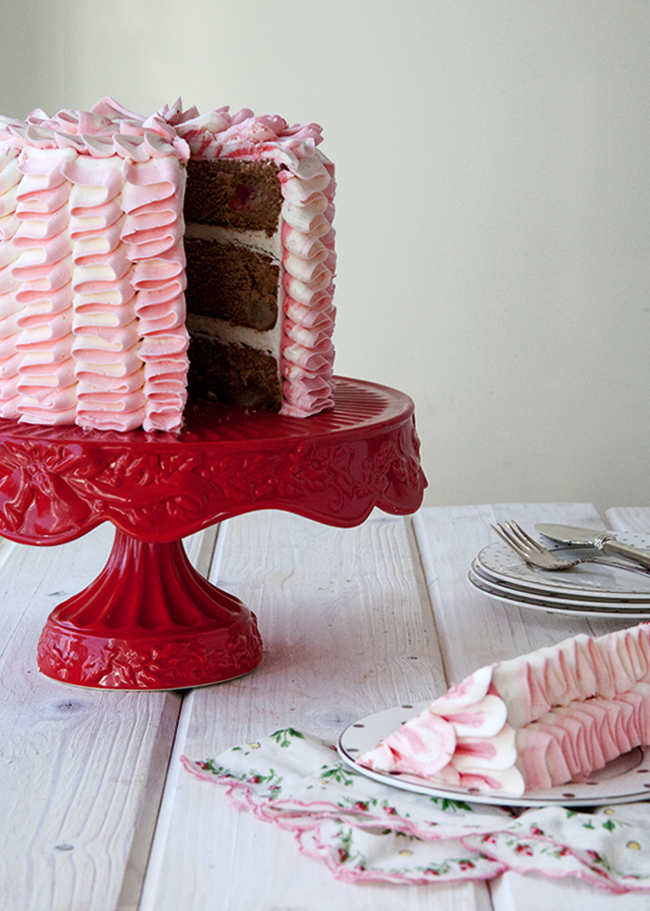
I've done the ribbon-ruffle-buttercream-cake before, so it was pretty clear what direction I would take to transform a classic Christmas candy into a new holiday dessert. The idea was fairly flawless in my head, although getting the job done was a bit tougher than I thought. I chose a color palette that consisted of various shades of pink and white and got to work.
How To Make a Ribbon Candy Cake:
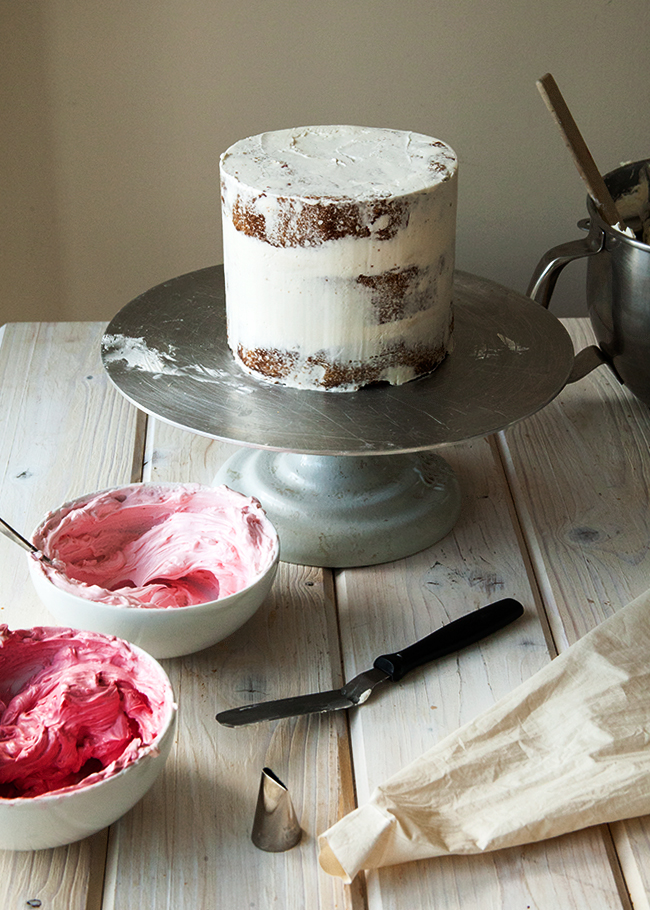
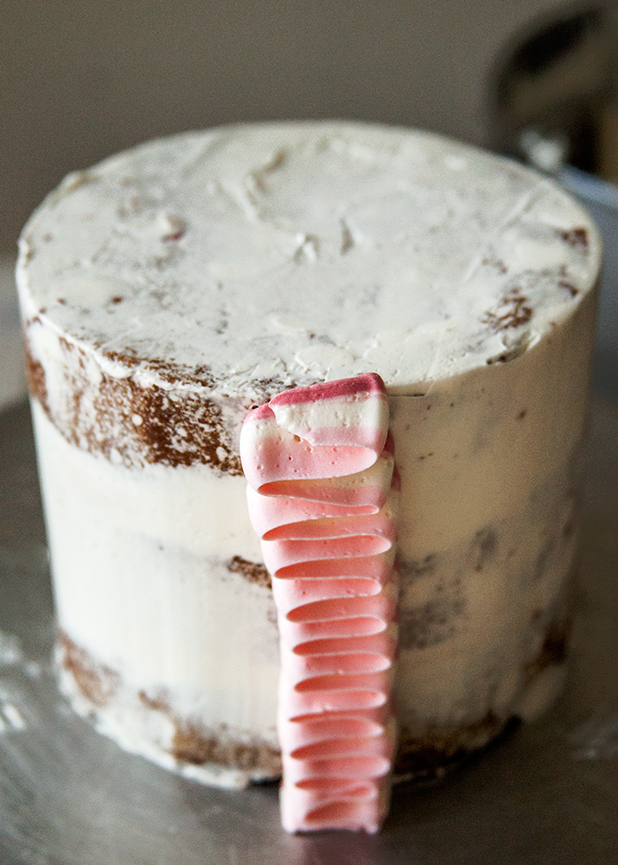
- Give your cake a good, solid crumb coat.
- Divide your frosting and tint three different colors.
- Fit a pastry bag with a large petal tip.
- Using a small off-set spatula, carefully stripe the side of pastry bag with one of the colored icing making sure to place icing on the side of the bag that correlates with one of the points of the piping tip - not the flat sides. You'll have to take a peek into the bag while you do this to make sure.
- Carefully stripe the opposite side of the bag with one of the other colors (the side that correlate with the other point of the piping tip)
- Fill an additional pastry bag fitted with a plain or round tip with the last color. Carefully squeeze in the icing from this bag into the center of the other bag - between the two colored stripes.
- Your bag should now be partially full with three different colors of icing.
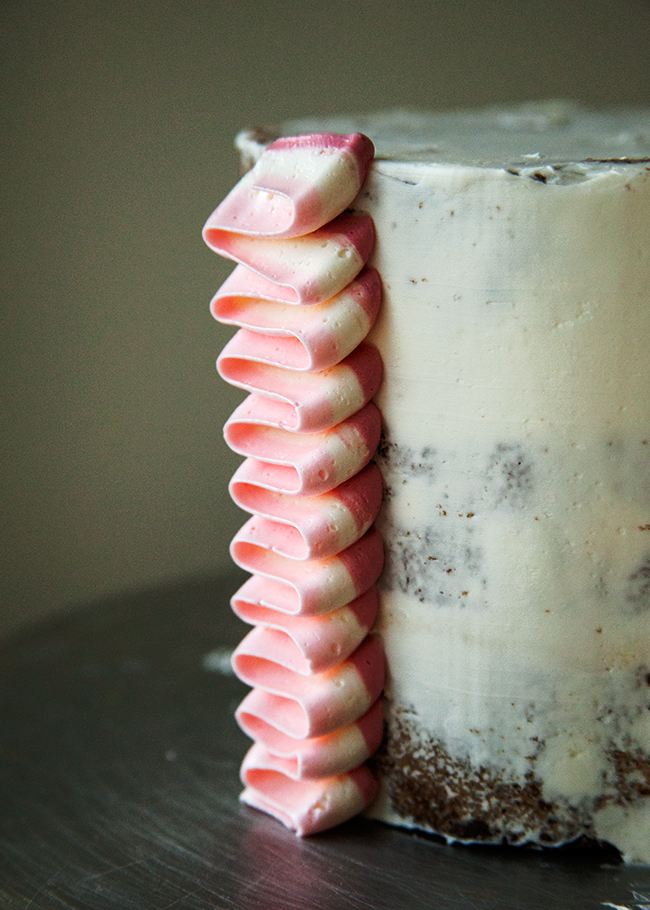
- With the narrow point of the petal tip facing out, hold the piping bag perpendicular to your cake board or serving plate.
- Keeping even pressure, pipe just up against the side of the cake. Starting from the bottom, pipe about 1 inch wide vertical rows, zig-zagging back and forth up to the top of the cake. The shape of the petal tip should create the ribbon ruffle look on its own.
- Continue to pipe rows around your cake until it is complete.
- For the top, pipe petal-like rings around your cake - spiraling into the center.

TIPS:
- Filling the bag may be a bit messy and tricky. I recommend only filling it up a little bit at a time. This may take time, especially with the three different colors, but it may help to stay organized.
- When filling the bag, remember that the narrow tip will be facing out, so stripe your bag with whichever color you want to show up the most on your cake.
- Don't fret if the colors start to run together a bit and are not perfectly uniform. It will be pretty regardless.

Julia G.
I was wondering how you transferred the cake to the cake stand without ruining the icing.
Tessa
Julia,Since this cake was not being transported, I actually finished it on the final stand. If you needed to move the cake from either a turntable to cake stand or transport it in a cake box, they you would use a cake board. Try to trim the board so it lines up with the edge of your frosting, so it does not show too much.
Thanks for stopping by!
Lyndsay //coco cake land
Eeks what a gorgeous post! I love the look of this cake - so clever and cute! Beautiful photos too Tessa!
Tessa
Thanks so much, Lyndsay!
aarathi
how did u did this outside work .. awesome
33 Unbelievable Cakes with Recipes | Chef Recipes
[…] stylesweetca.com […]
Lisa
Love the red cake stand! I collect them, but don't have a red one yet. Beautiful cake!
Laura Rodriguez
Hi Tessa,
I am needing to make a cake similar to this for a customer. What tip number do you suggest for the ribbon candy? Beautiful cake by the way...so simple yet gorgeous, reminds me of simpler times growing up as a child! Thank you for the helpful demonstration and description.
Laura
Tessa
Thank you, Laura!I am not sure exactly what number tip is was.... It was a medium rose petal tip. I'd look up the number from my supplies for ya, but I am out of town this week.
Laura Rodriguez
Thank you Tessa for your reply! After doing a bit of research, I did find out that the petal tip is tip #81. I am making this cake tonight for a customer who is having a birthday party. Thanks for your instructions! I hope mine turns out as pretty as your cake! Wish me luck!
Tessa
Awesome!!! I am sure it will be lovely. Best of luck 😉
Lucia
Hello Tessa! Congratulations on this cake!! I reached your page through pinterest and im loving it!!!!! Im pretty new with the frosting technique, i tried some recipies but im not very pleased with the results.. i wanted to ask you if its better to prepare the frosting and use it right away or its better to leave it in the fridge.. in my poor experience, when i put it in the fridge it turns very hard and after a while melts a little bit and does not hold the shape.. can you please help me with this???Sorry if my english is not the best! im writing you from Argentina!
Thank you so much for all your tips and congratulations on your amazing cakes! 🙂
Tessa
Lucia,Thank you for stopping by! I am so sorry your did not have great success with your cake. Yes, the buttercream will become too stiff if left in the refrigerator for too long. Ideally, it should be room temperature. What type of buttercream are you working with?
Red and Gold Christmas Wedding | Burnett's Boards - Wedding Inspiration
[…] // glitter deer place cardholder from West Elm, photographed by Jessica Kettle // ribbon cake via Style Sweet // bell garlands: unknown // gold stars from Free People // champagne from Glitter Guide, […]
Crushing On - Chez Us
[…] This candy cane cake […]
The 33 Cutest Cakes Of 2013 - Viral Tunnel
[…] stylesweetca.com […]
The 33 Cutest Cakes Of 2013 | Viral Chow
[…] stylesweetca.com […]